How to Generate Your First Document In Salesforce
Category :
Document Generation

Docs shouldn’t be complicated.
With Docs Made Easy, creating professional, Salesforce-powered documents is just a few clicks away.
Get Started NowDocs Made Easy is a Salesforce-native solution built to support document automation and structured document management. In this step guide, you will get quick steps to Generate Your First Document In Salesforce using a guided setup that ensures consistency and accuracy.
Step 1: Once the app is installed from Salesforce AppExchange, open the App Launcher from the top-left corner and search for Docs Made Easy.

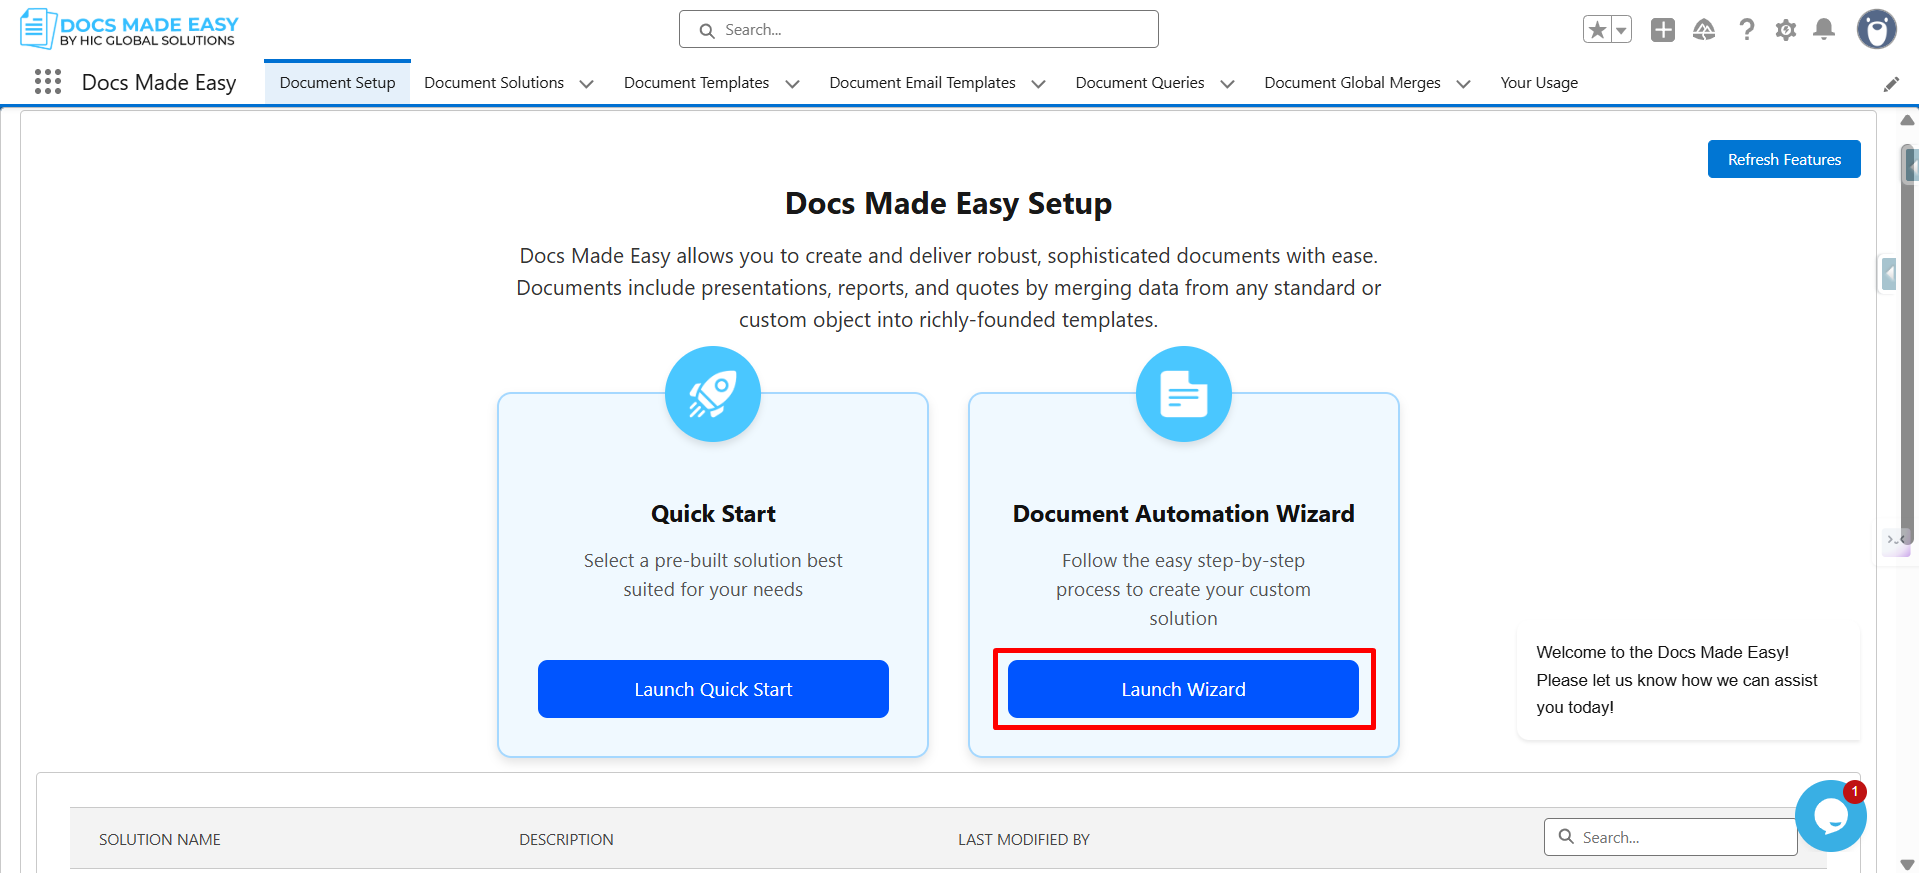
Step 2: After the app opens, navigate to the Document Setup tab and click Launch Wizard.
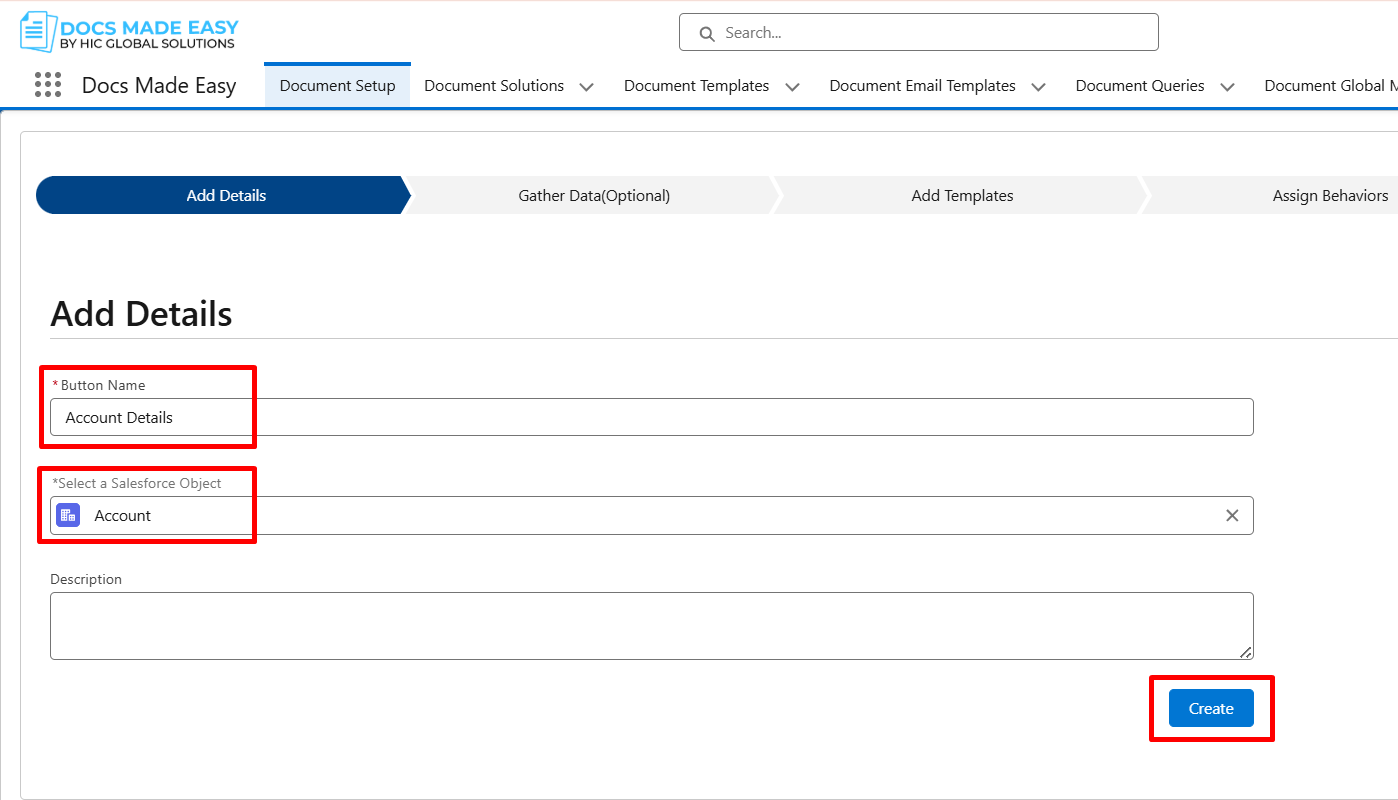
Step 3: You’ve now entered the setup wizard. On the Add Details page, provide a name in the Button Name field and select the Salesforce object you want to generate Salesforce documents from.
Click Create to proceed further.
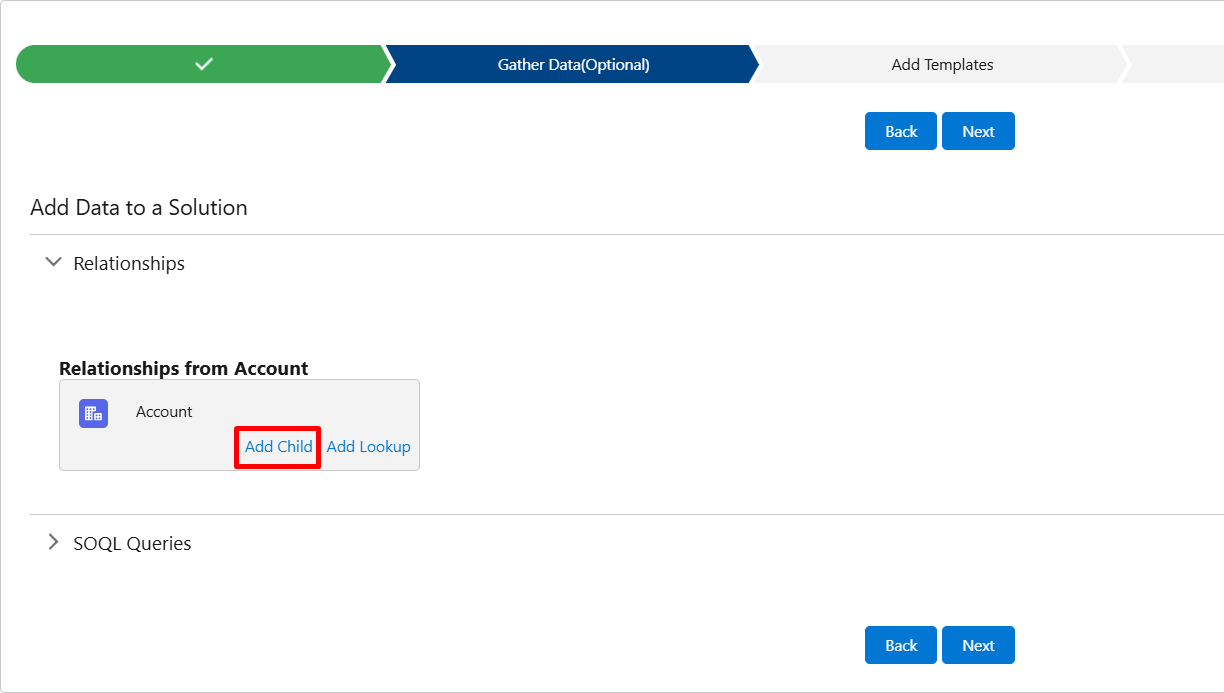
Step 4: Your custom button is now created. On the Gather Data page, click Add Child to include related object data.
Step 5: Now, choose the required object, assign it an alias, and click Save.
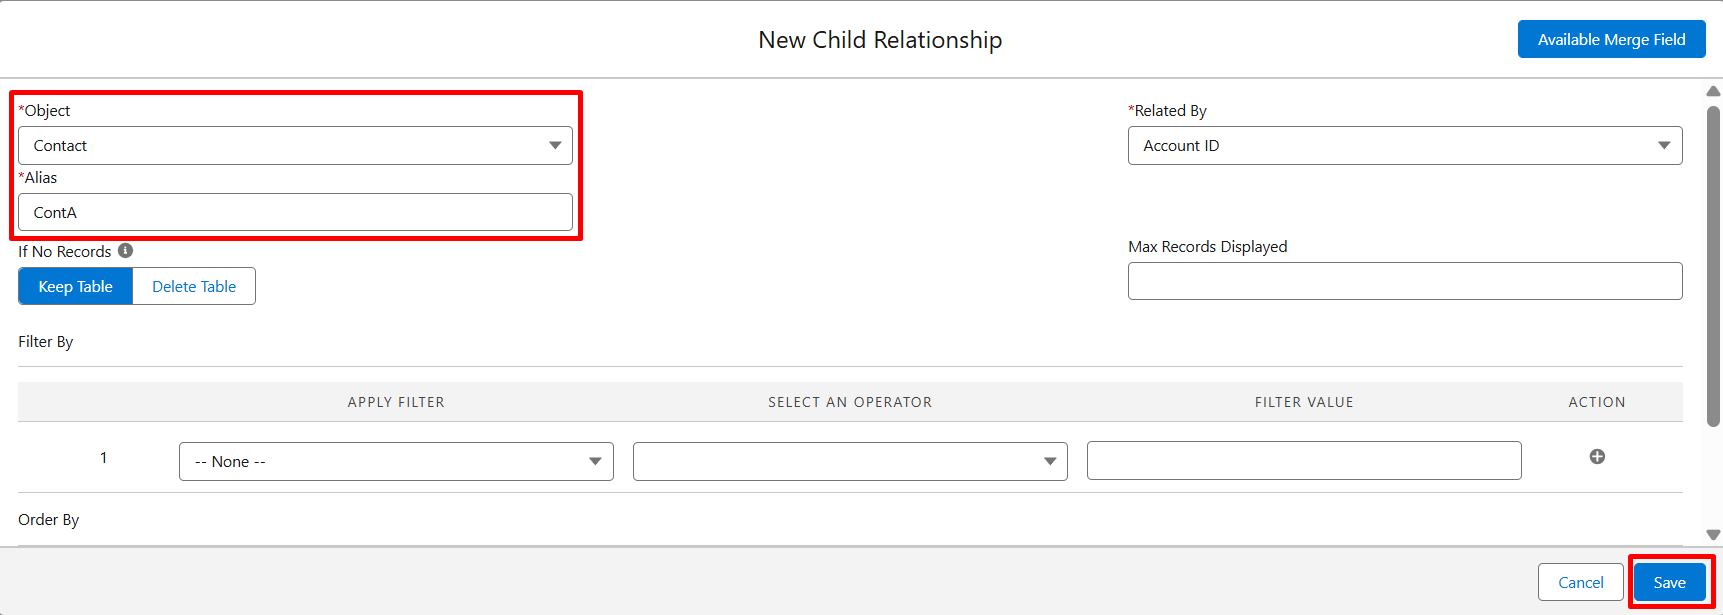
Step 6: Once done, click Next to continue.
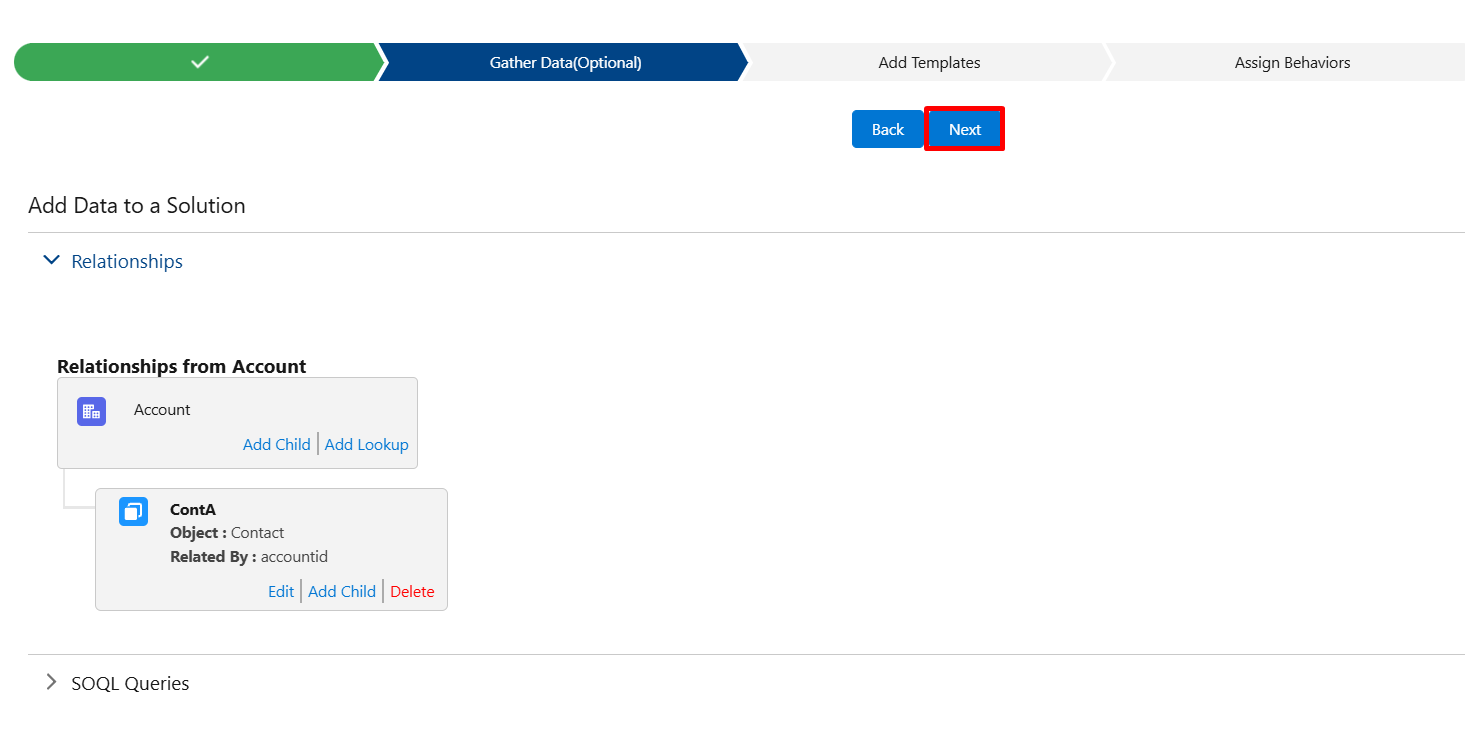
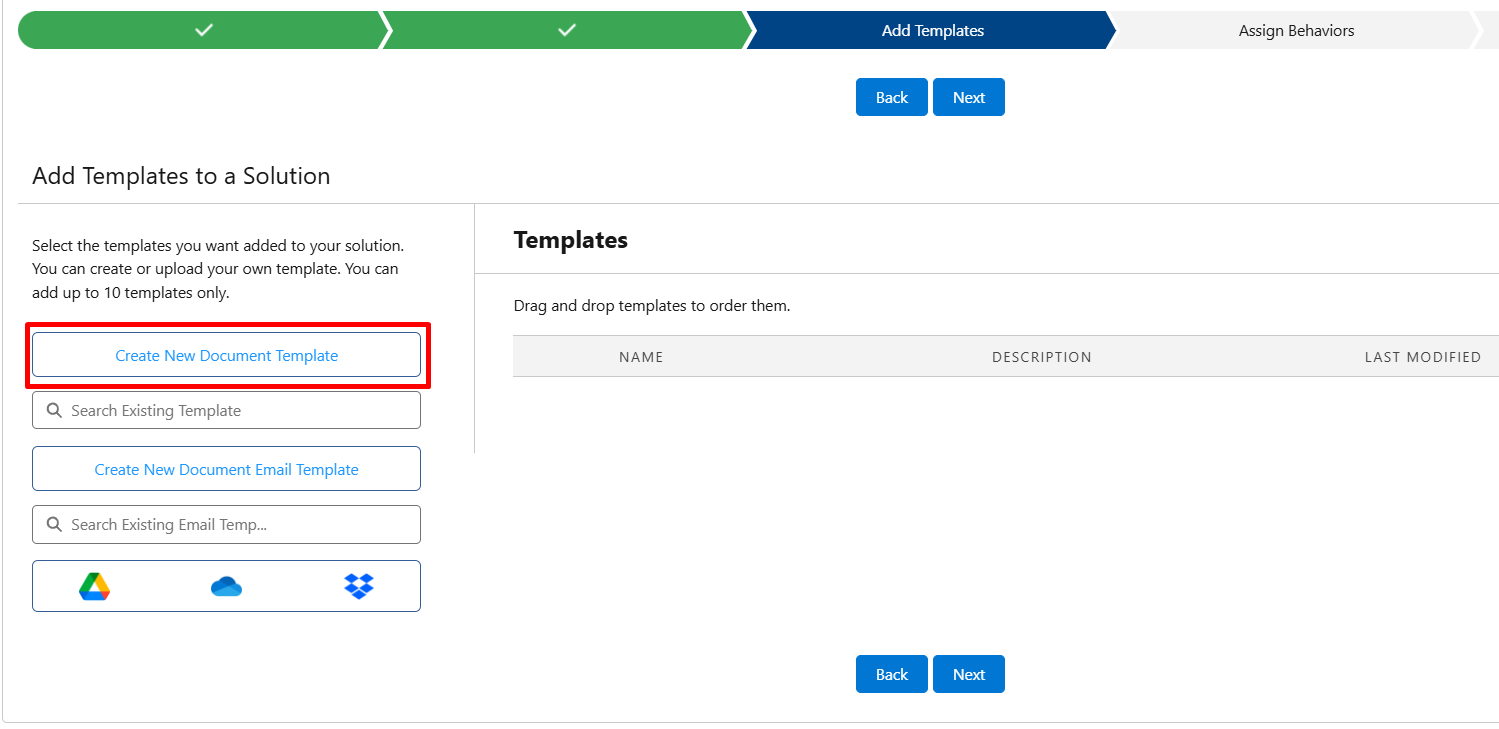
Step 7: Here, you’ve successfully gathered data from related objects. Next, on the Add Templates page, click Create New Document Template.
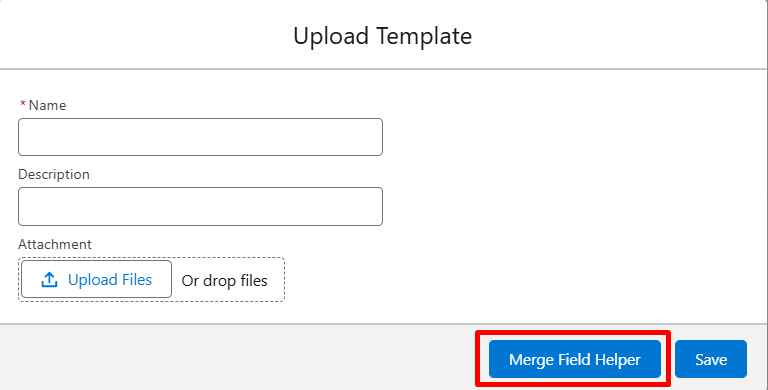
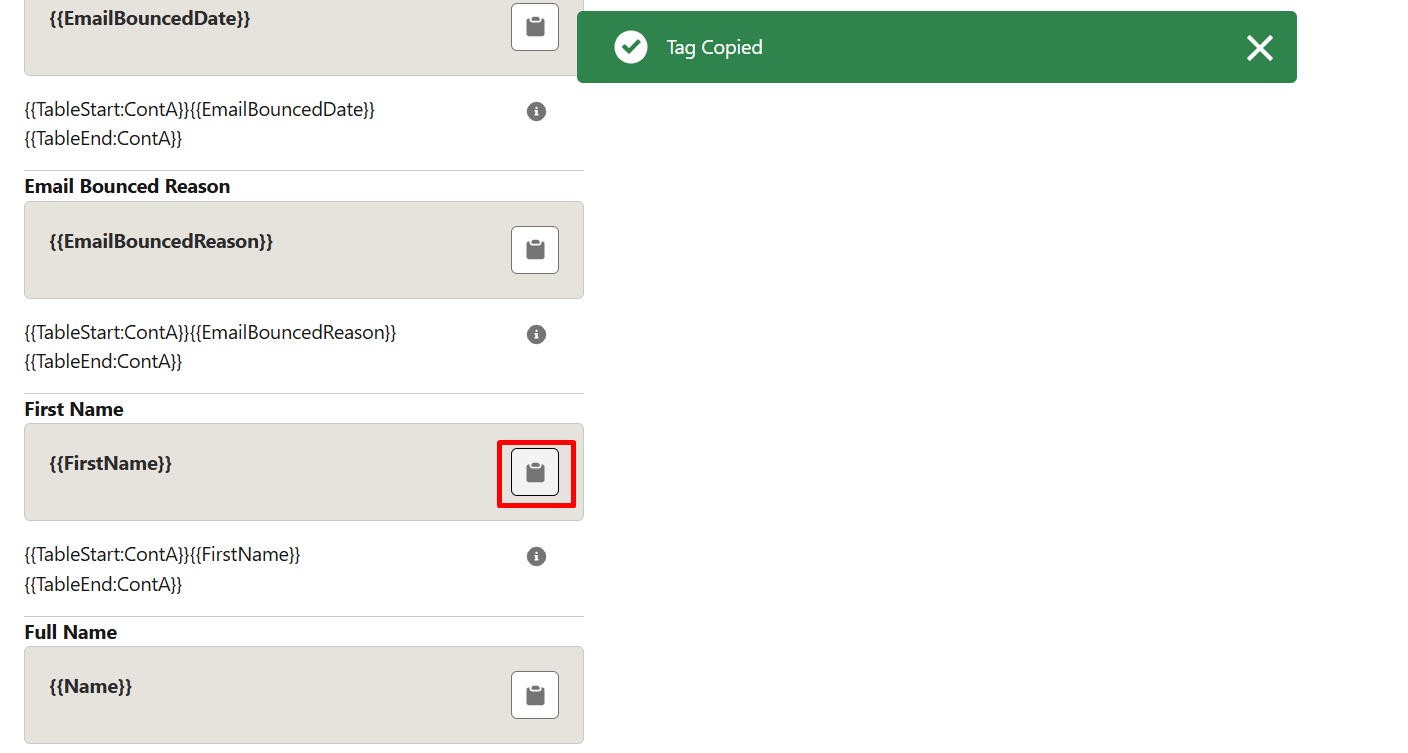
Step 8: Now, an upload window will appear, click Merge Field Helper to select the fields you want to include in your template, such as Account Number or Account Description.
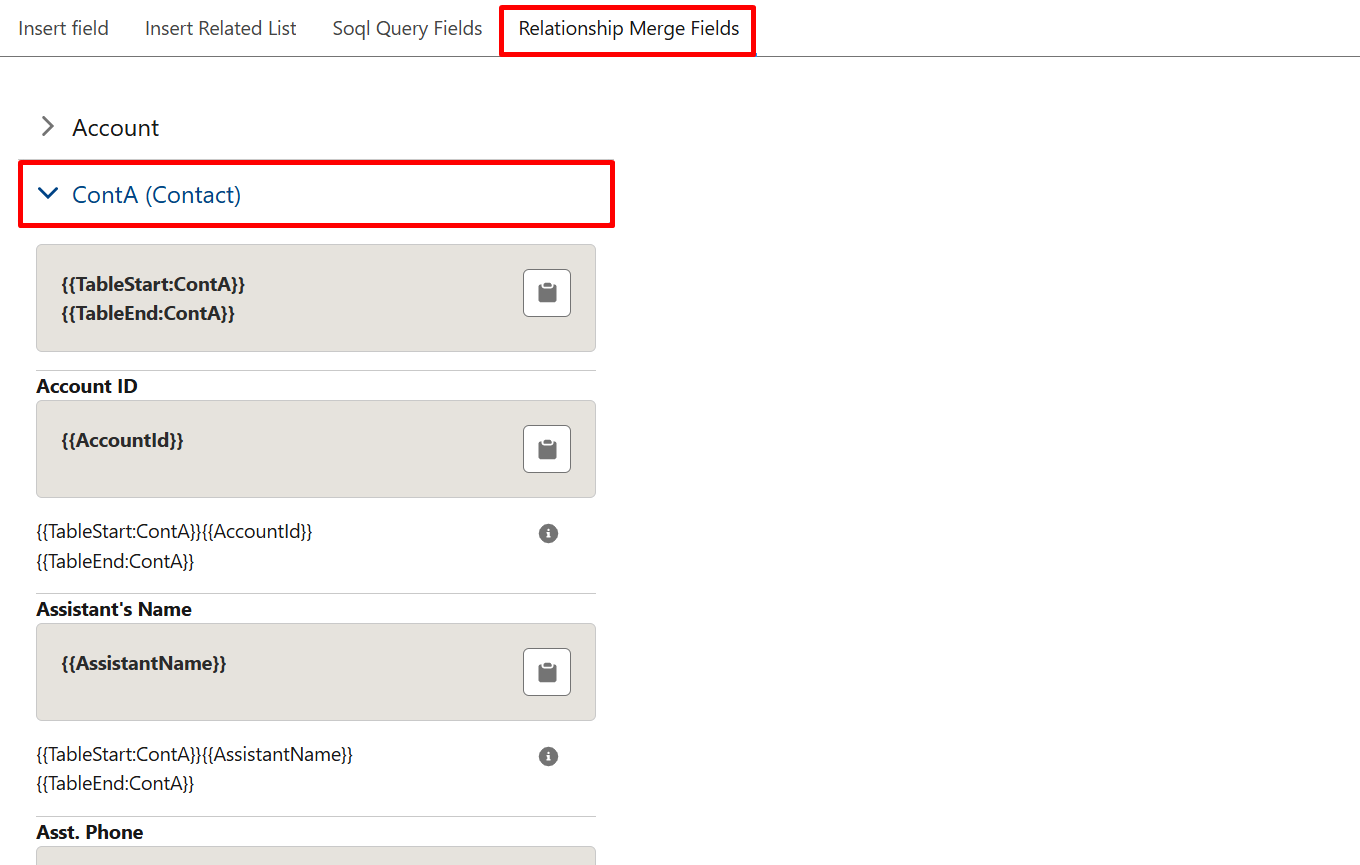
Step 9: Use the Copy to Clipboard option to copy the merge field syntax and paste it into your Salesforce document template.

Step 10: Here, you can also add fields from related objects by selecting Relationship Merge Fields, copying their syntax, and inserting them into the template for a more Salesforce dynamic document.
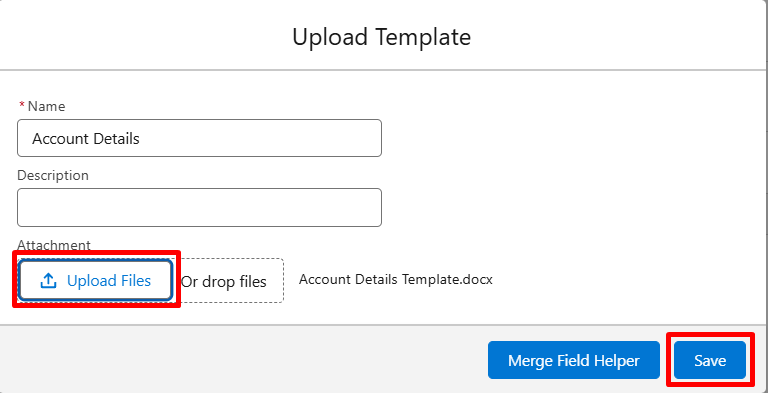
Step 11: Once your template is complete, give it a name, click Upload Files, and then select Save to move forward.
Step 12: Now, on the Assign Behaviors page, background mode is enabled so the document generation runs smoothly in the background.
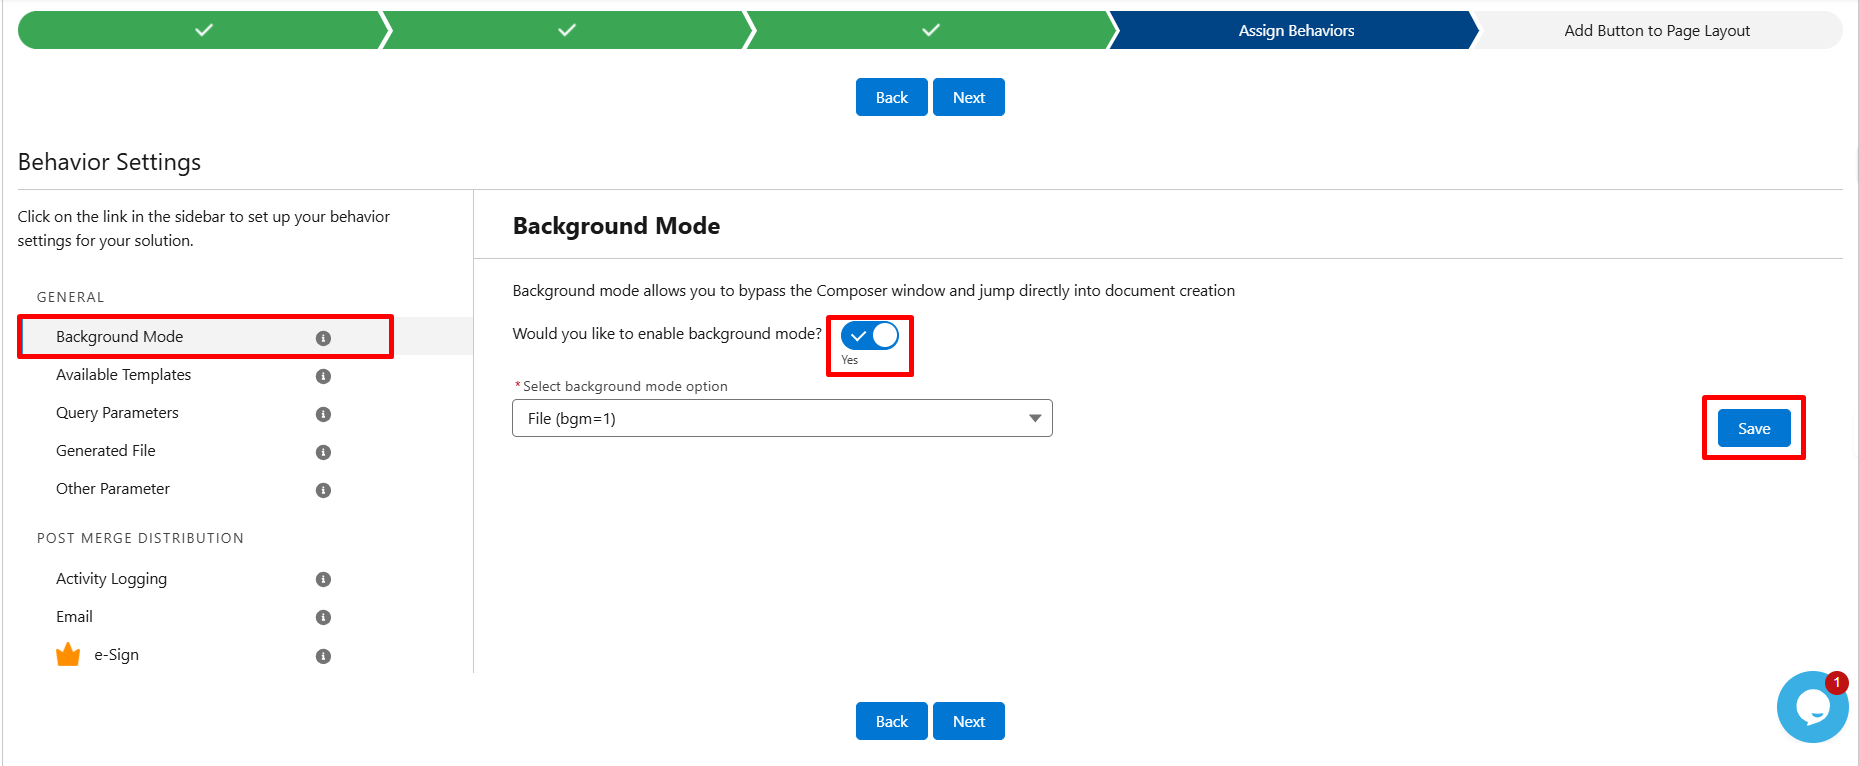
Step 13: Under Generated File, select PDF as the output format. You can change this option based on your requirements.

Step 14: After configuring these settings, click Next.

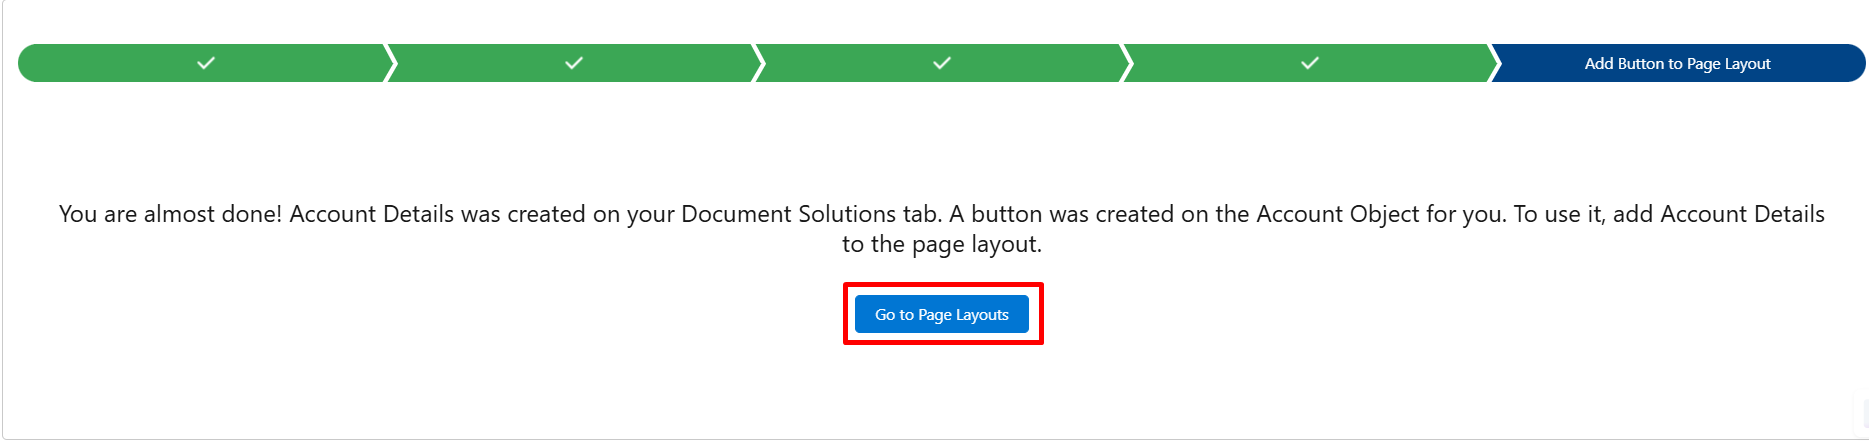
Step 15: On the Add Button to Page Layout page, click Go to Page Layouts and open the Account layout.
Step 16: Under Mobile and Lightning Actions, locate the custom button you created and drag it into the Salesforce Mobile and Lightning Experience Actions section.
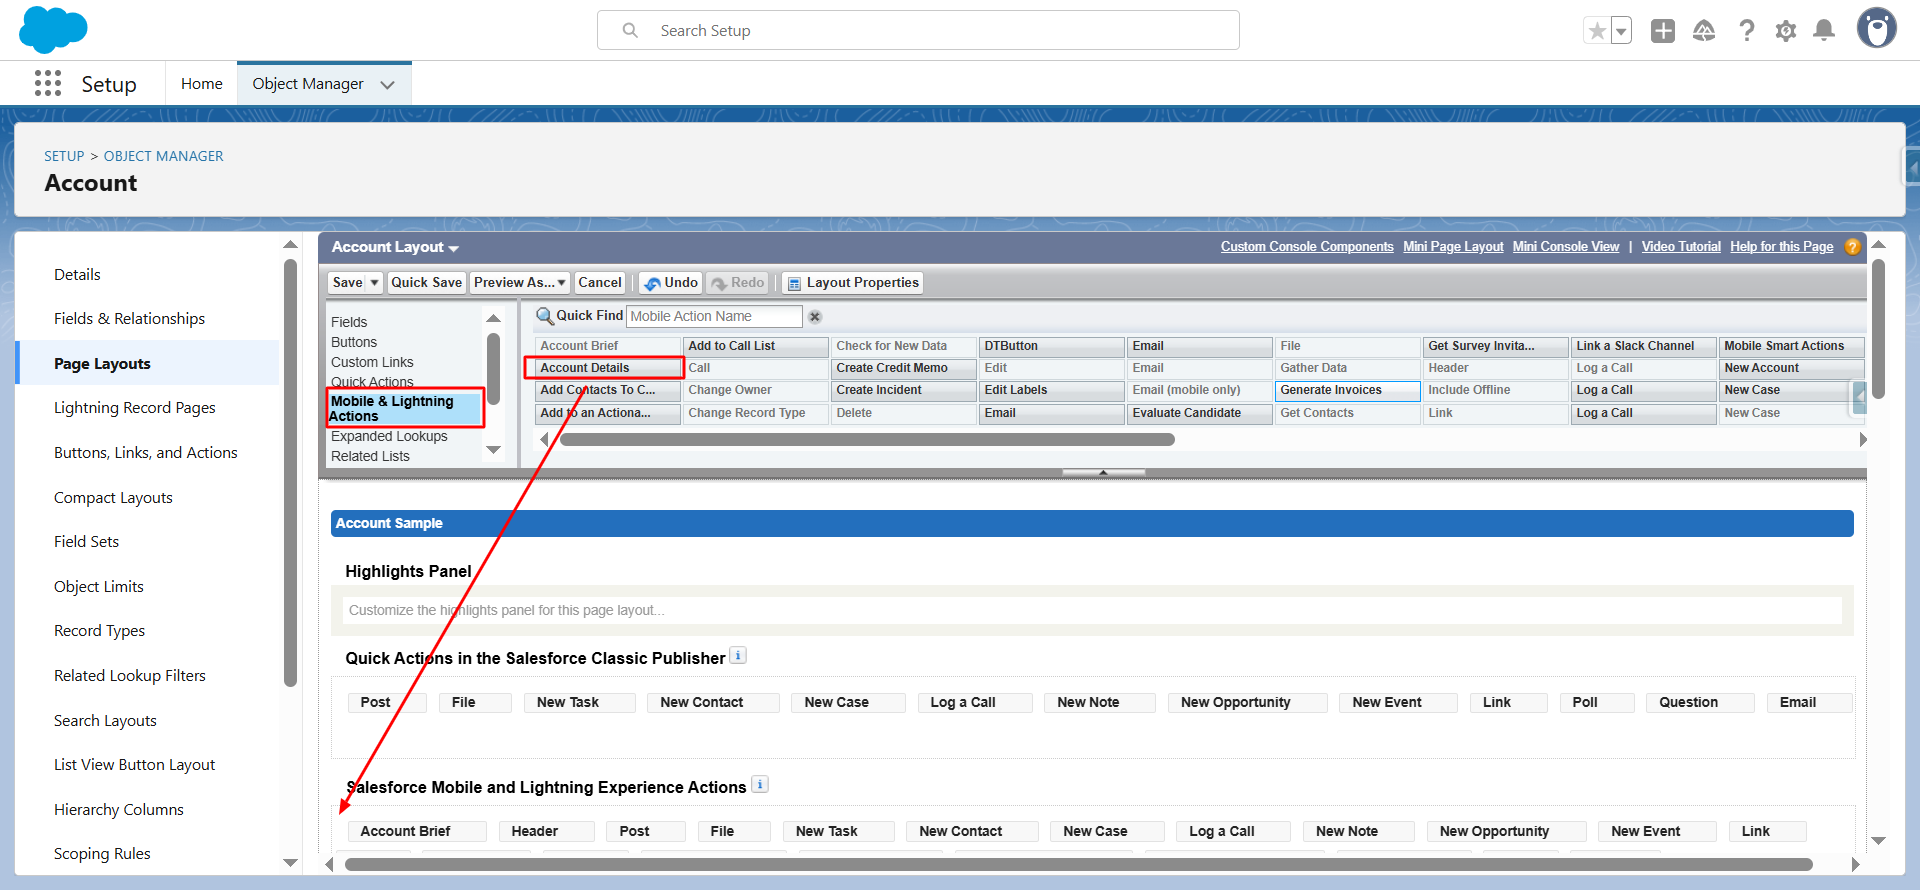
Step 17: Click Save to apply the changes.
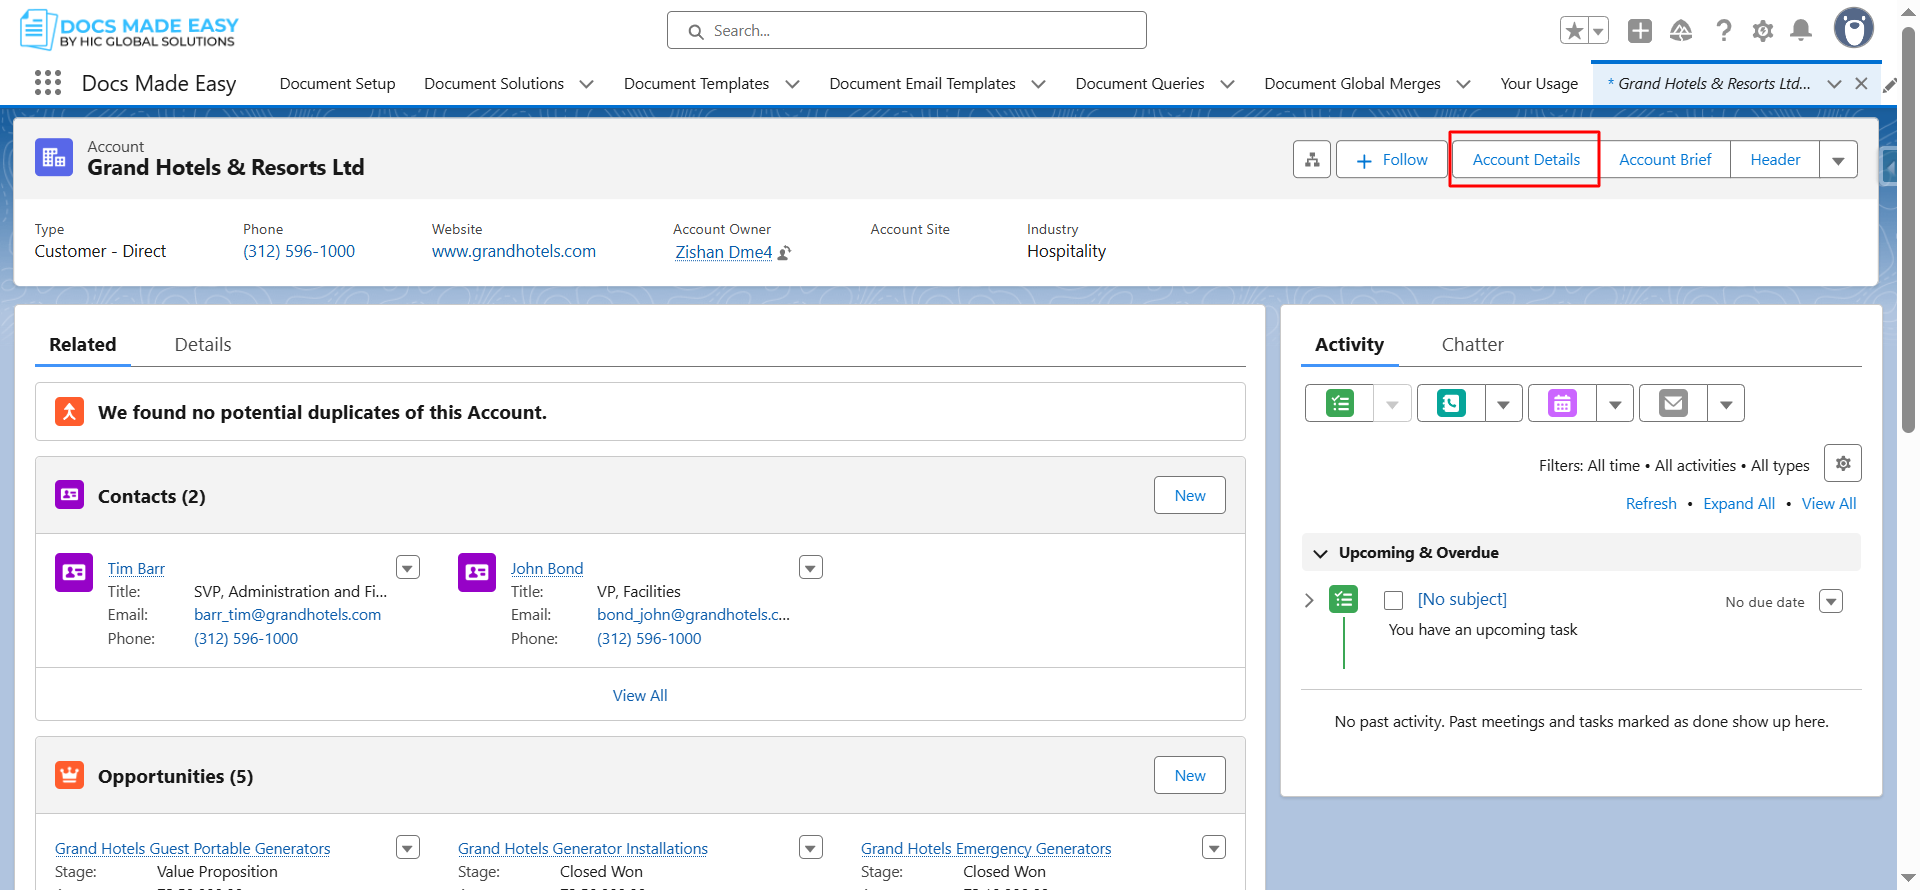
Now, open the App Launcher, search for Accounts, and open any account record.
You’ll see your custom button in the top-right corner of the page.
Finally, click the button on the account record, and your document will be automatically generated and downloaded as a PDF.
Conclusion
Congratulations! You’ve successfully generated your first document in Salesforce using Docs Made Easy. With document automation, repetitive tasks are handled effortlessly, letting you focus on what matters. This demonstrates how smooth and reliable Salesforce document automation can be, turning complex workflows into a seamless process directly within your CRM.
Frequently Asked Questions
Related Blogs