How to Send Custom Emails in Salesforce Using Docs Made Easy
Category :
Document Automation

Docs shouldn’t be complicated.
With Docs Made Easy, creating professional, Salesforce-powered documents is just a few clicks away.
Get Started NowManaging Salesforce documents manually often leads to inconsistent emails, missing attachments, and extra administrative work. A structured email workflow helps teams send accurate, professional documents faster while reducing repetitive tasks.
With the Salesforce document automation solution, you can generate documents, attach them to customized emails, preview the final output, and send everything directly from Salesforce. This approach improves efficiency, saves time, and delivers a better customer experience.
In this step-by-step guide, we’ll show you how to use Docs Made Easy to simplify the entire email sending process directly from Salesforce.
Step 1: Login to Salesforce.
Step 2: Open Docs Made Easy from the App launcher.
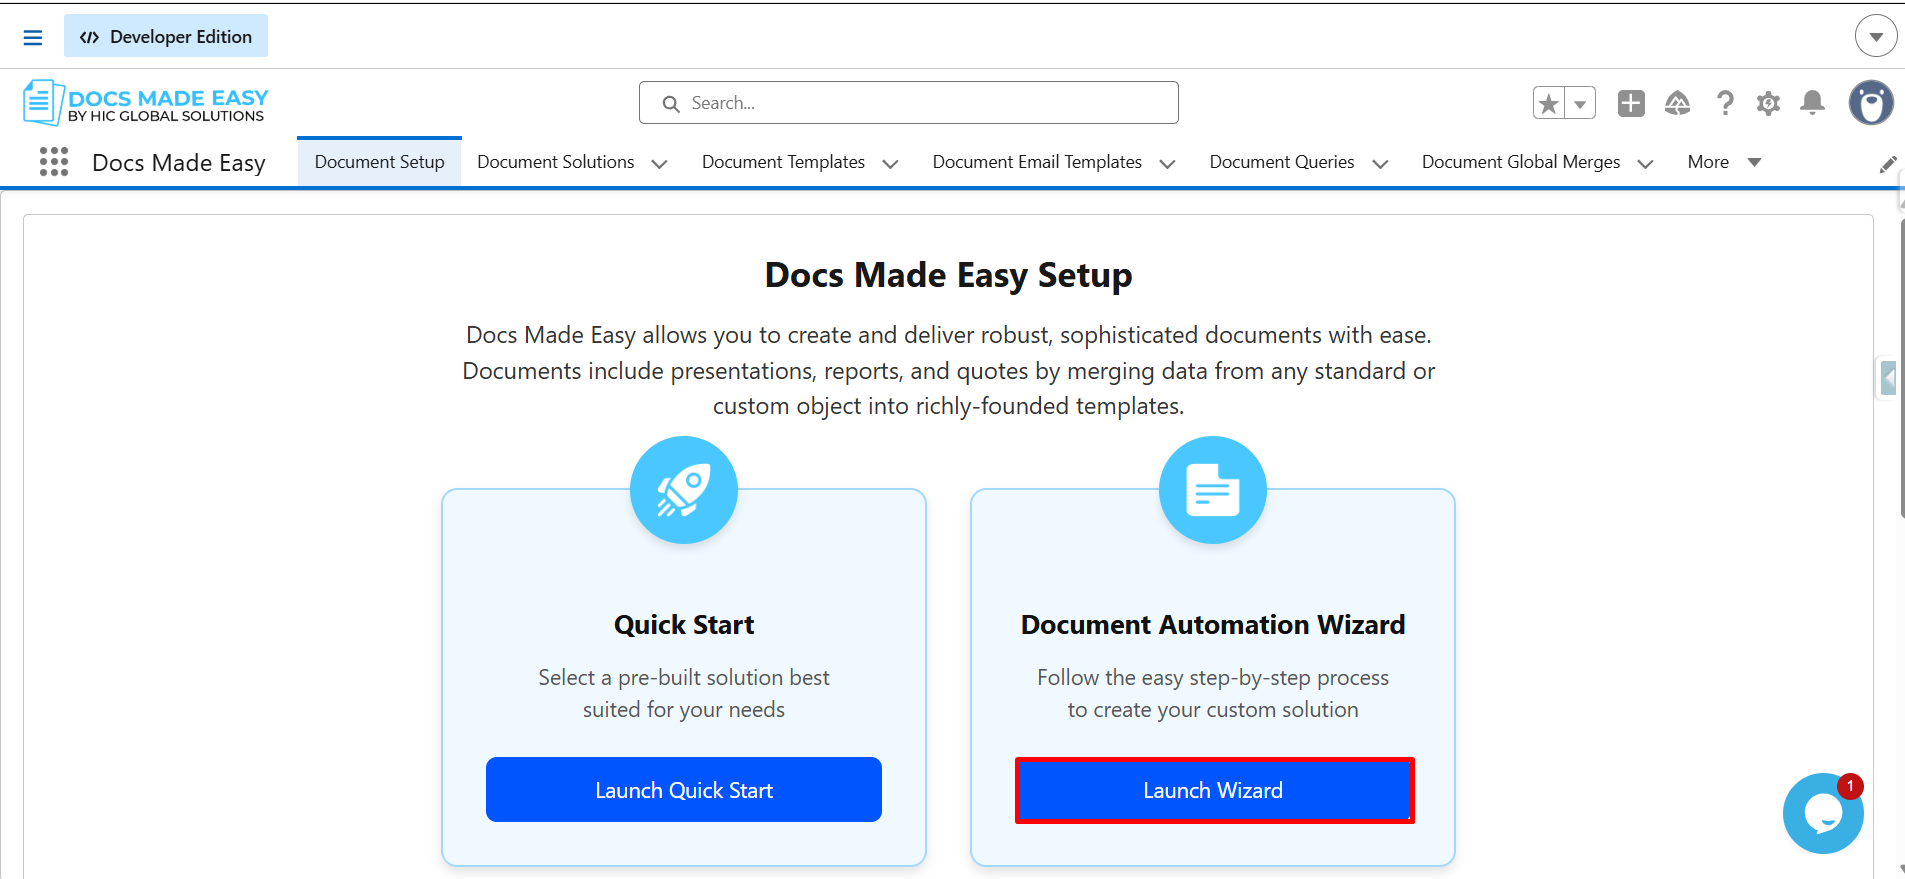
Step 3: Now Navigate to Document Setup and click on the “Launch Wizard” button.
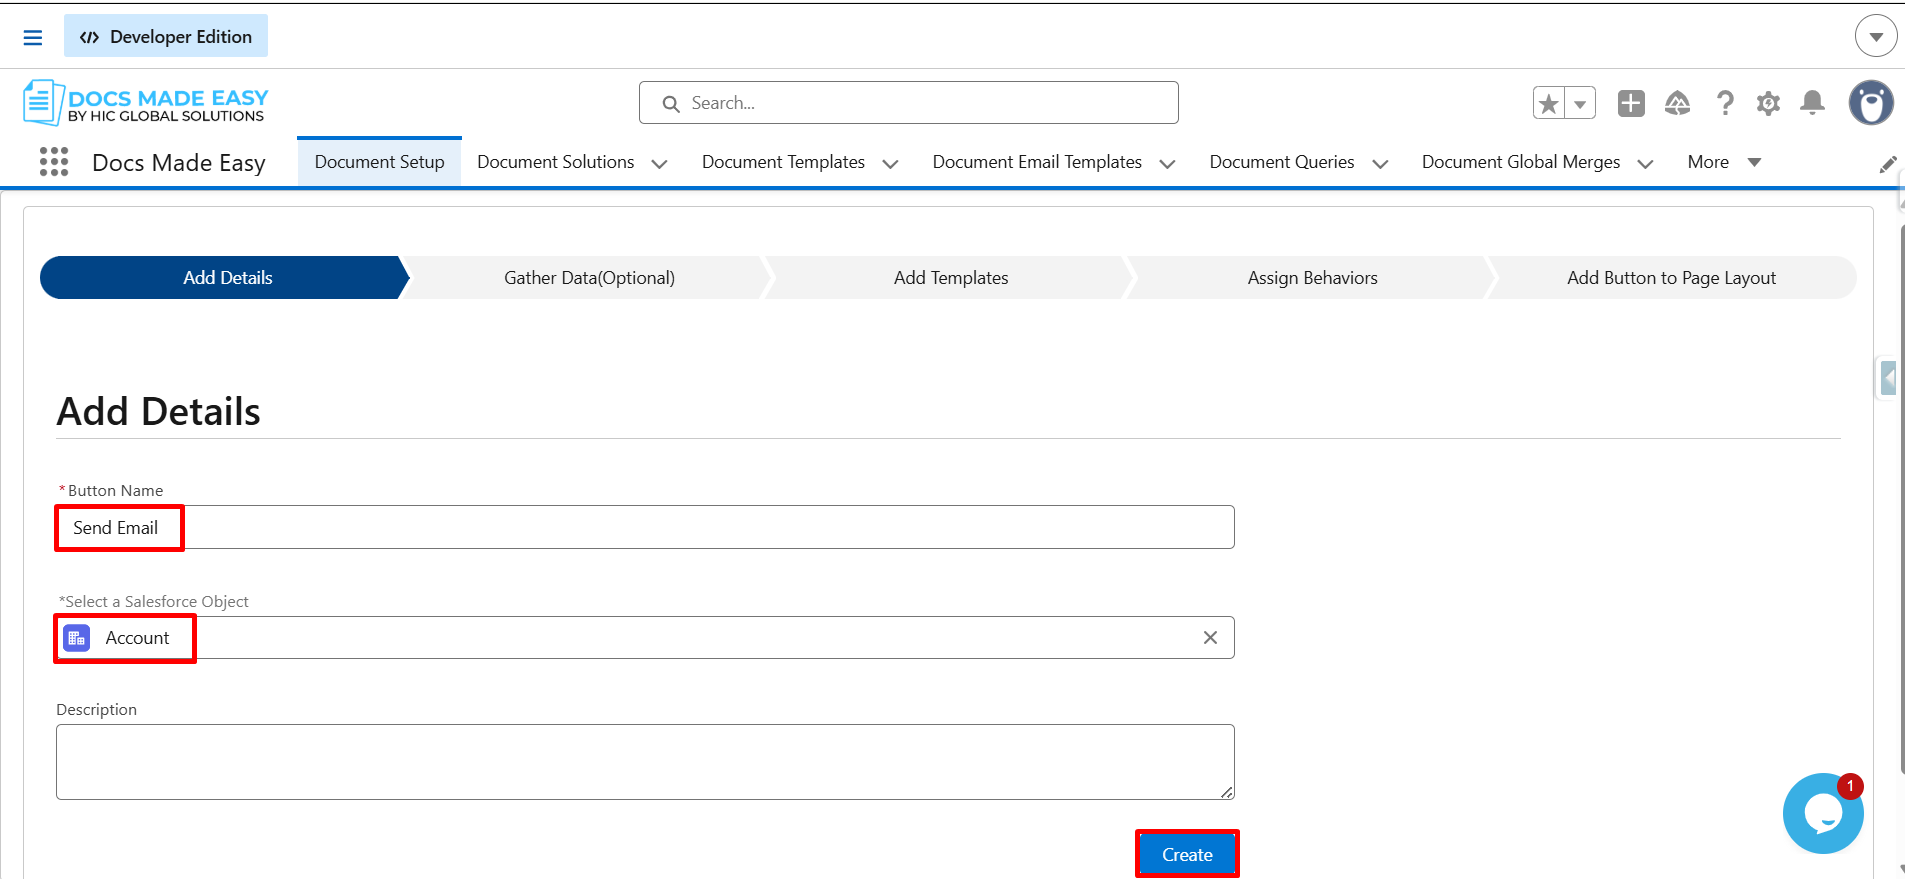
Step 4: Enter Button Name, select Salesforce object. Click on Create.
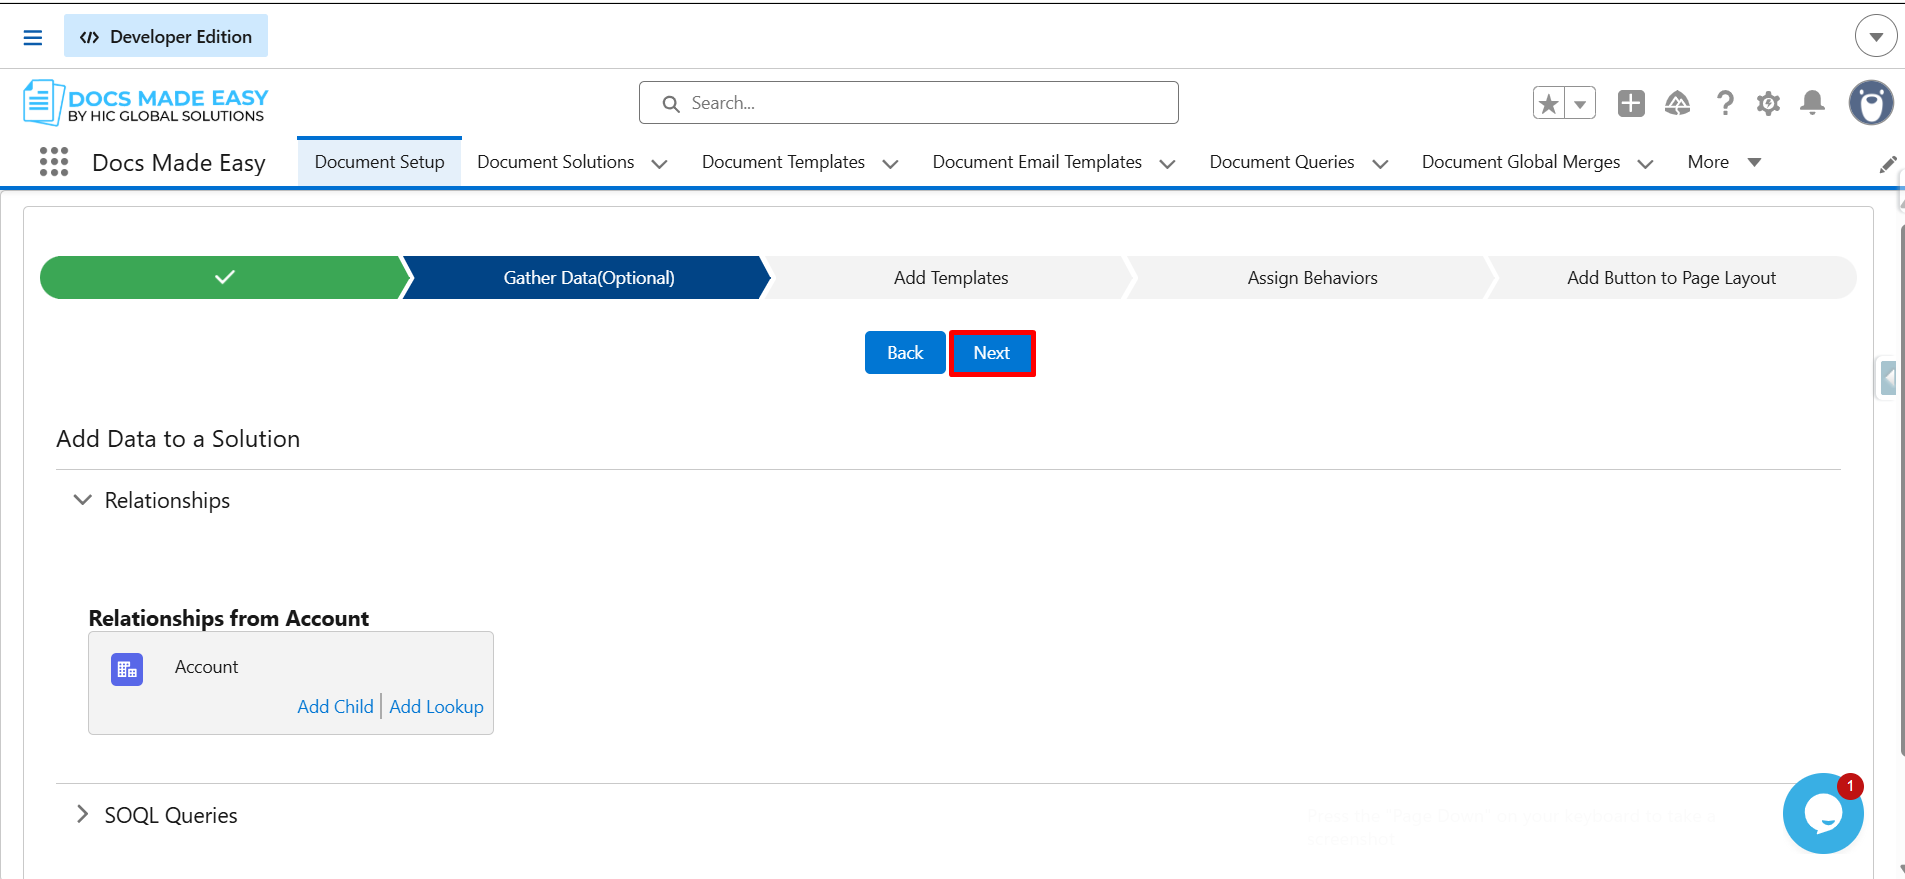
Step 5: Click on Next.
Step 6: Click on Create New Document Template.
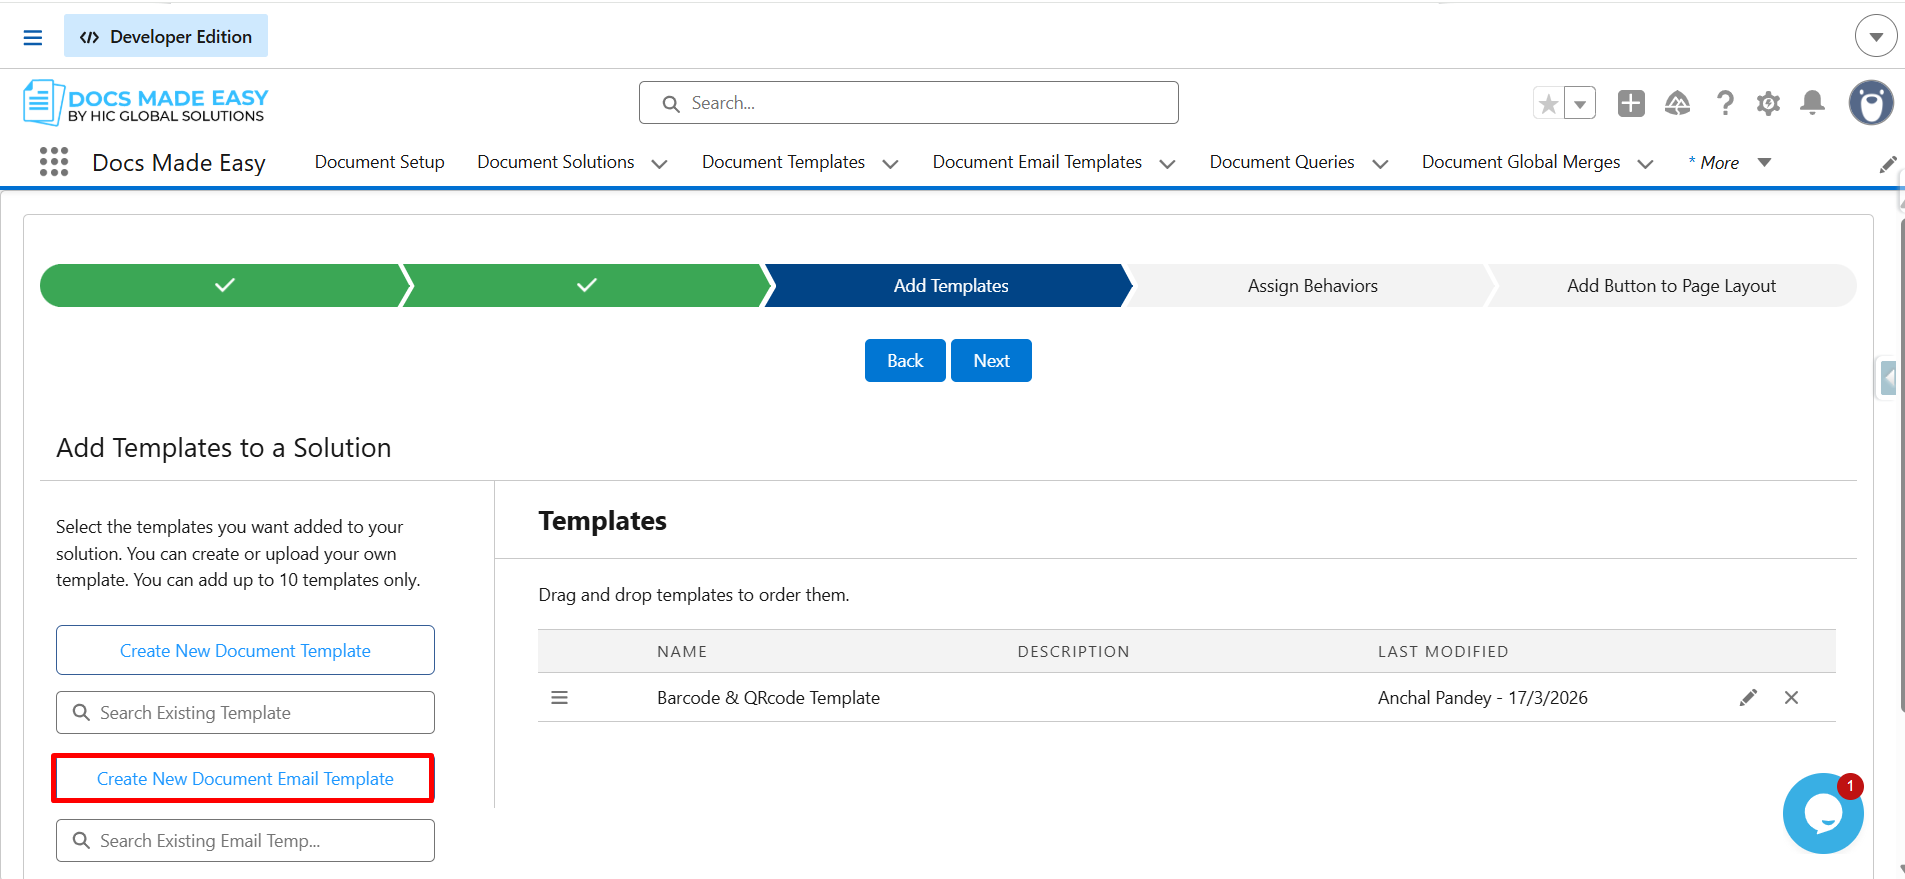
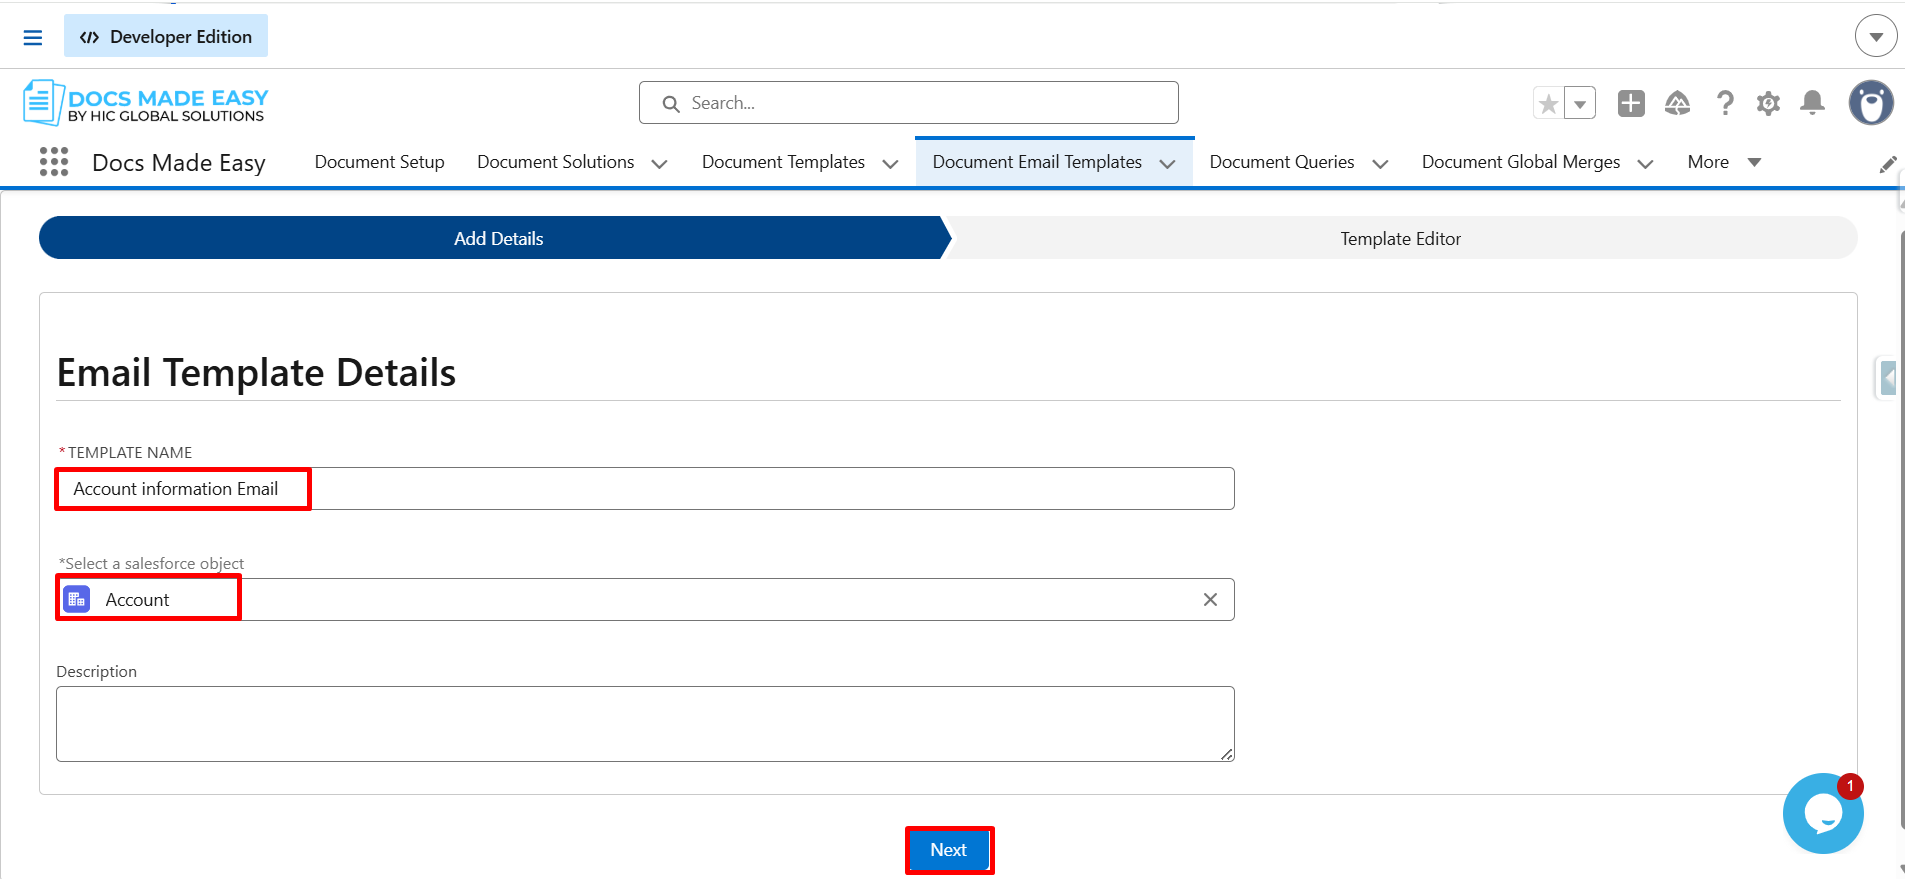
Step 7: Enter Template Name and select Salesforce object, then, click on Next.
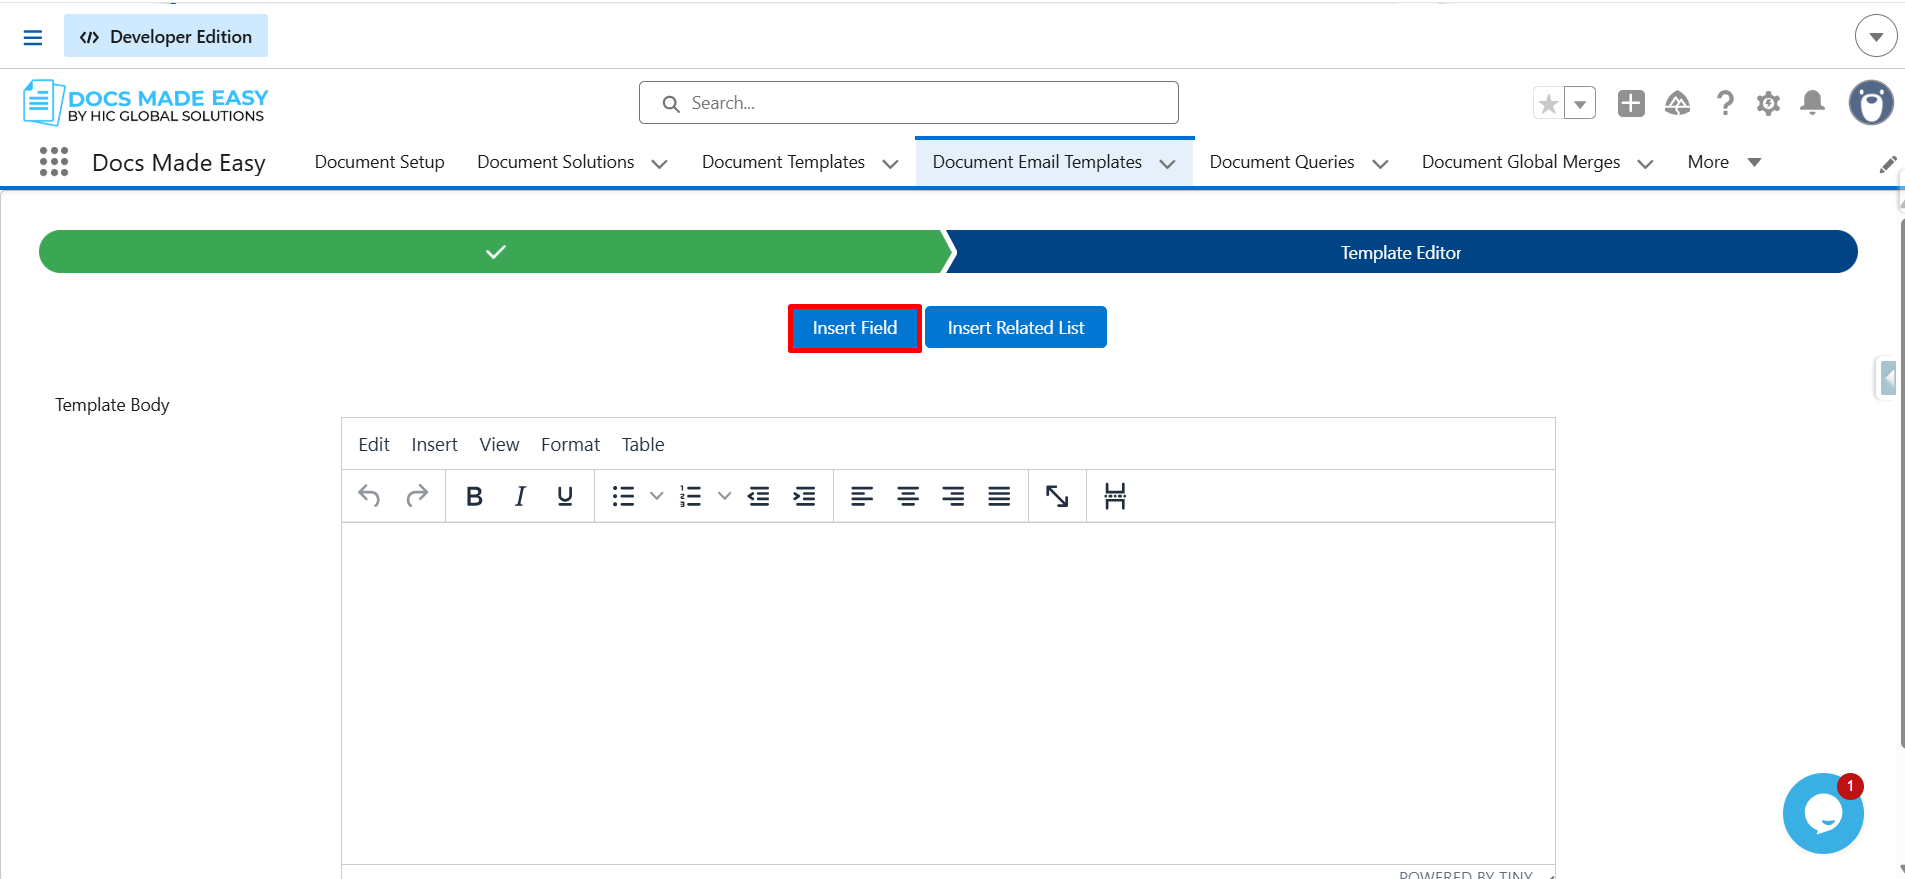
Step 8: Now the Template editor will be open. Click on Insert field.
Step 9: Add all the required fields from the available list. Then, click on the Insert button to add the selected field into the template.
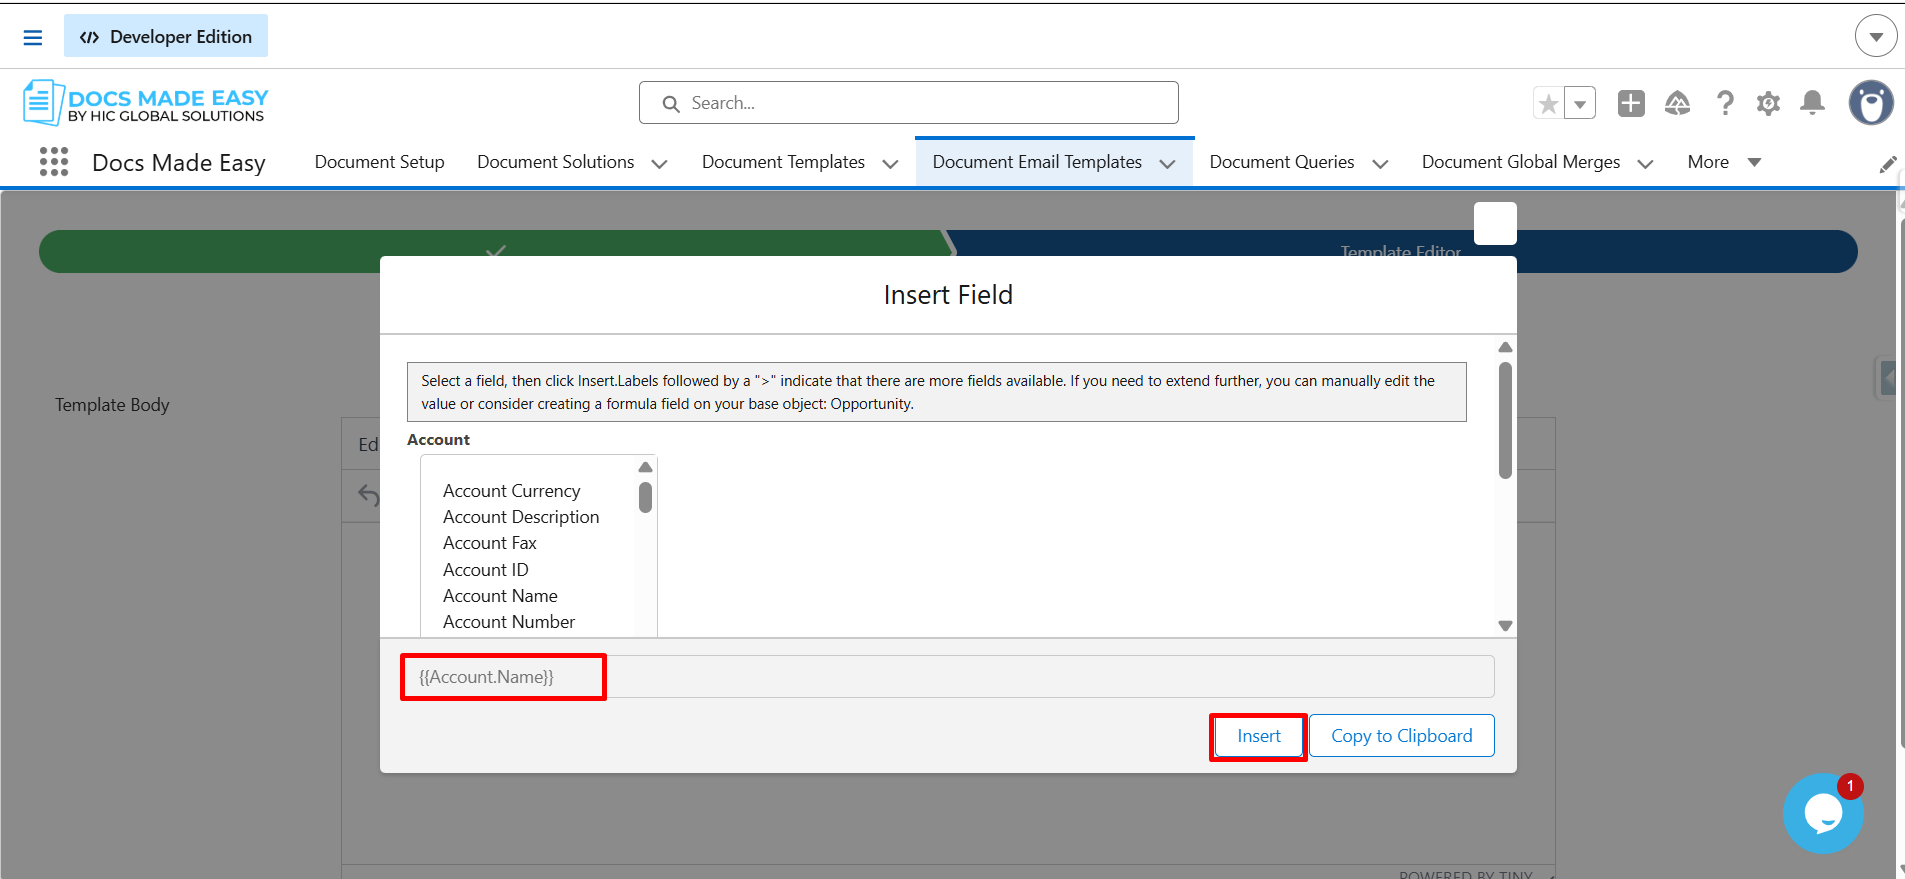
Step 10: Inserted field syntaxes will be displayed in the designated content area. Click on Save & Close to save the changes and exit the editor.
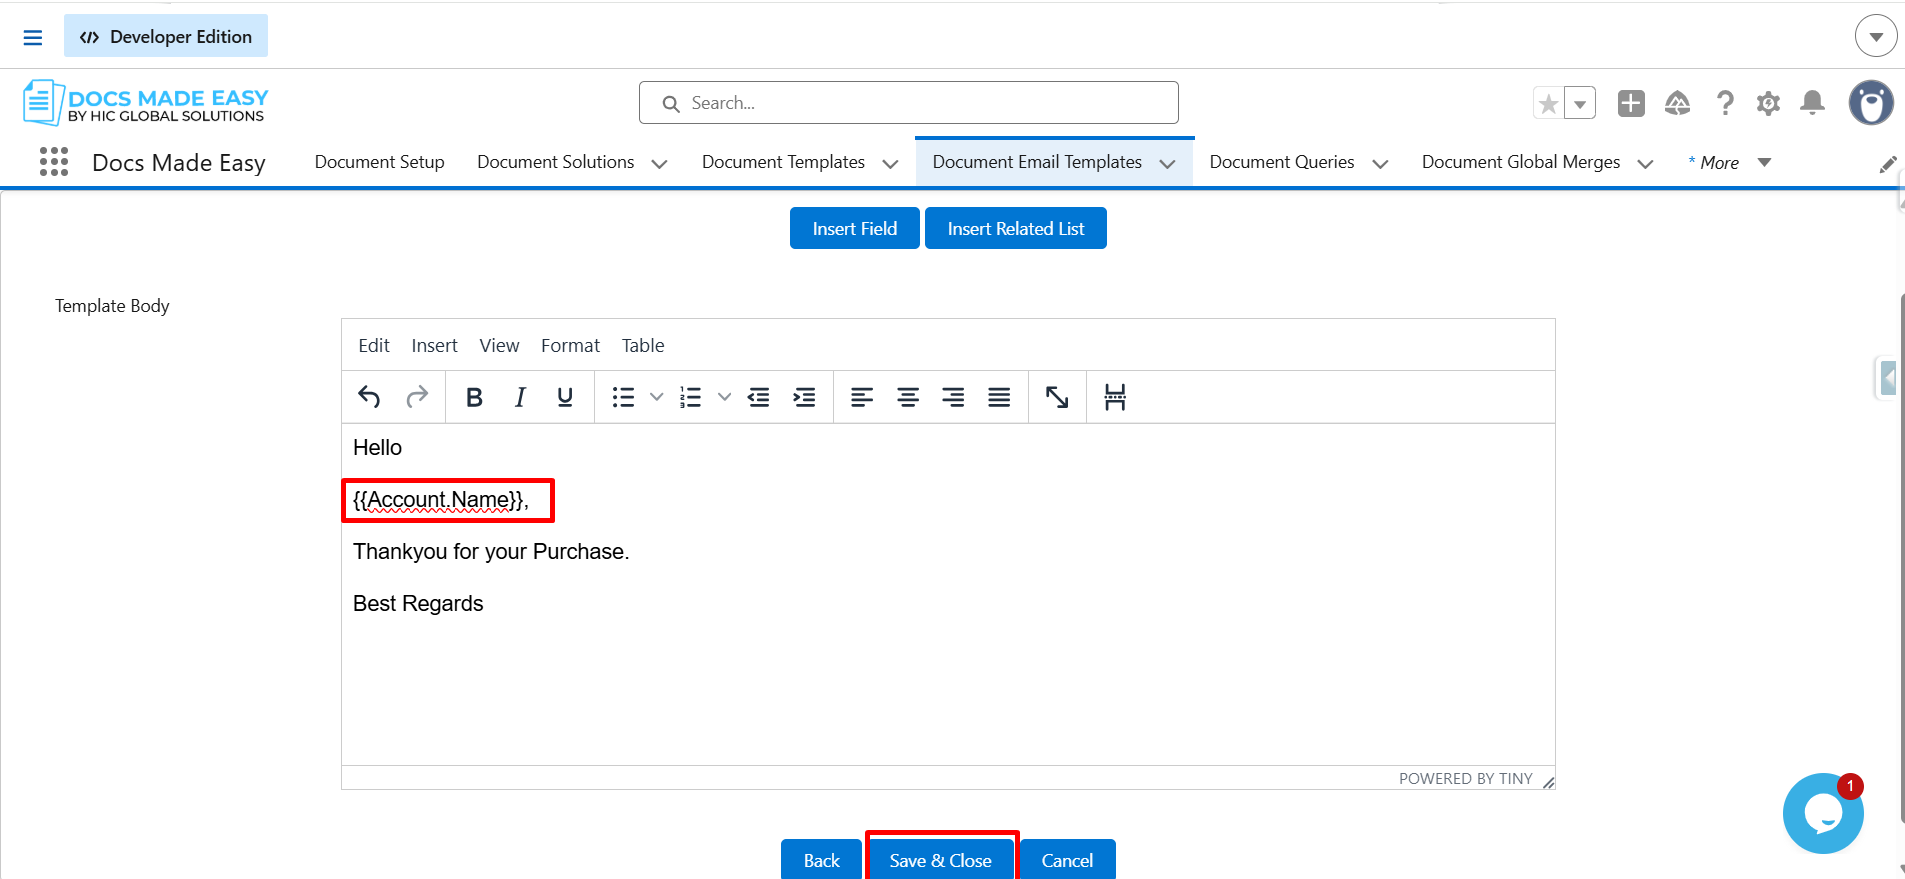
Step 11: Navigate to the Solutions – Add Template window. Click on Next.
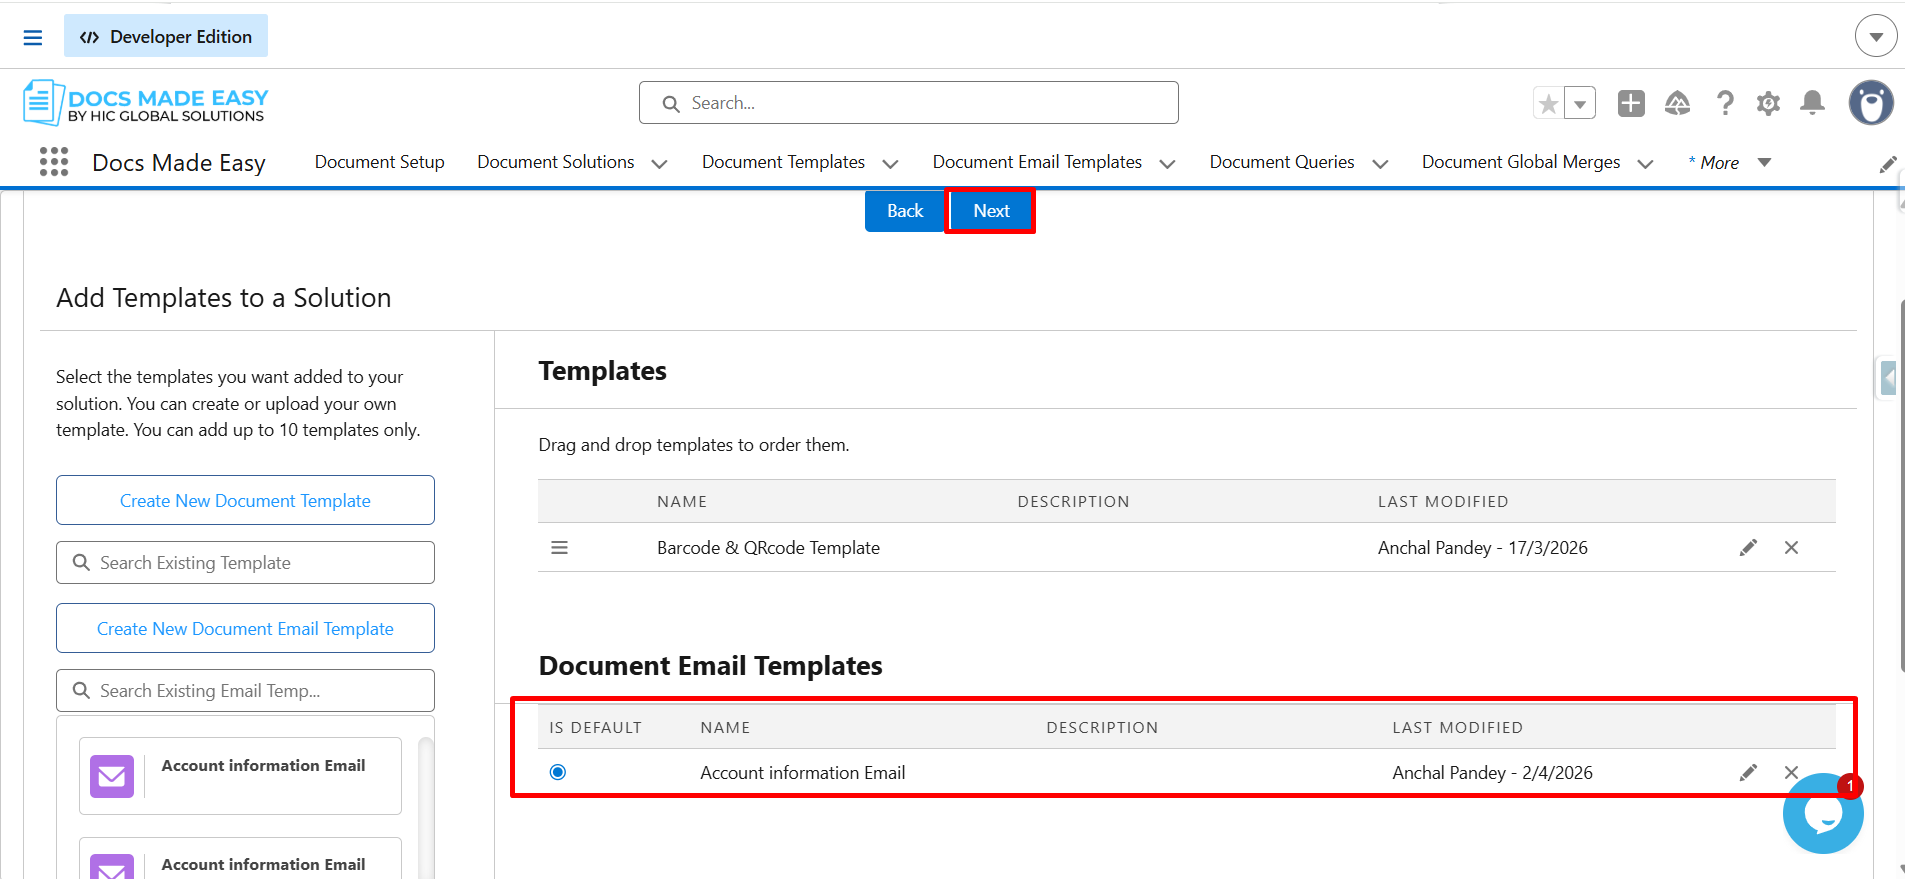
Step 12: Click on Email.
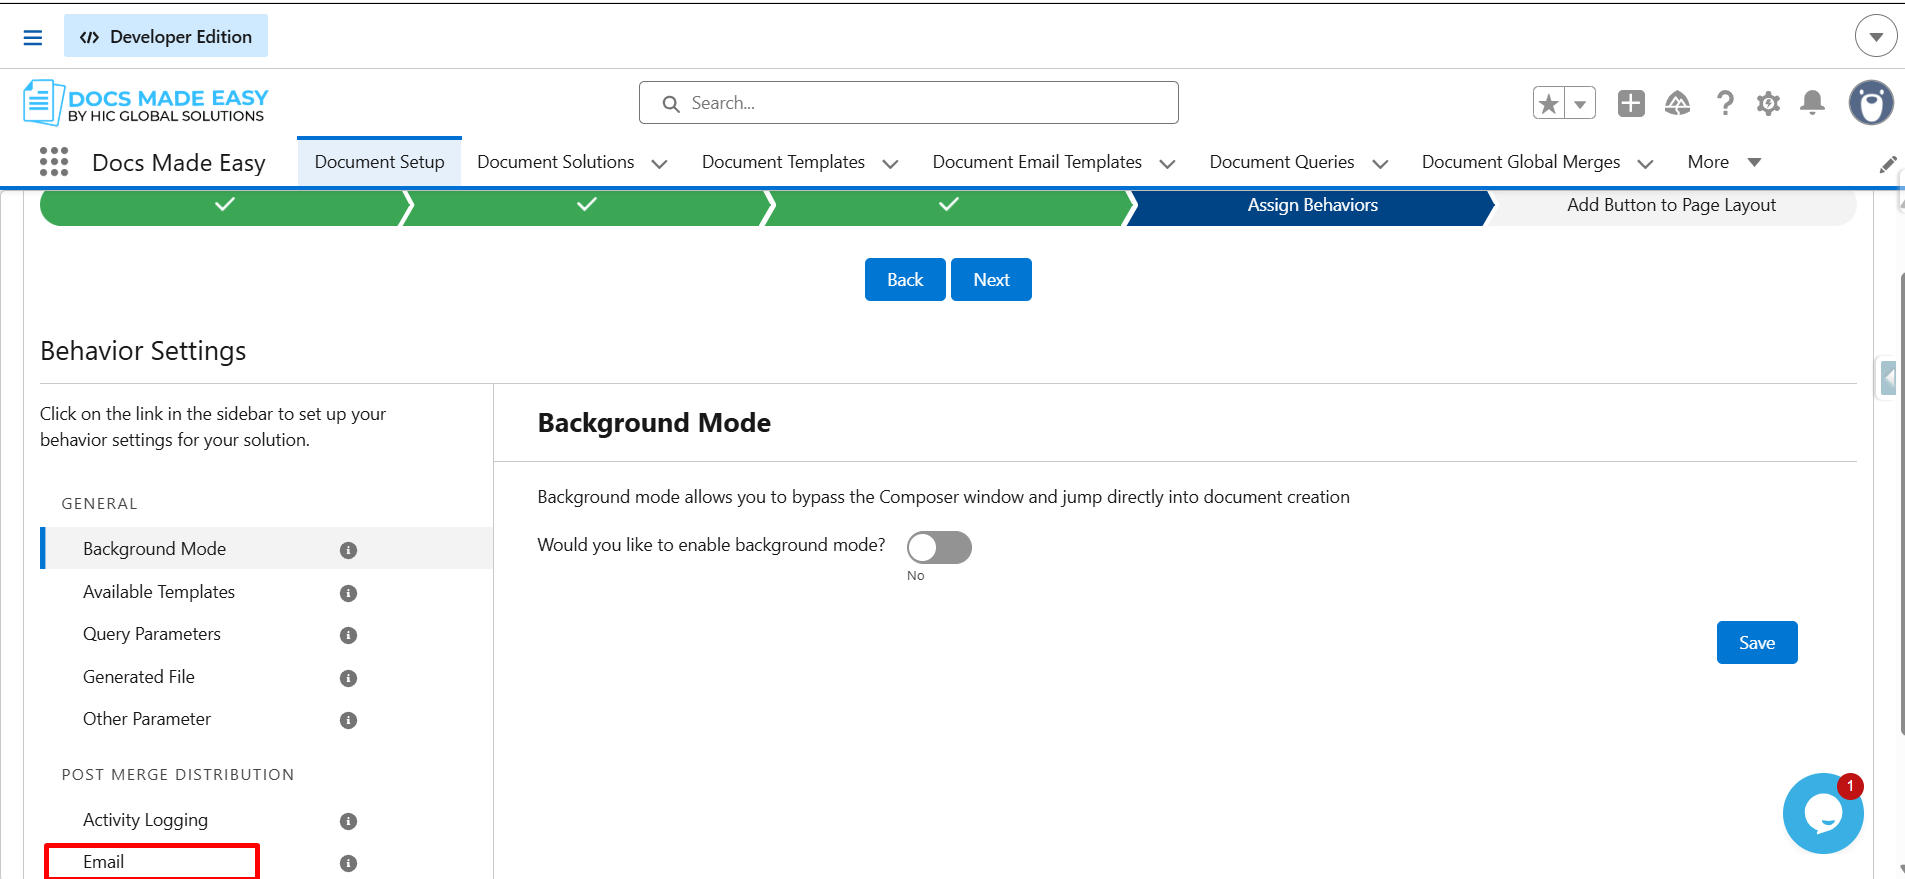
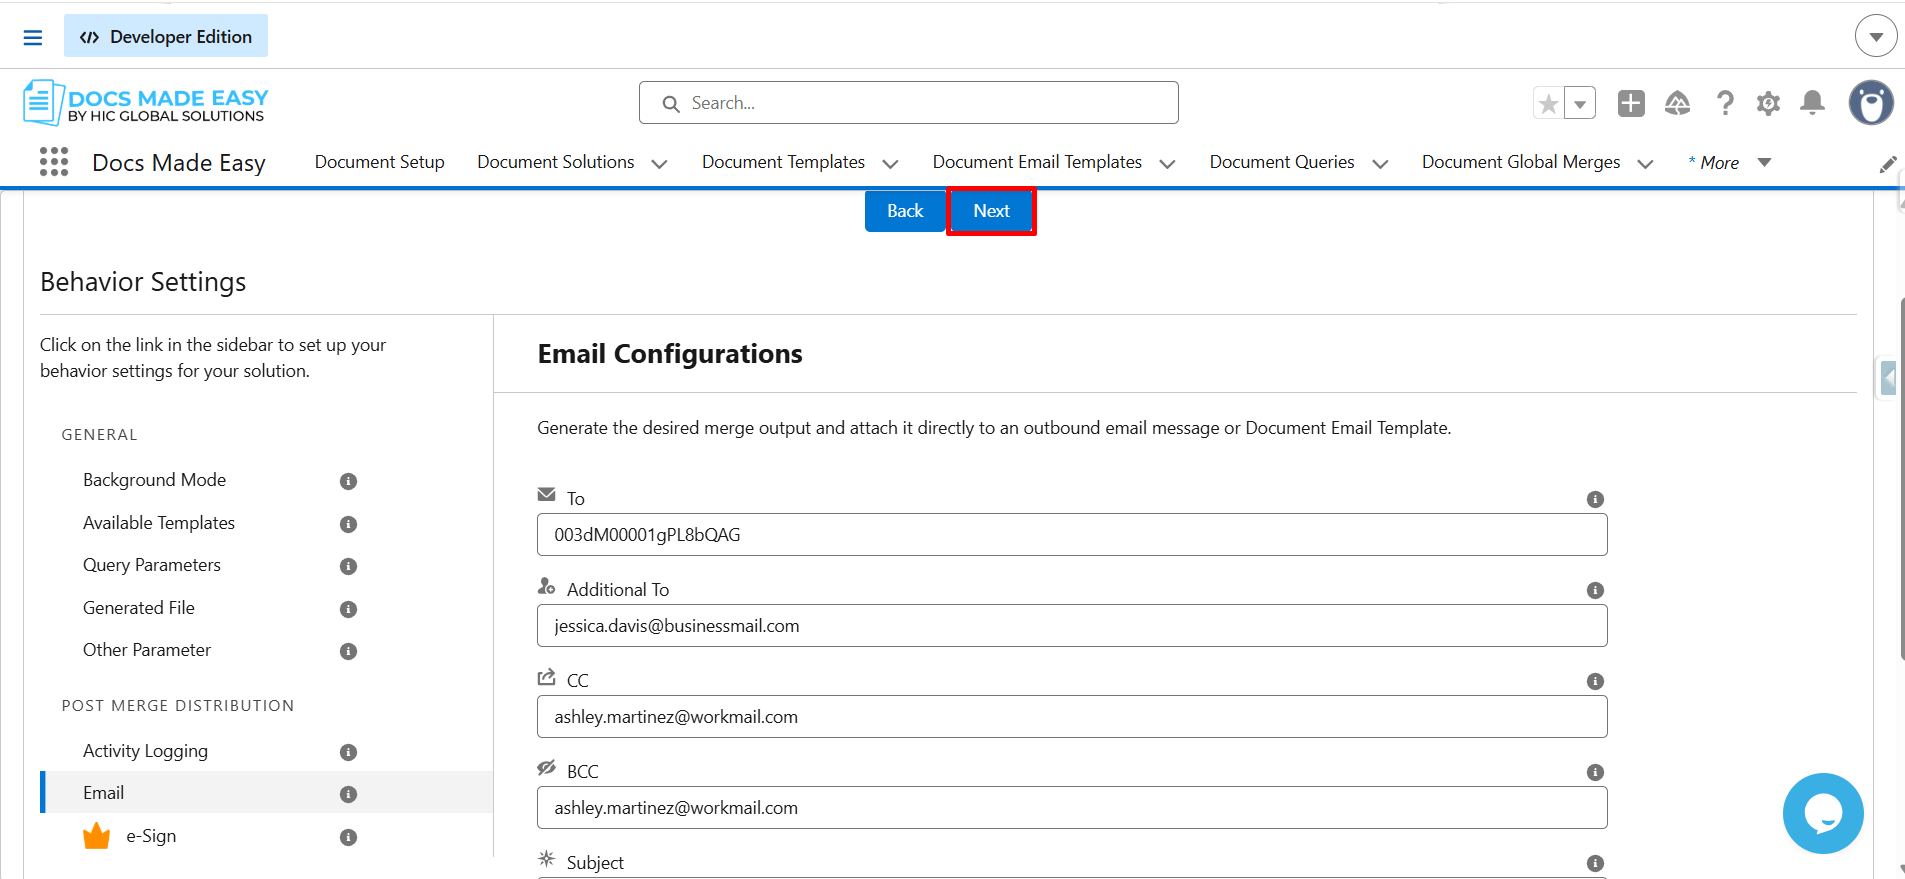
Step 13: Enter the recipient Contact ID in To field.
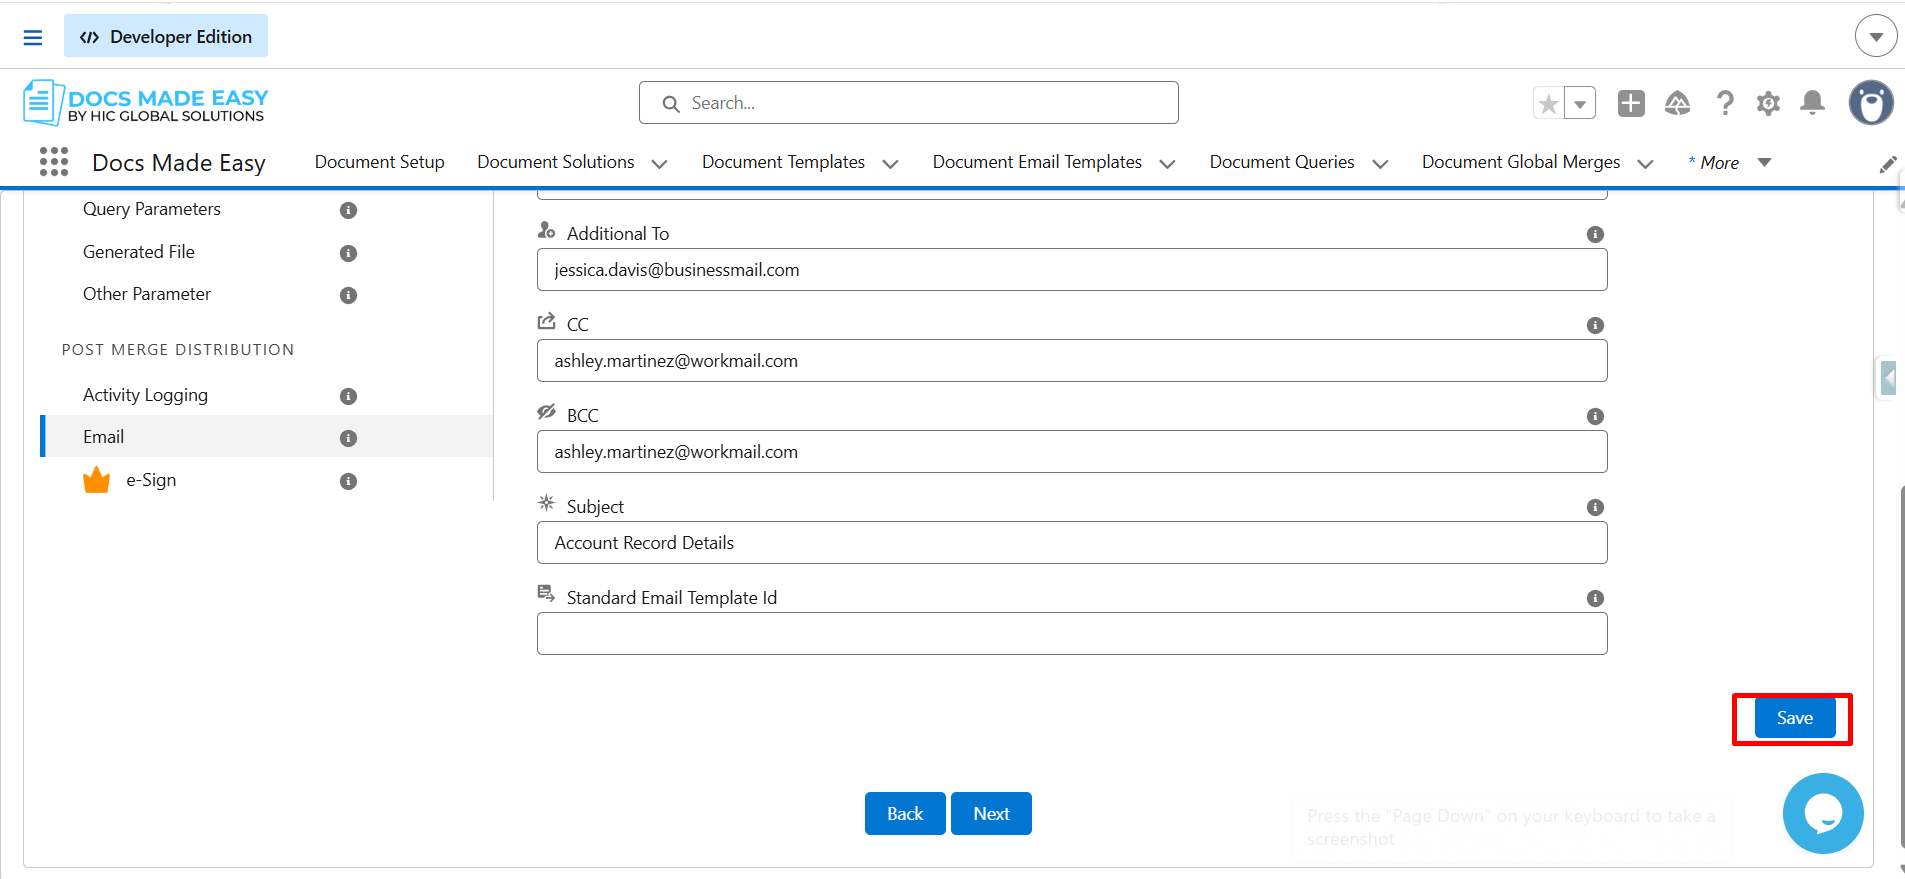
In the Additional To field: Enter additional email address to specify extra recipients.
Add CC and BCC (Optional)
Enter the email Subject.
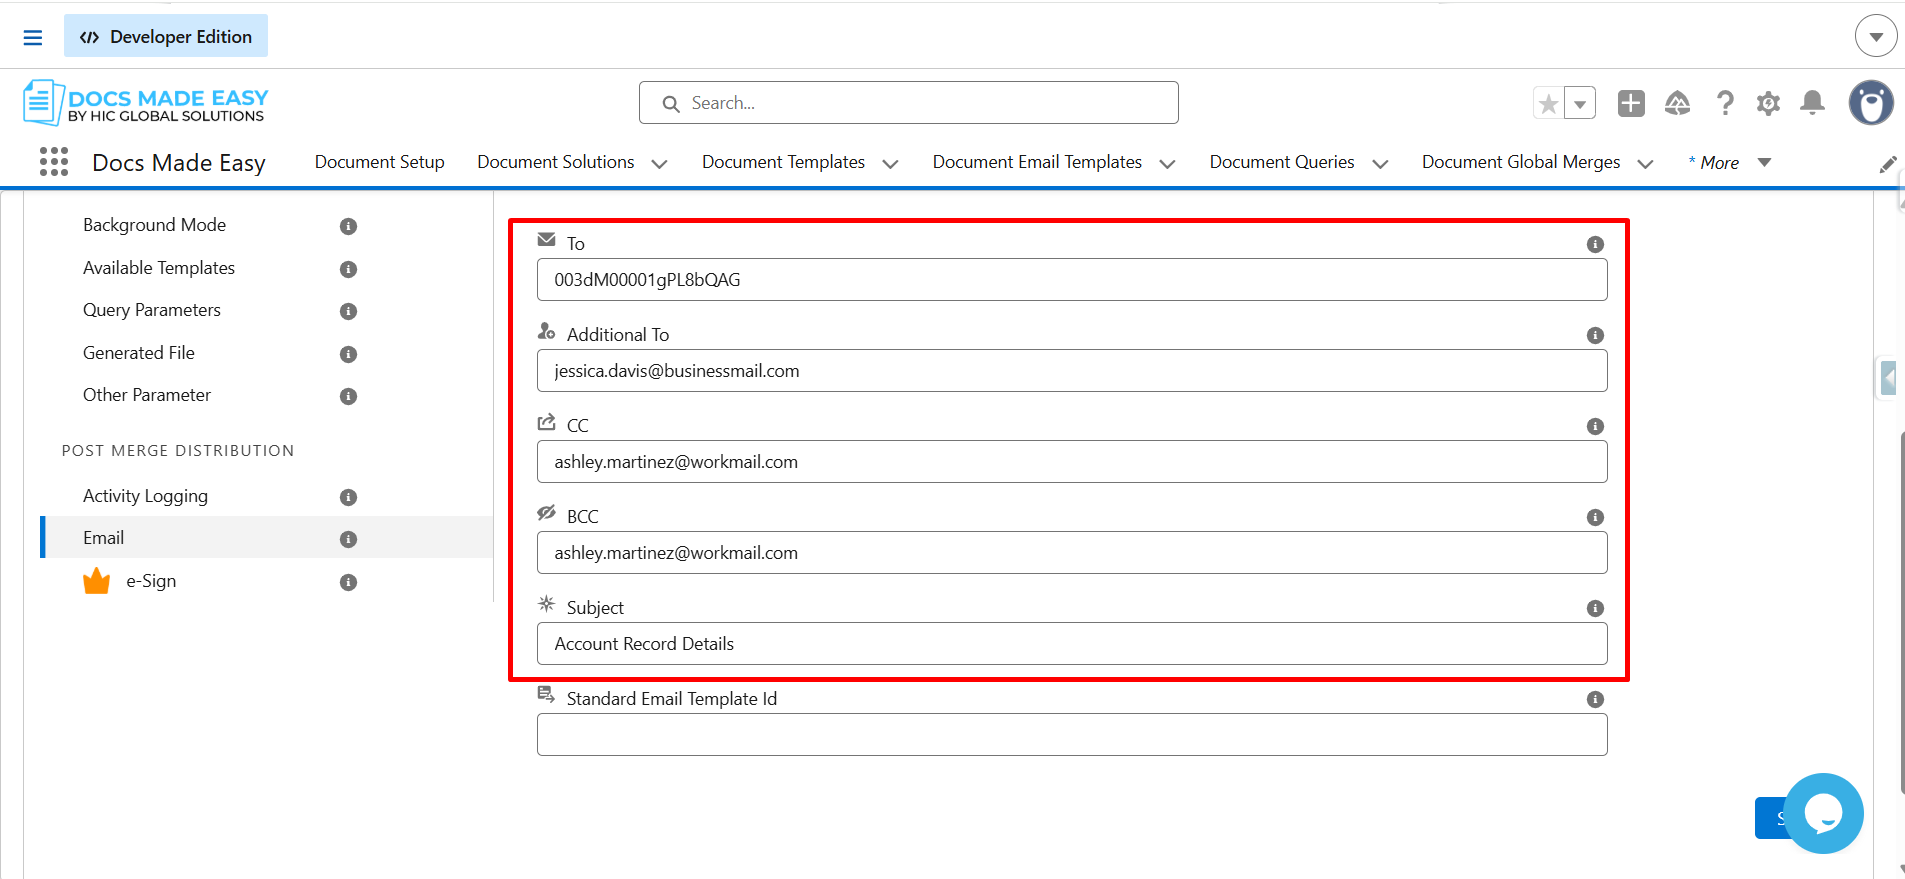
Step 14: Click on Save.
Step 15: Click on Next.
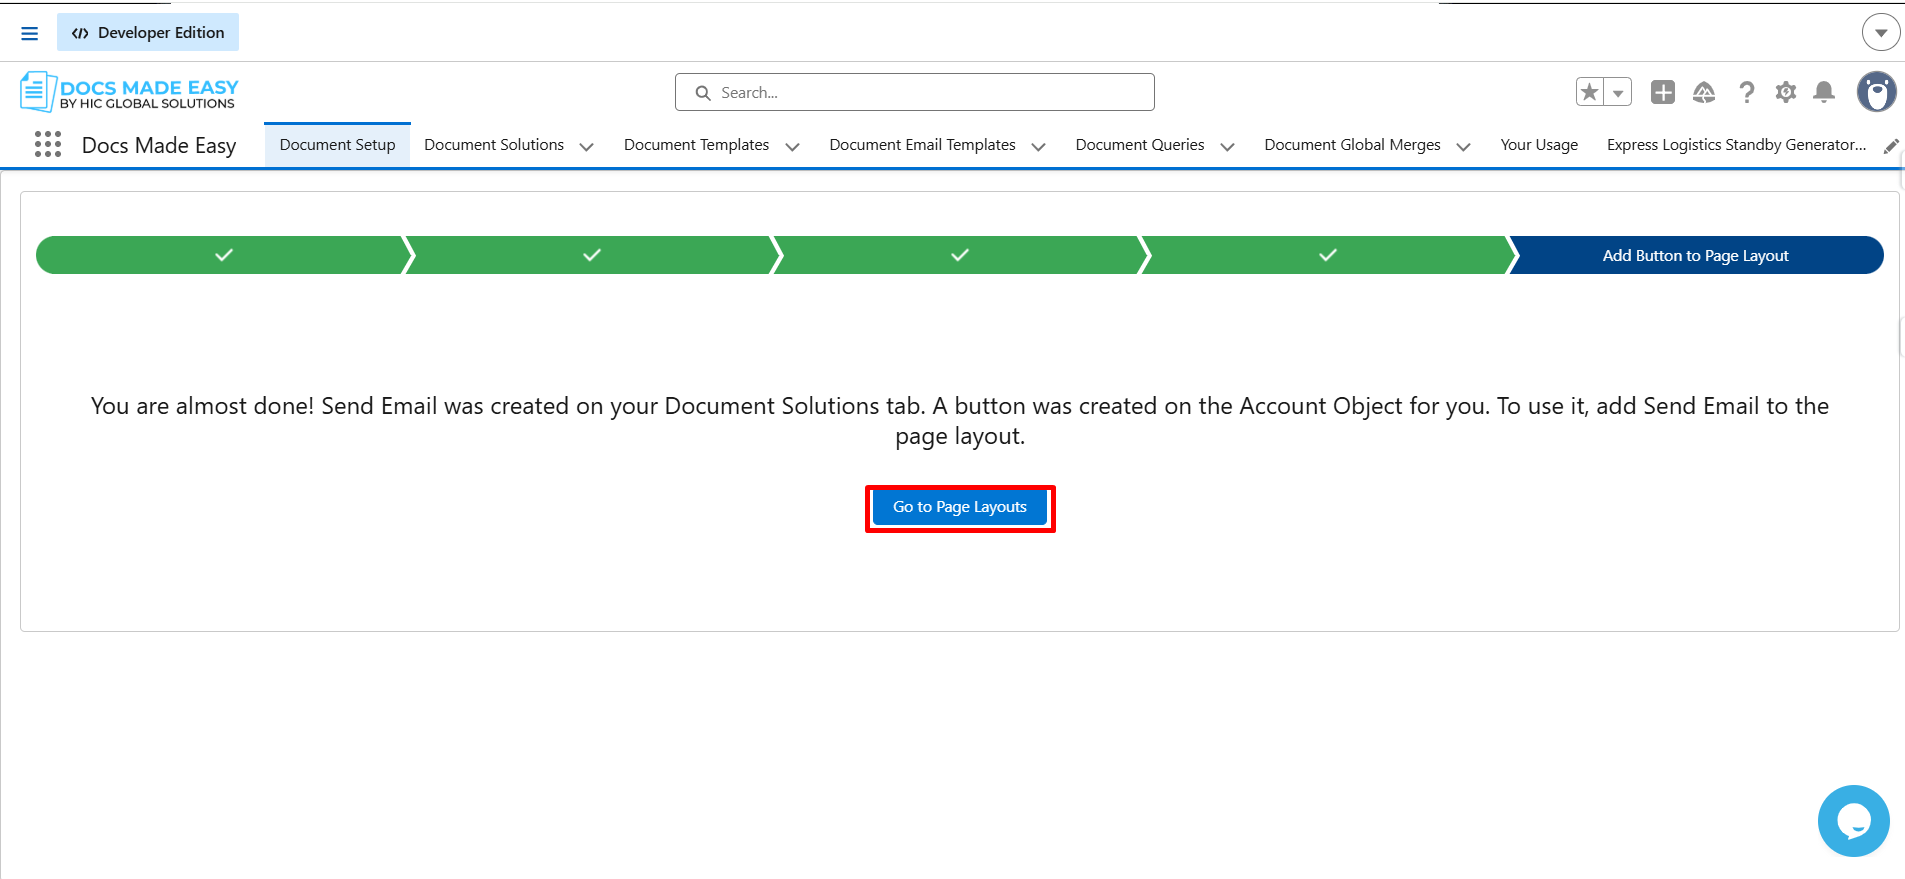
Step 16: Click Go to page Layout.
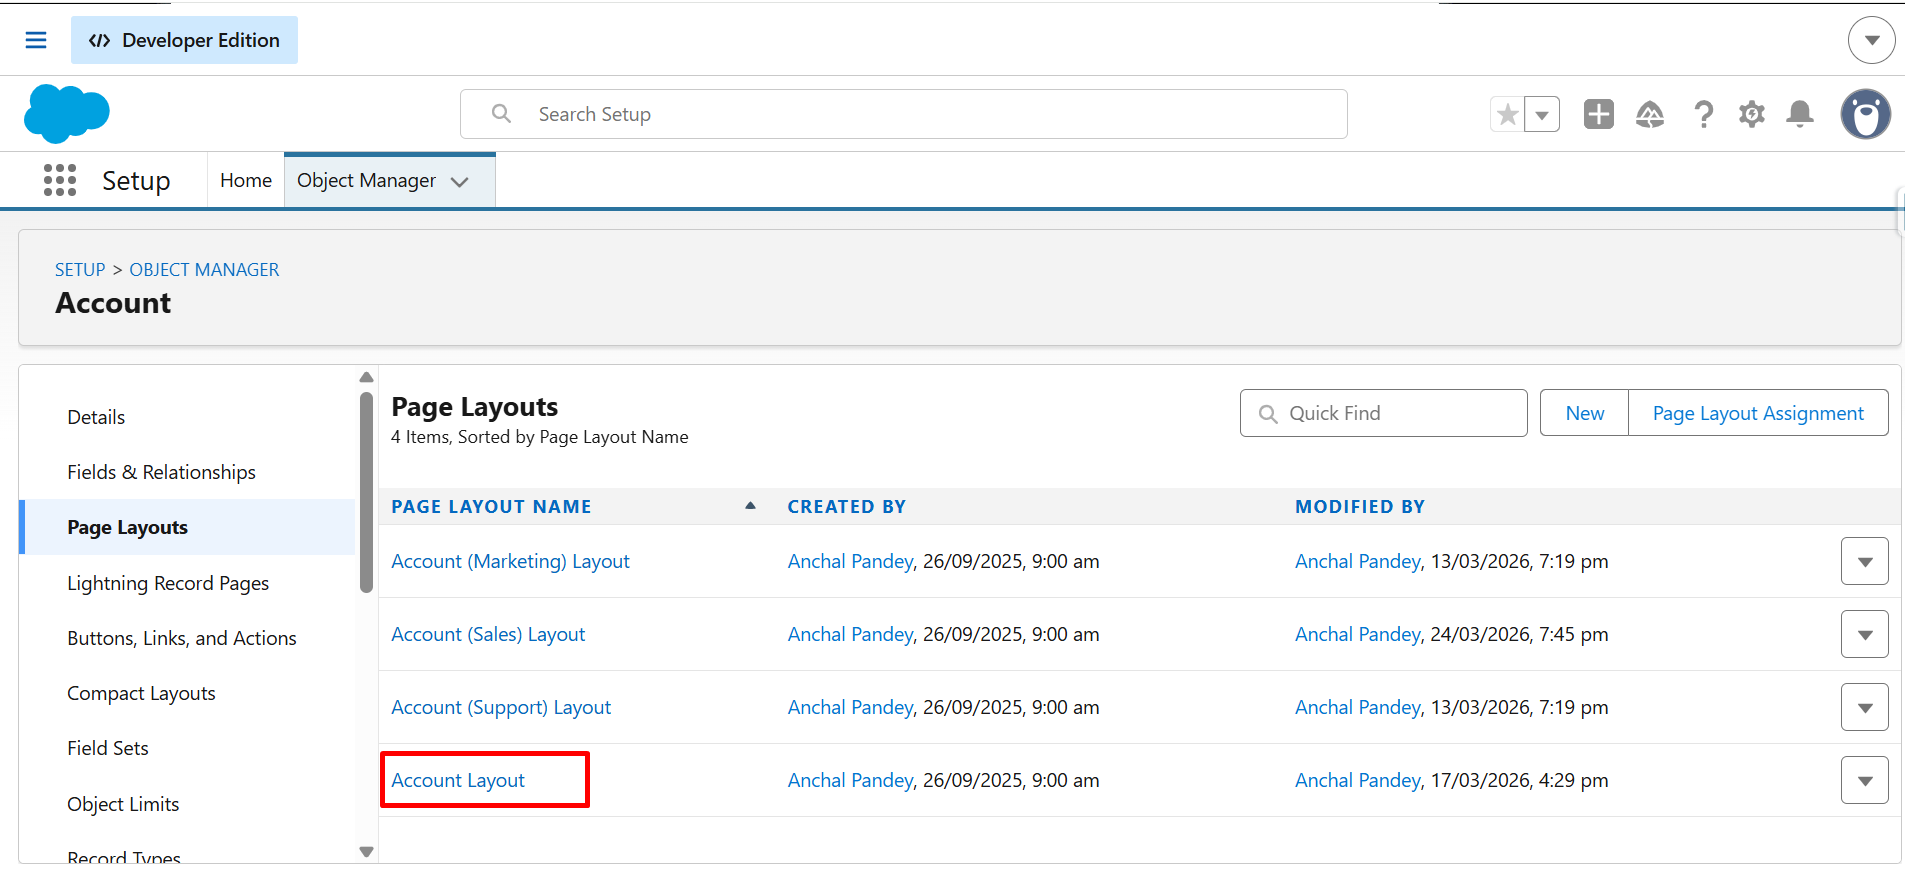
Step 17: Click on Account Layout.
Step 18: From Mobile & Lightning Actions drag and drop the Send Email button in Salesforce Mobile and Lightning Experience Actions.
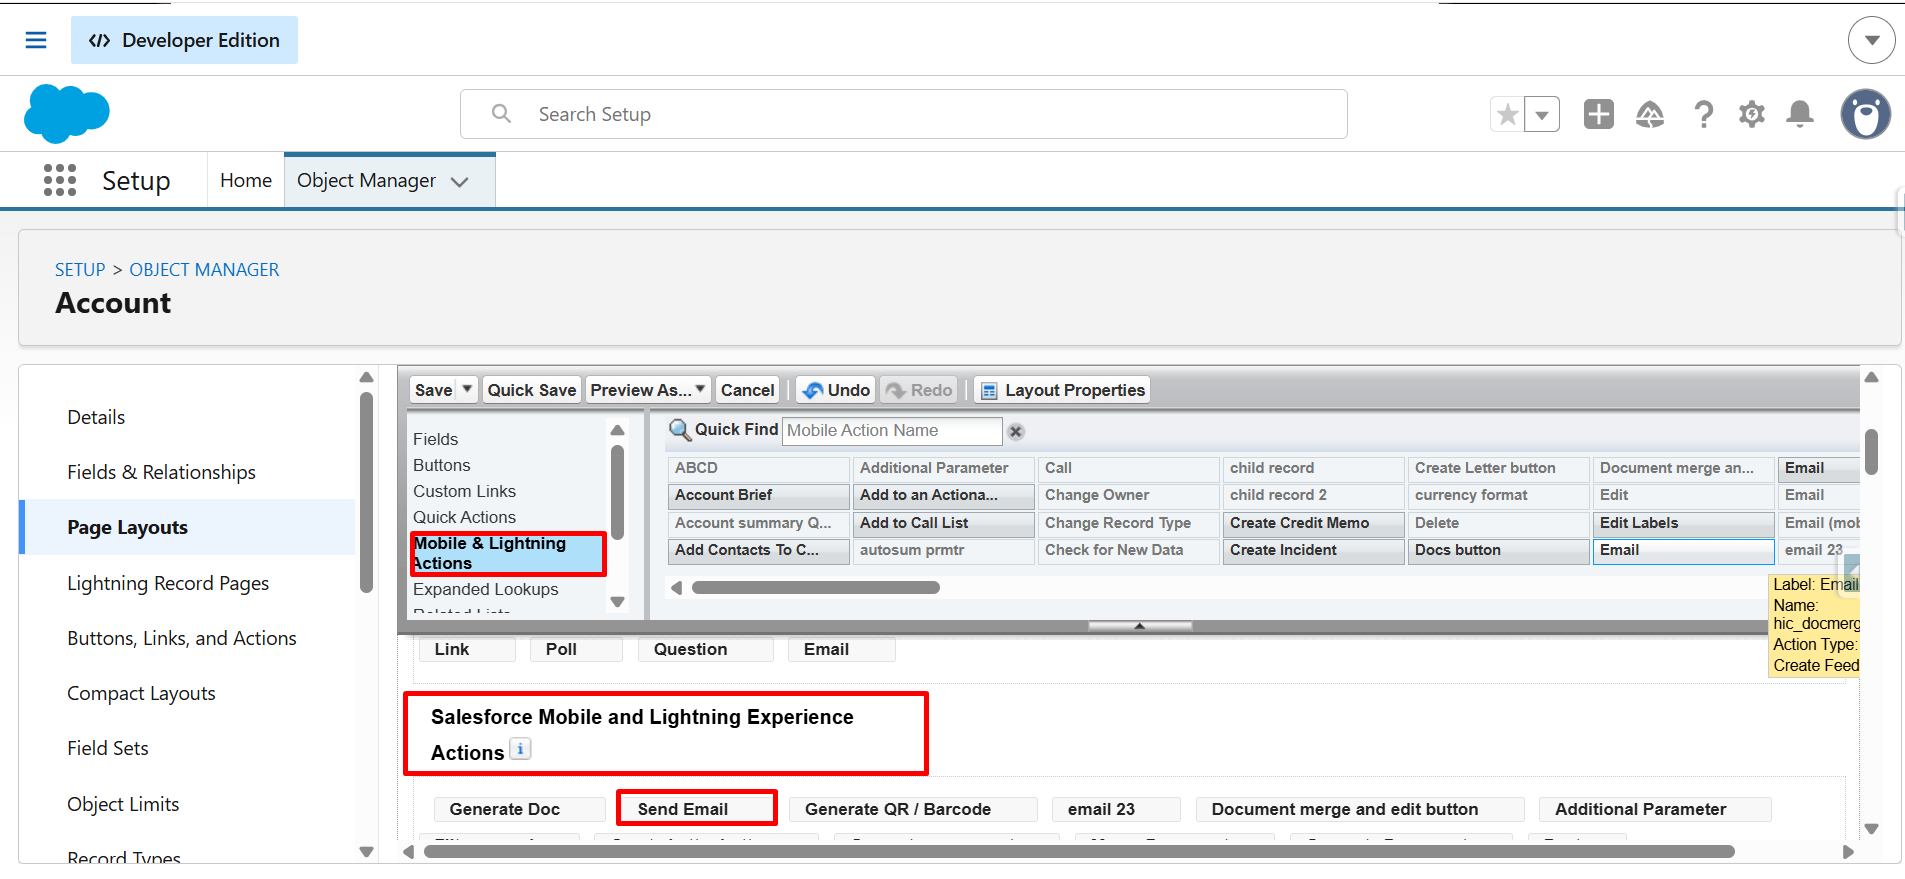
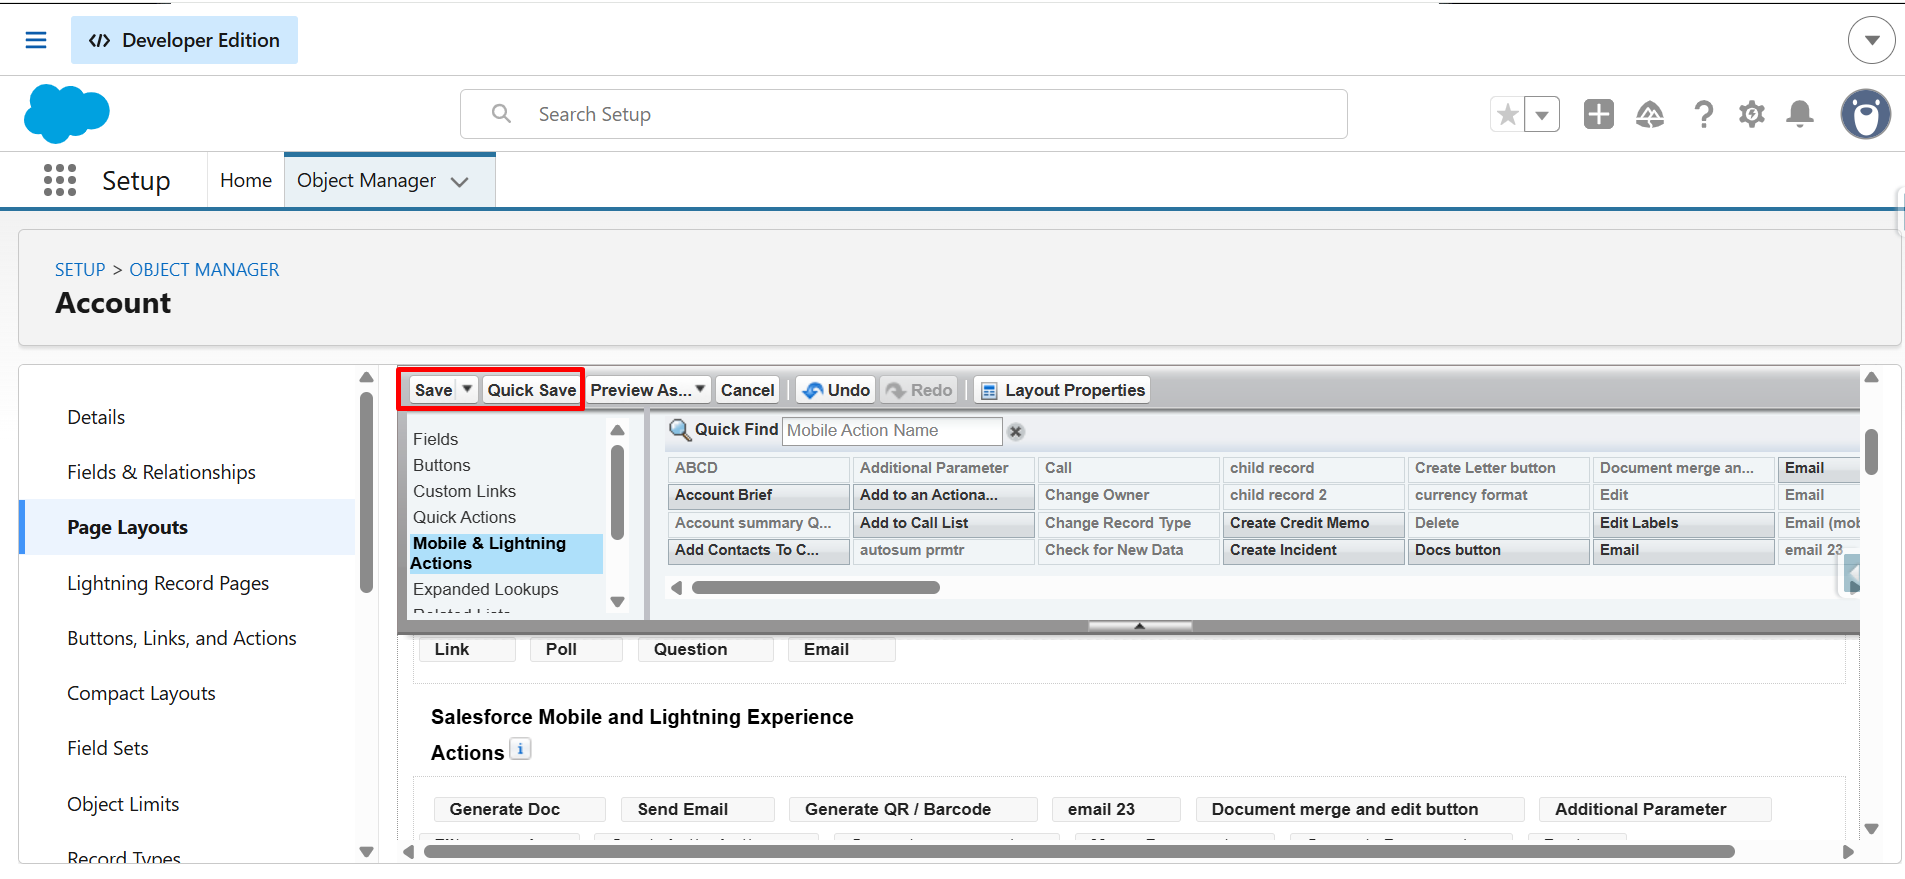
Step 19: Click on Save or Quick Save.
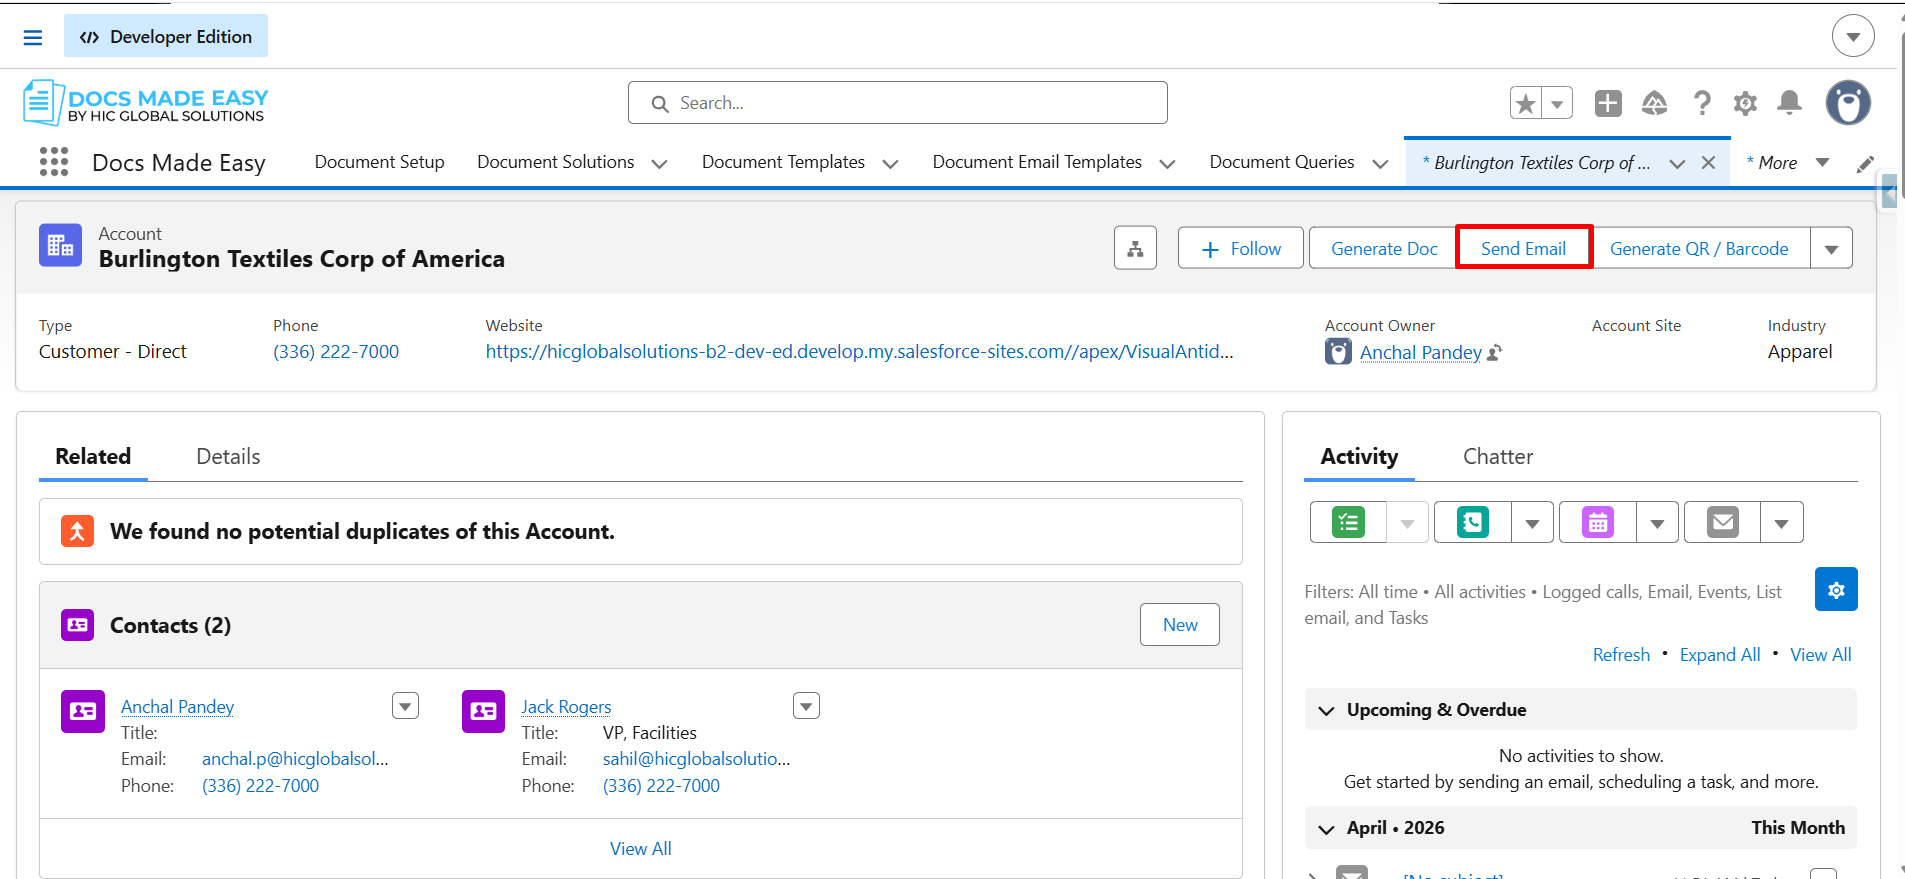
Step 20: Go to Account record and click on the button you have created (Send Email).
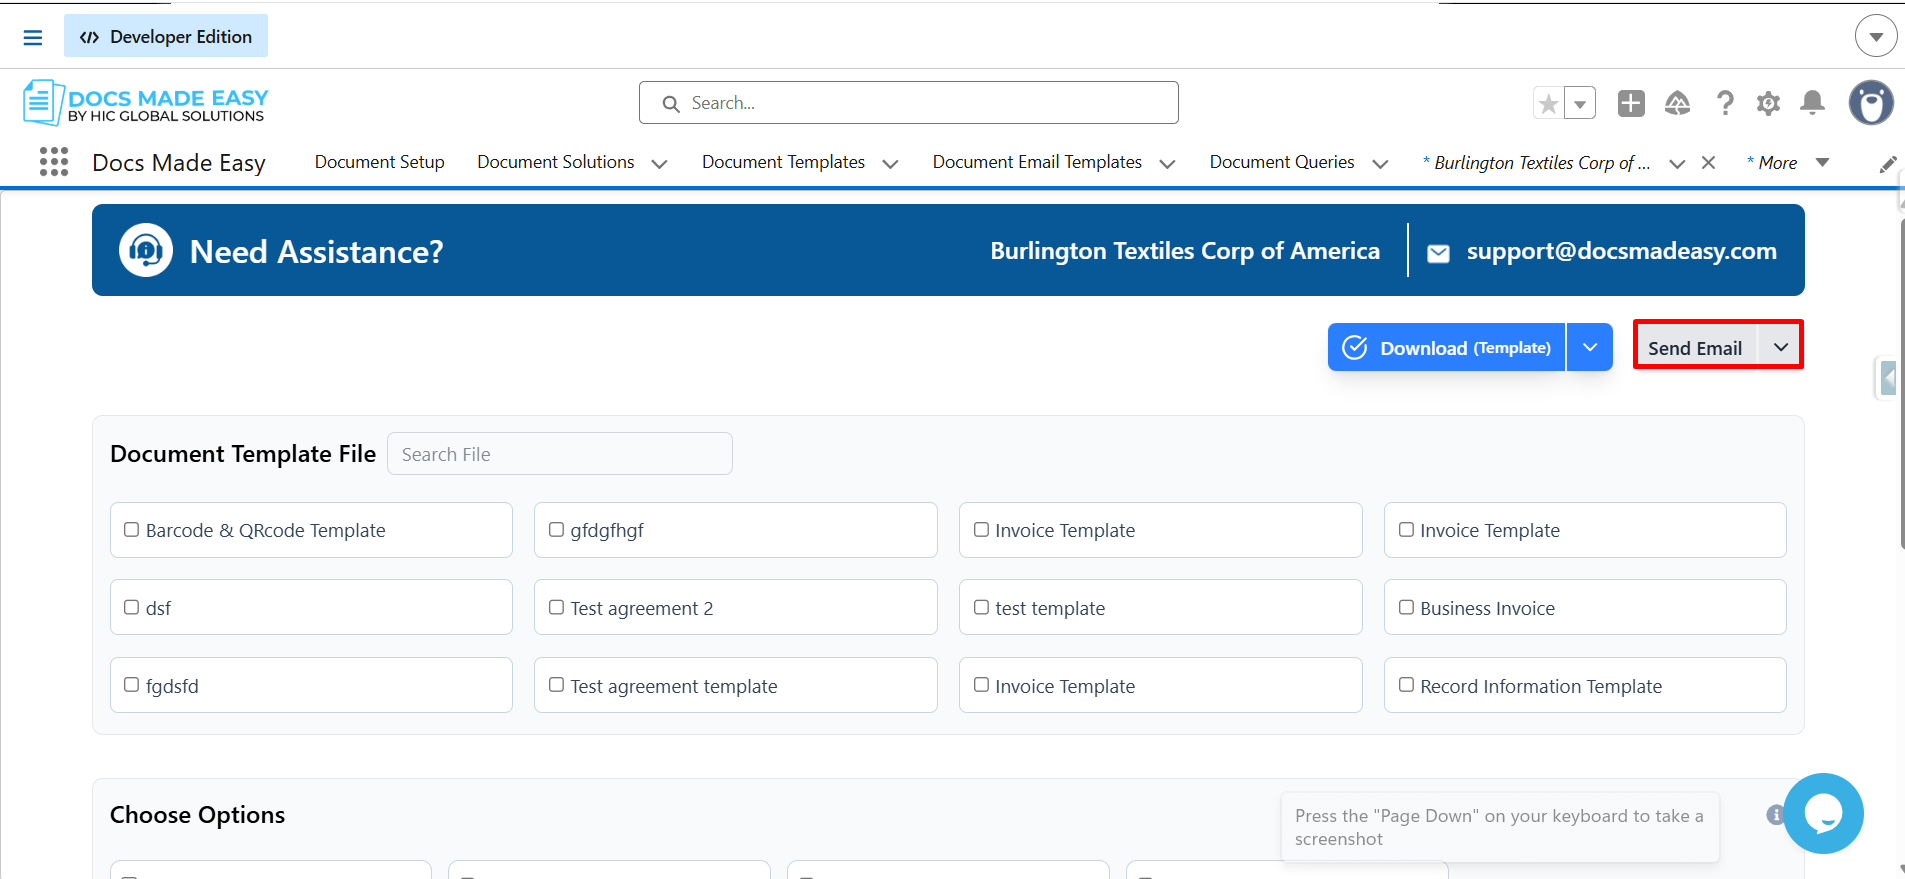
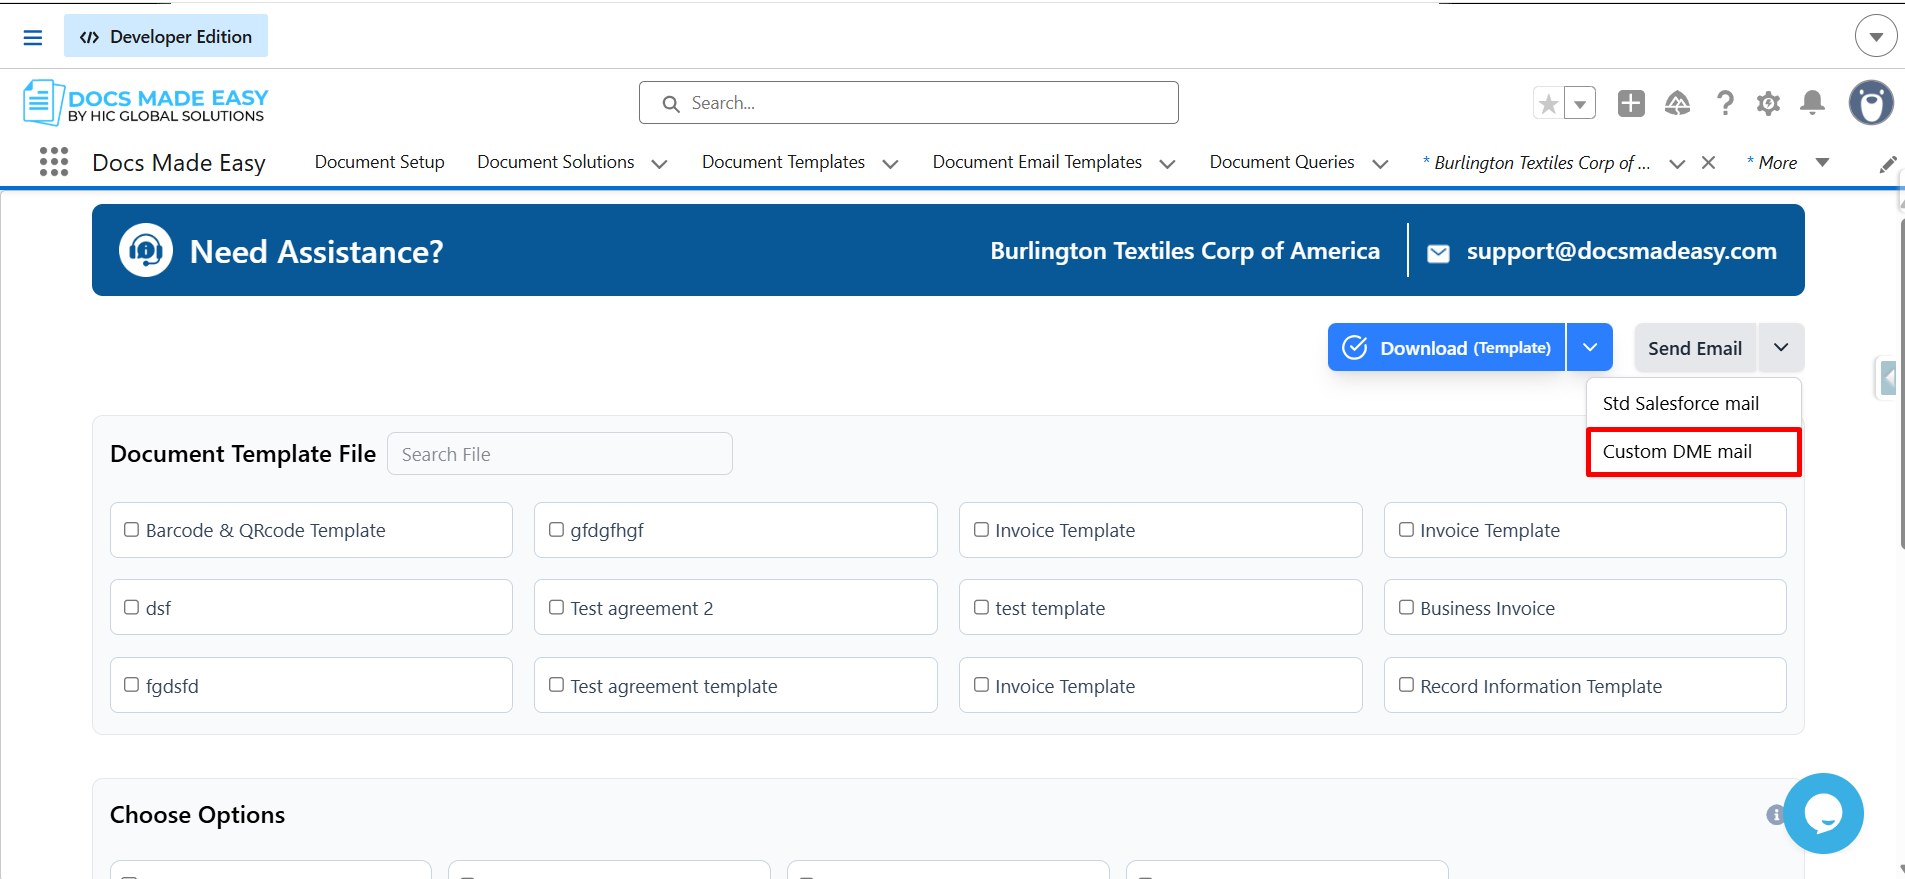
Step 21: Click on the “Send Email” button located at the top right section.
Step 22: Click on Custom DME mail.
Step 23: Under Choose Custom DME Mail Template, select the desired mail template.
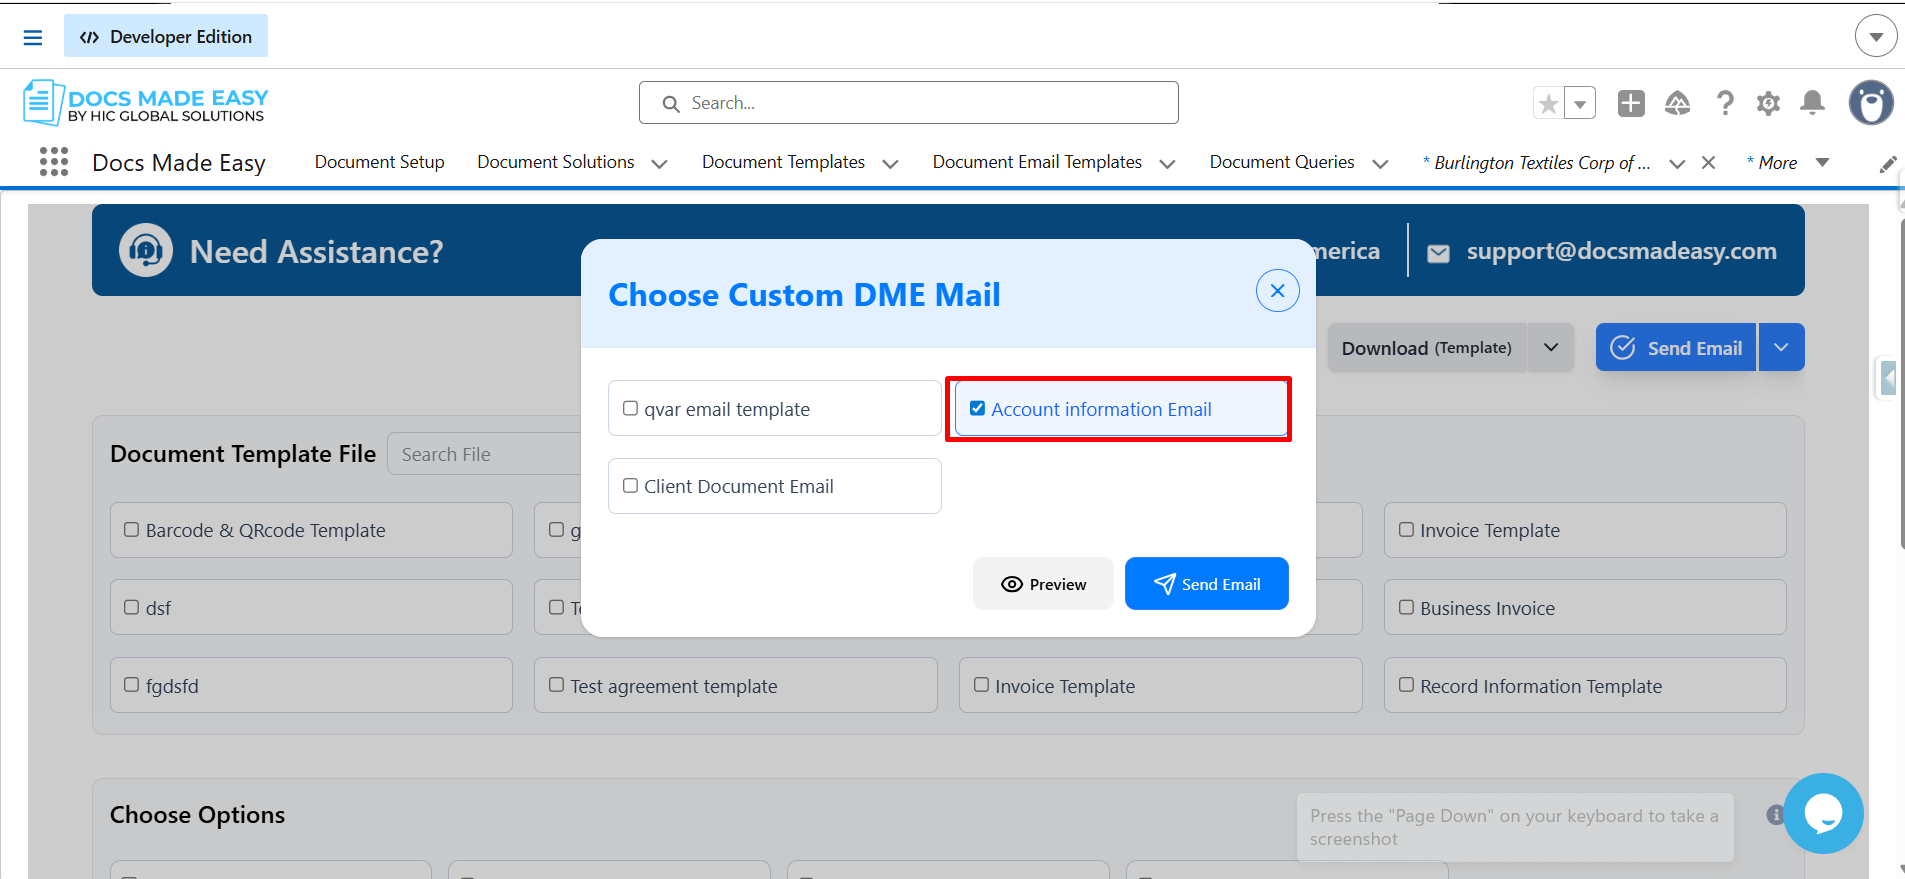
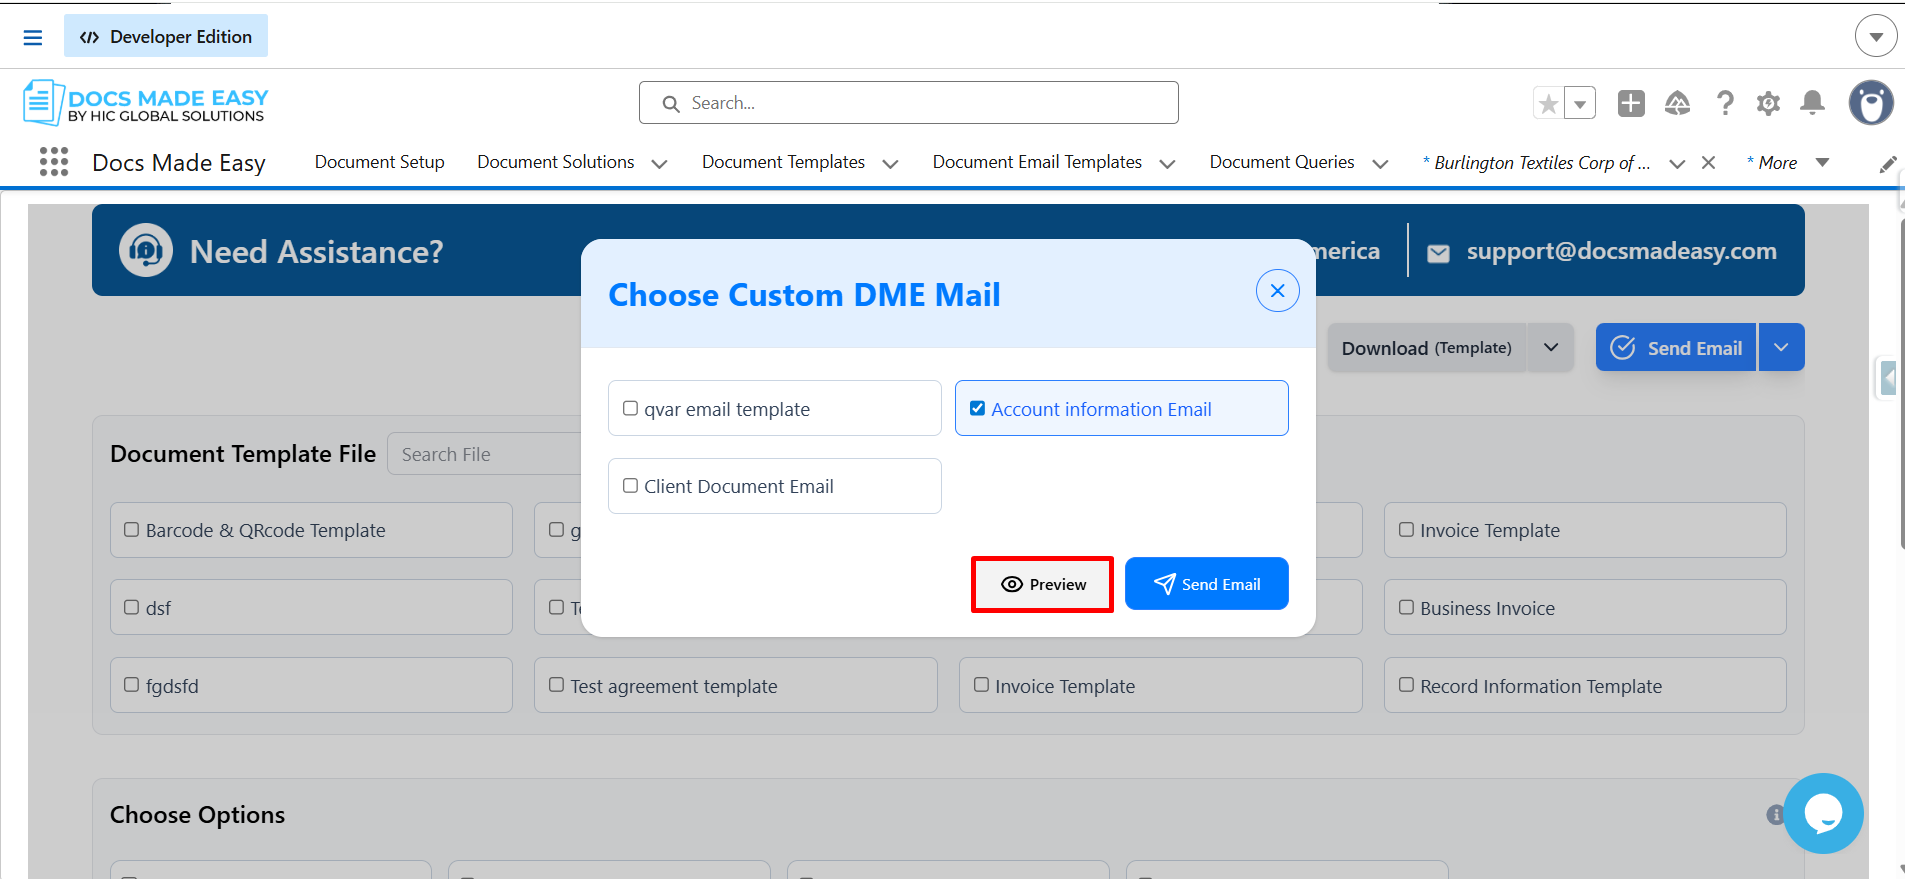
Step 24: Click Preview to review the email content before sending. If no changes are needed, click Send Email to send it directly.
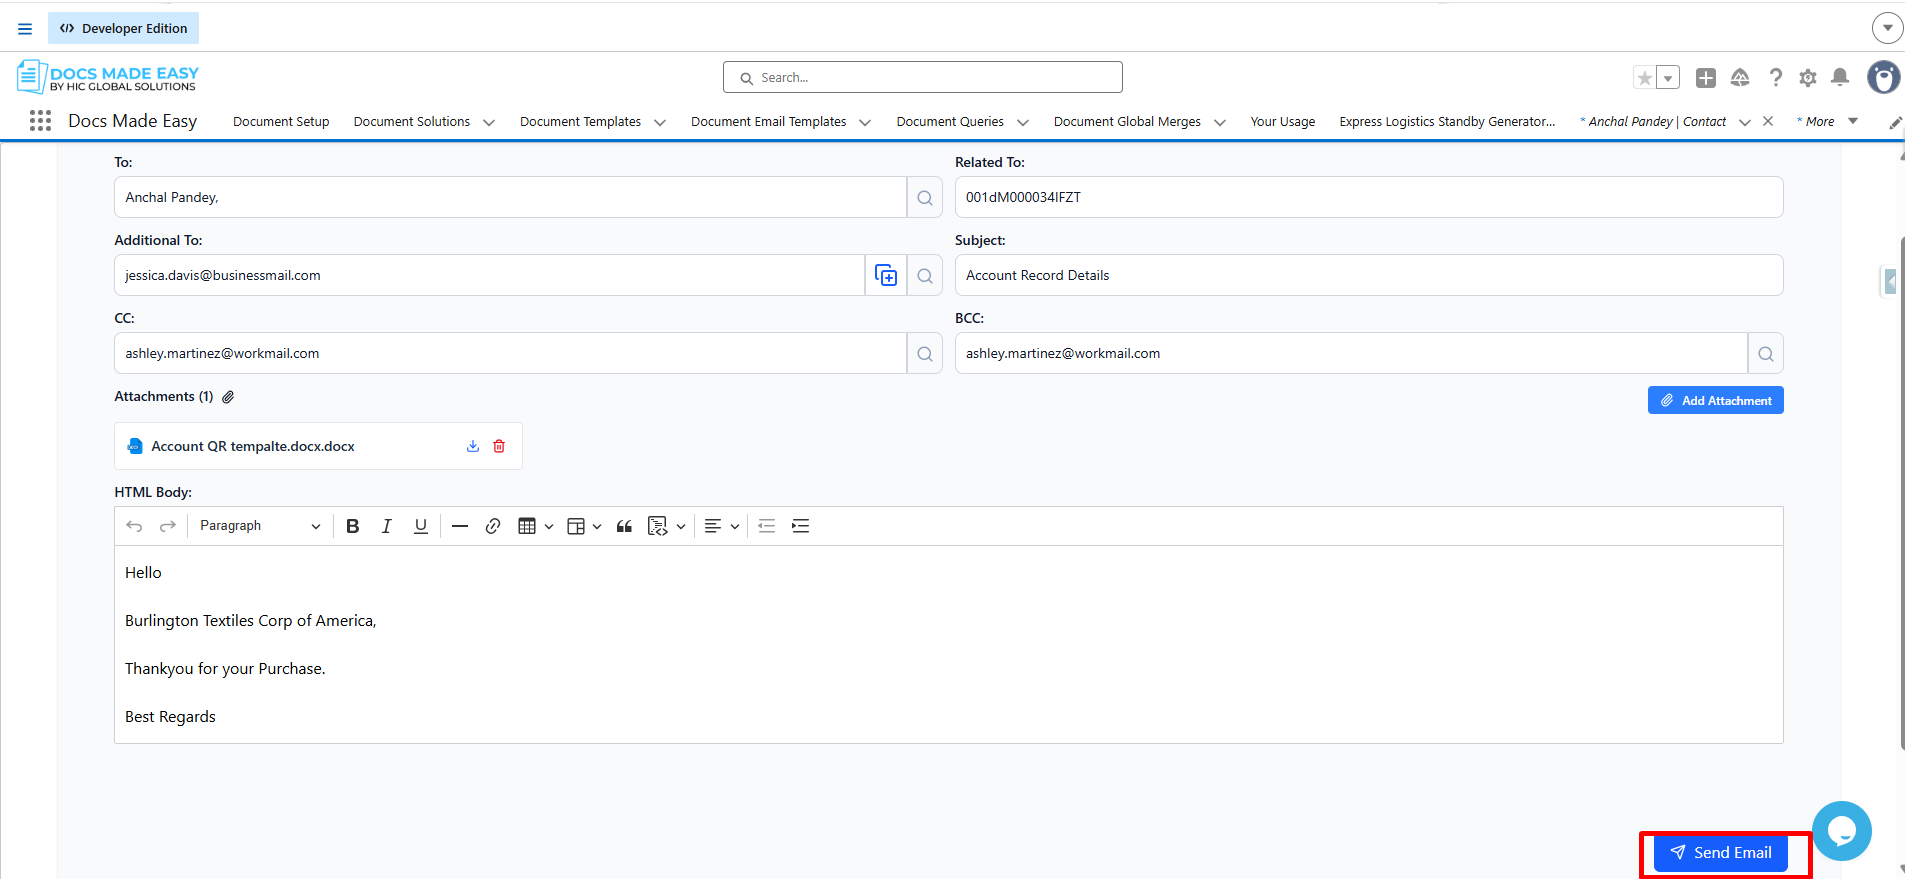
Step 25: If you click Preview, the Email Preview screen is displayed. Review the following sections:
- Recipients (To, Additional To, CC, BCC)
- Subject
- Email Body (HTML Editor view)
- Attachment
After verification:
- Click Send Email to send the email
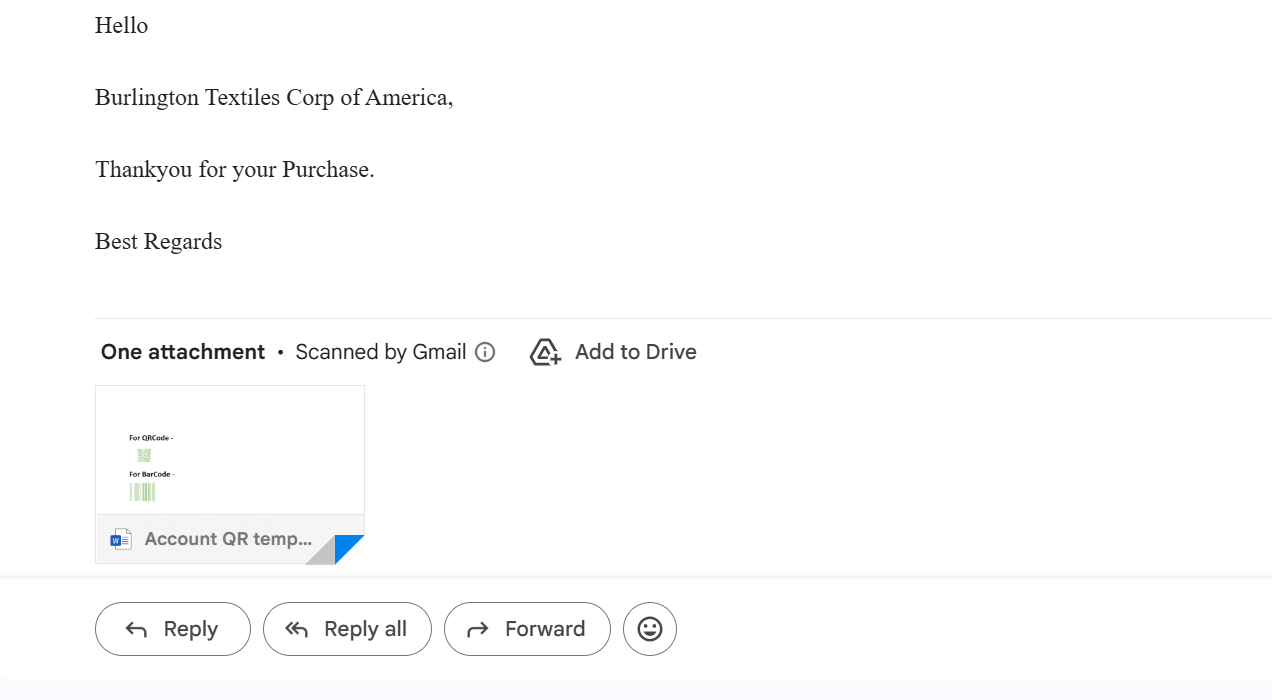
Step 26: Open the email to view the generated output.
Conclusion
Sending Salesforce documents doesn’t have to involve multiple tools or repetitive manual steps. With Docs Made Easy, you can configure custom email templates, generate documents, preview the final output, and send everything directly from Salesforce through a single streamlined workflow.
By following this guide, you can use Salesforce document automation to improve accuracy, reduce turnaround time, and deliver a better experience for recipients. Whether you’re sharing invoices, contracts, or other business files using a Salesforce document template, the entire process becomes faster, more consistent, and easier to manage.

Top Companies Trust Docs Made Easy What’s Stopping You?
Frequently Asked Questions
Related Blogs
Beyond E-Signatures: Choosing a DocuSign Alternative for Complete Document Workflows
For many businesses, DocuSign became the default choice for electronic signatures. It solved a real problem: getting documents signed without…
The Future of Healthcare Documentation: Salesforce Automation and AI
Healthcare organizations are under more pressure than ever to manage growing numbers of patient information while delivering faster, more personalized…
How to Add Images in Salesforce Document Templates
This guide explains how to add images from Files or Attachments into your templates while keeping the focus on Salesforce…