How to Set Up the QVar Parameter for Dynamic Document Templates in Salesforce
Category :
How To

Docs Made Easy Proudly Featured by Salesforce
Docs Made Easy simplifies Salesforce document automation with dynamic templates, automated workflows, and easy configuration for faster document generation.
Explore Now!If you want your document generation process to dynamically display templates based on specific record data, setting up the QVar parameter correctly is important. With Salesforce document generation, you can control which templates appear by using a Document Query and passing its ID through parameters.
Follow these steps carefully to configure the QVar parameter the right way and make your document solution work dynamically.
Step 1: Open Docs made easy in Salesforce.
Step 2: Click on Document Queries.
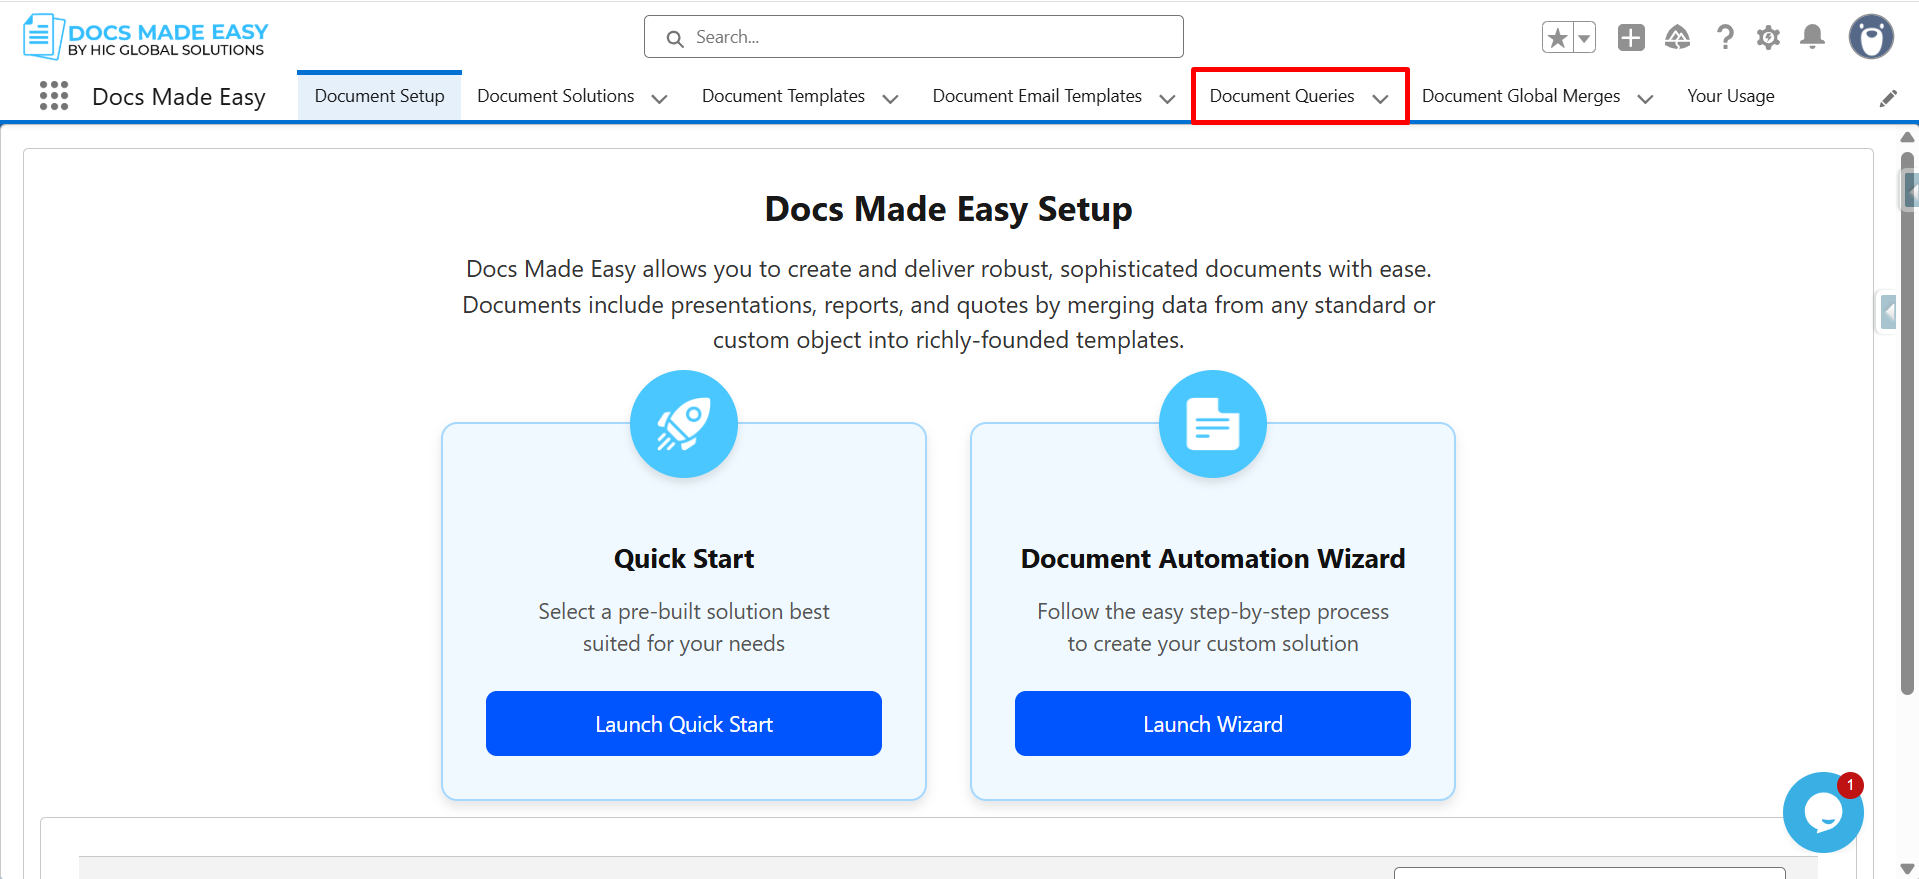
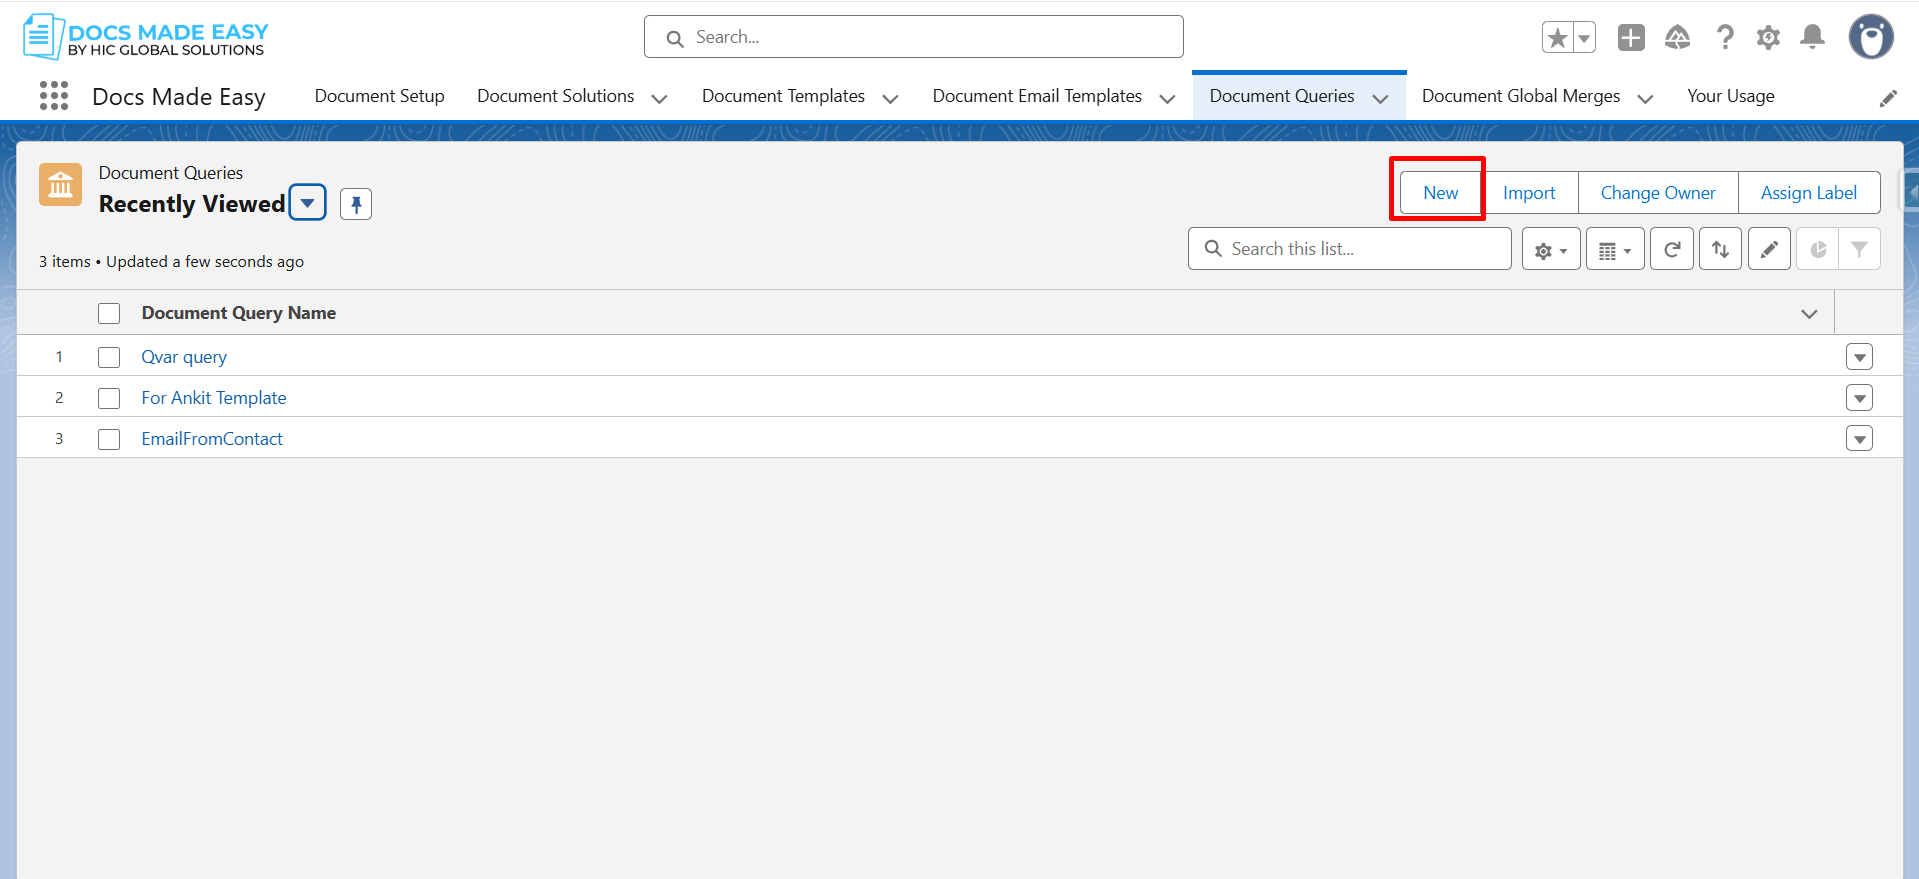
Step 3: Click on New.
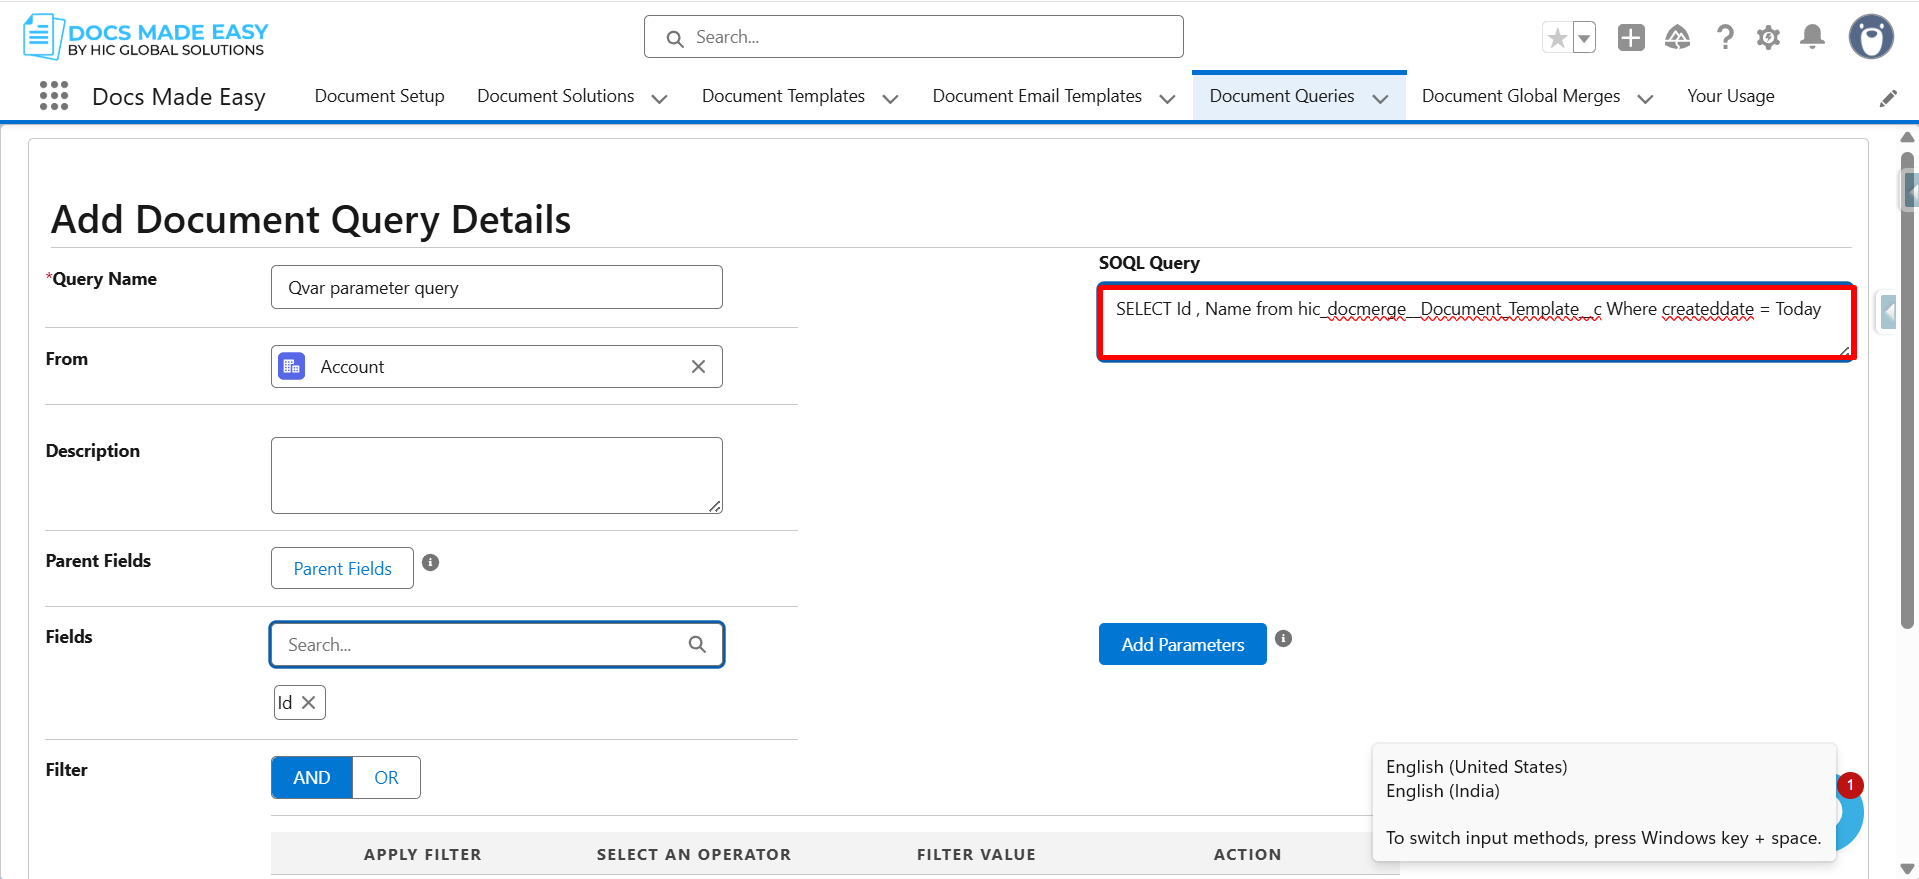
Step 4: In the Query Name field, enter Query name.
From the From dropdown, select the required object (e.g., Account).
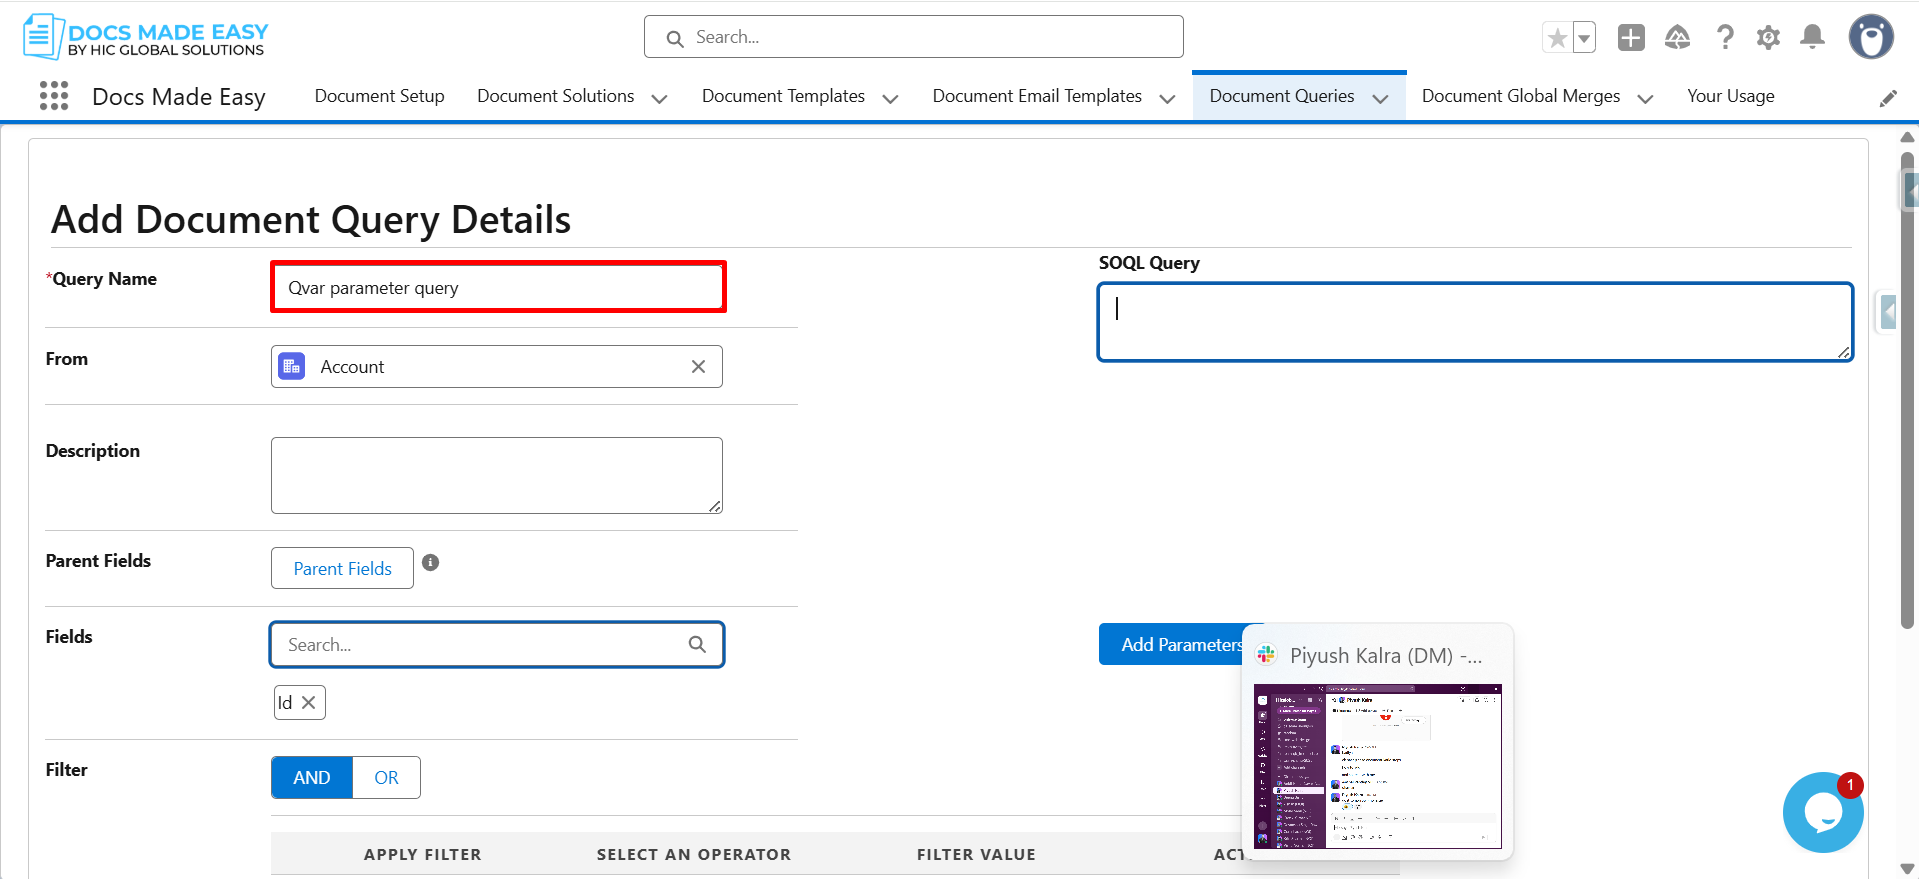
Step 5: In the SOQL Query section, write the Query.
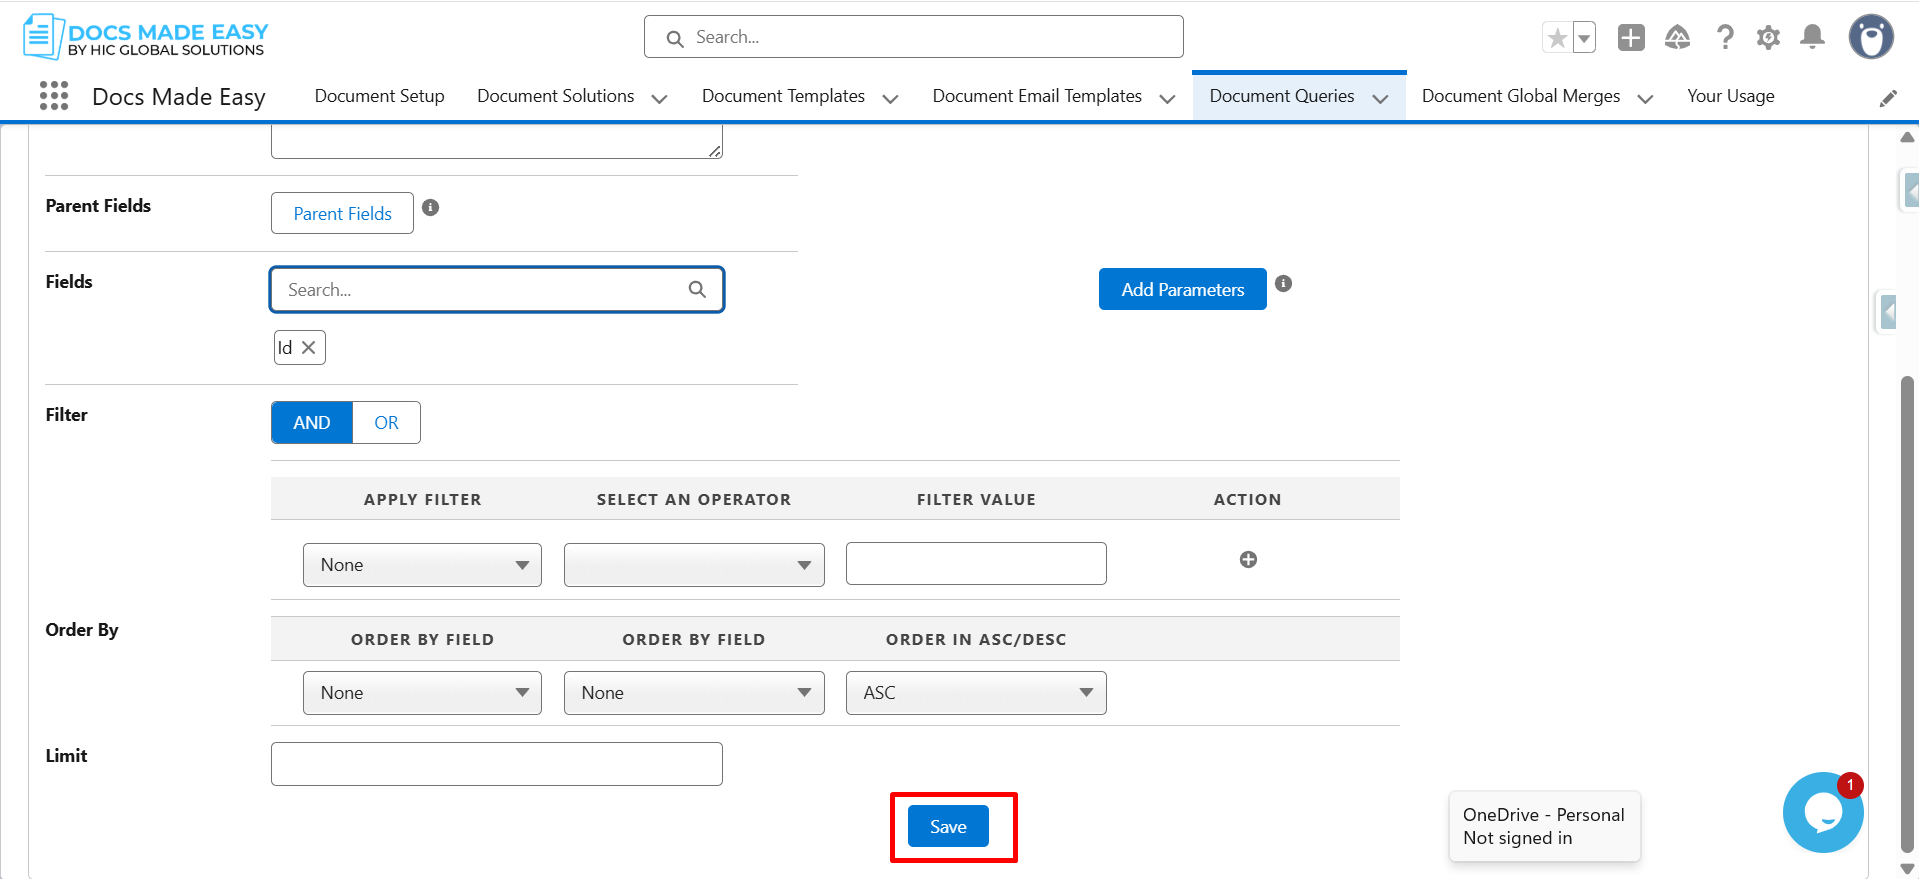
Step 6: Scroll down and click the Save button.
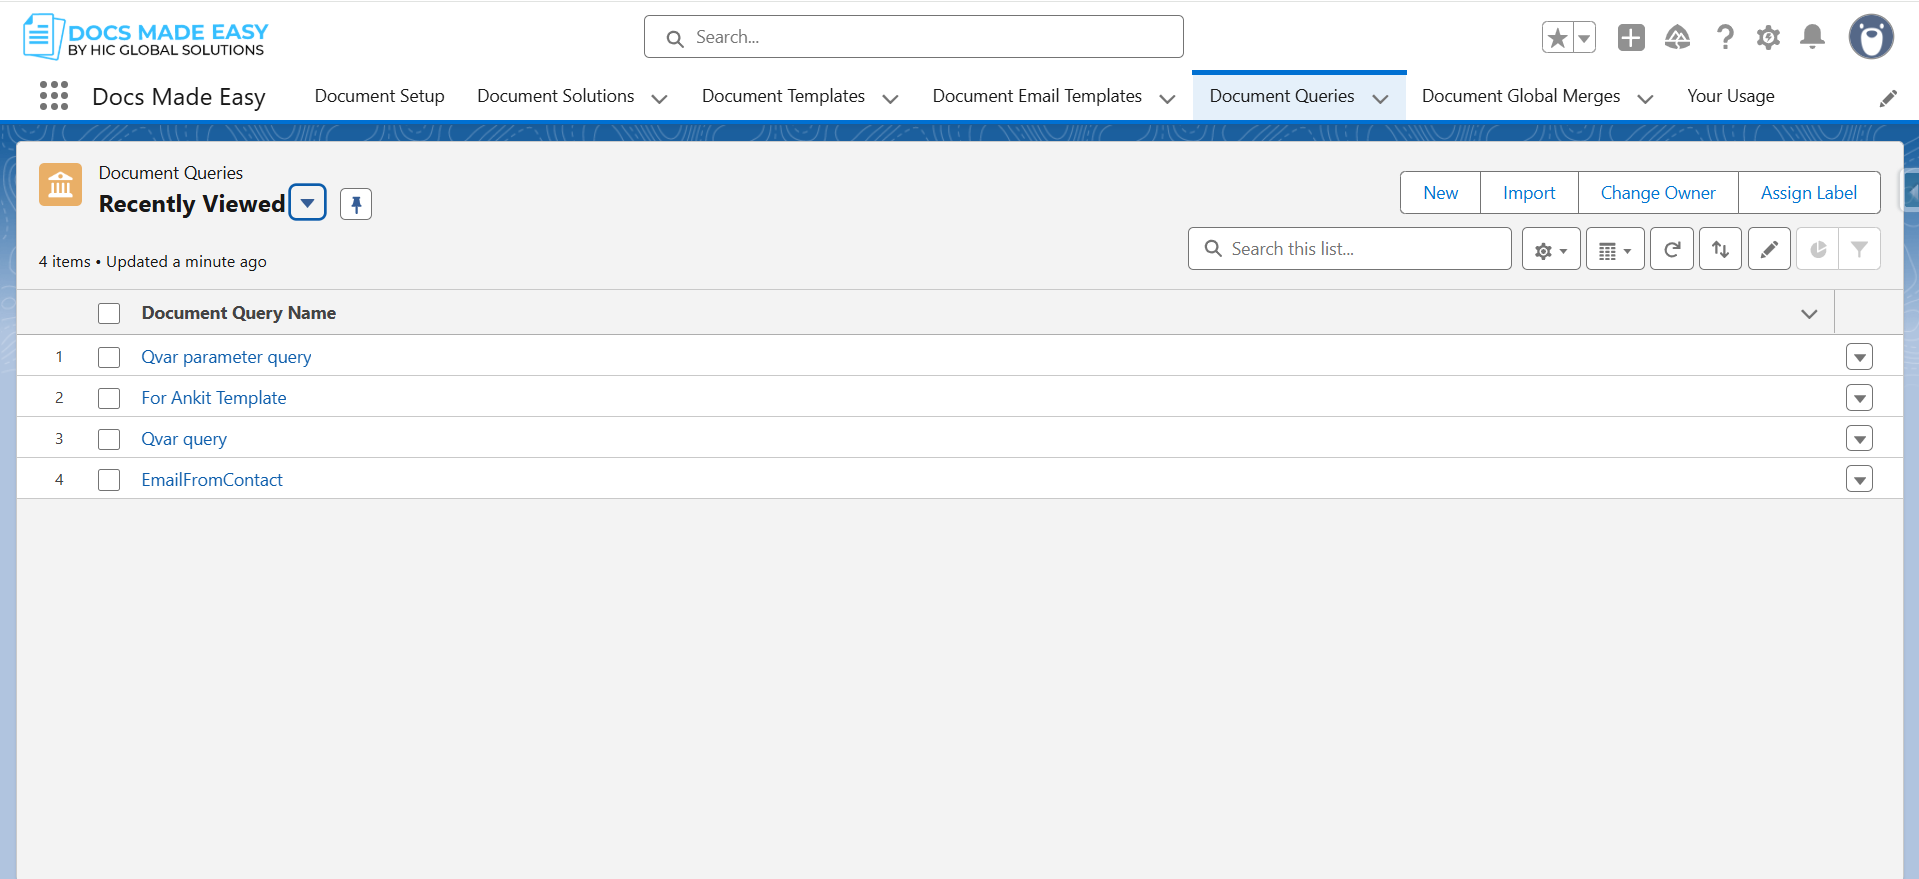
Step 7: Once created, the document query will appear in the Document Queries list.
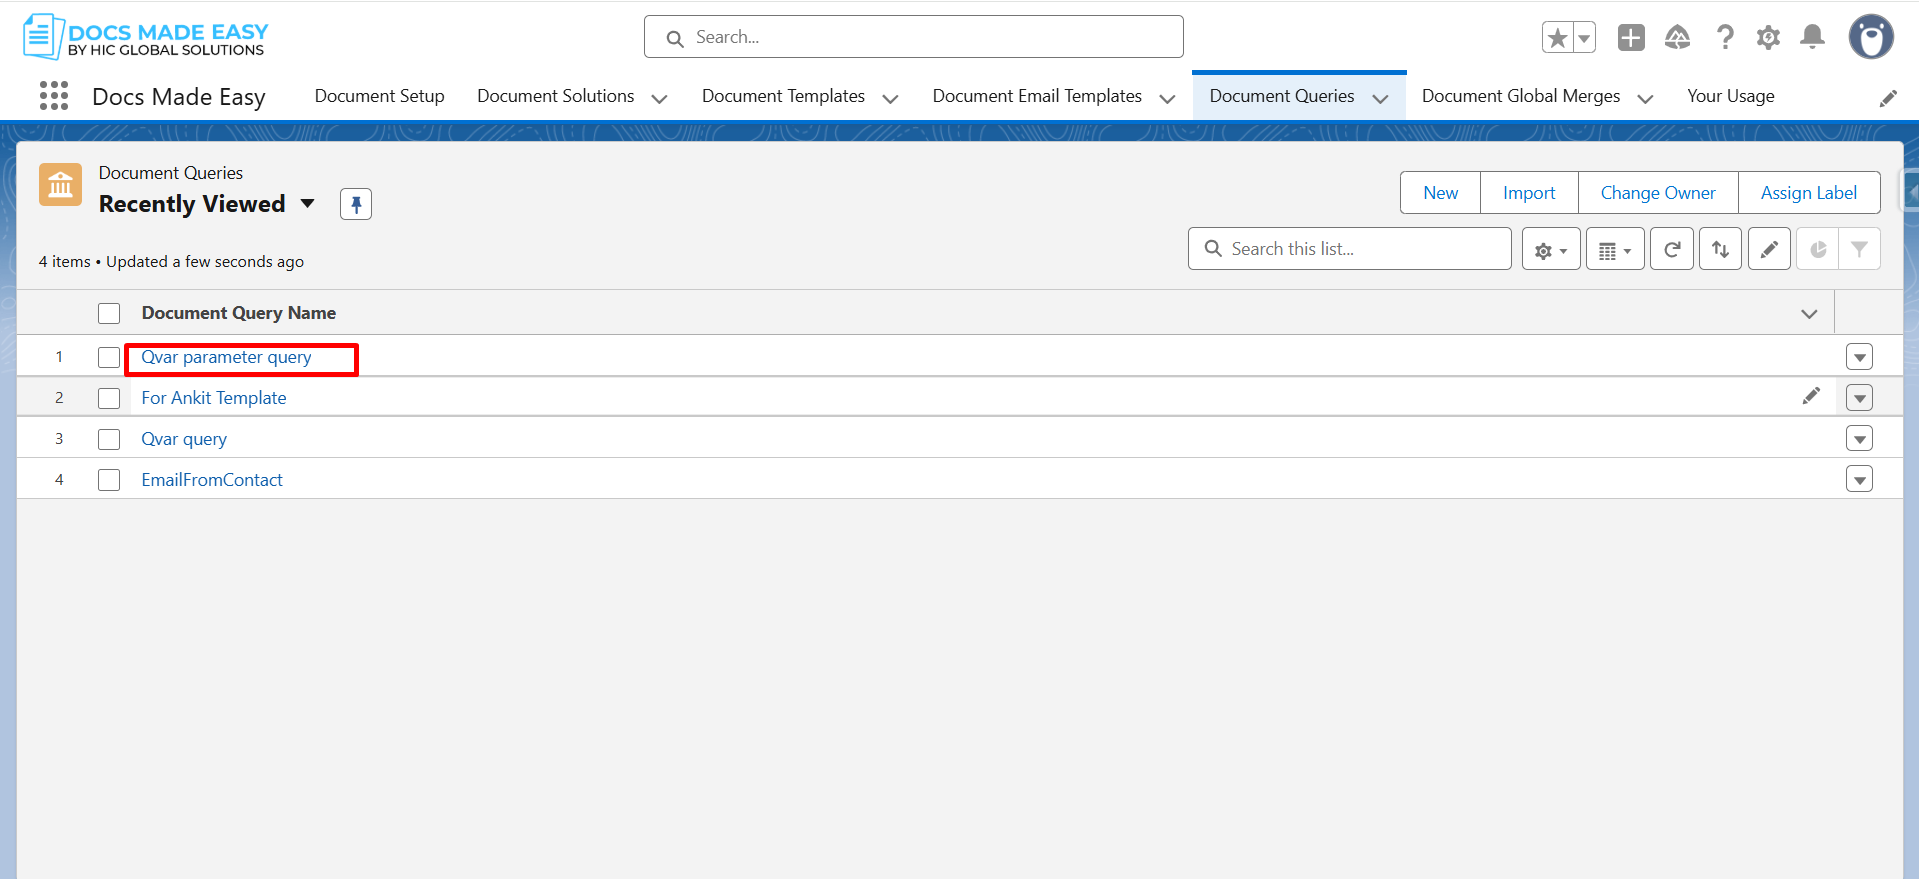
Step 8: Click on the document query to open it.
Step 9: Now, copy the Document Query ID.
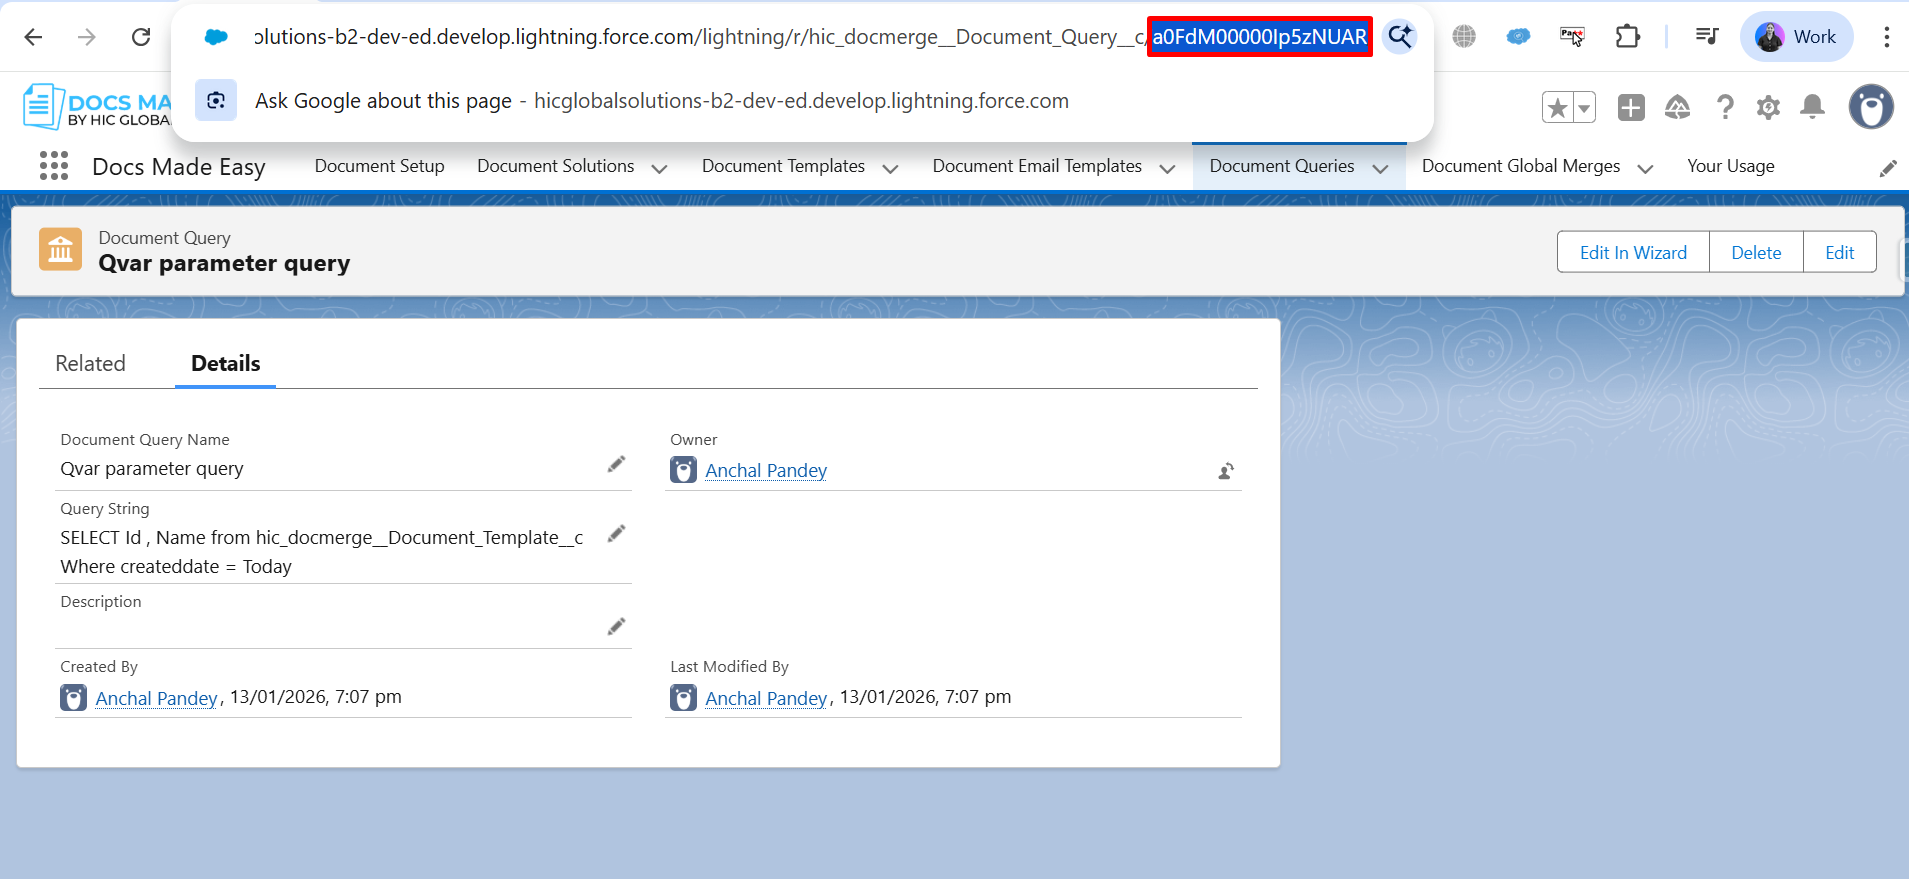
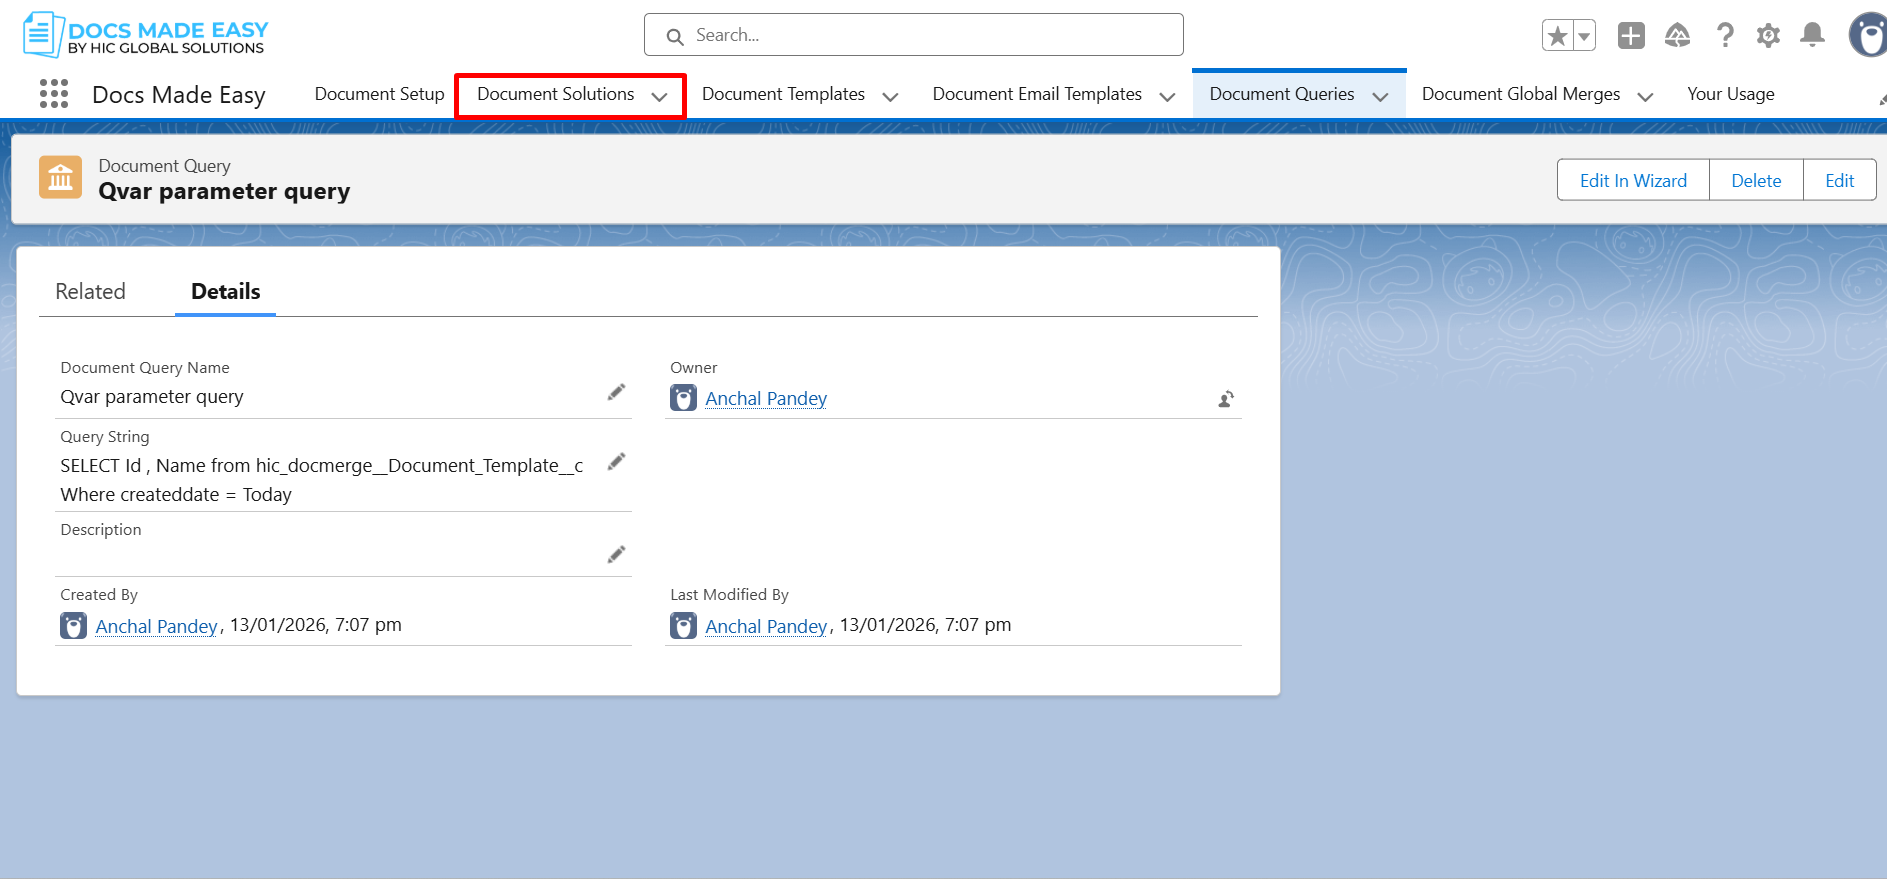
Step 10: Now go to the Document Solutions.
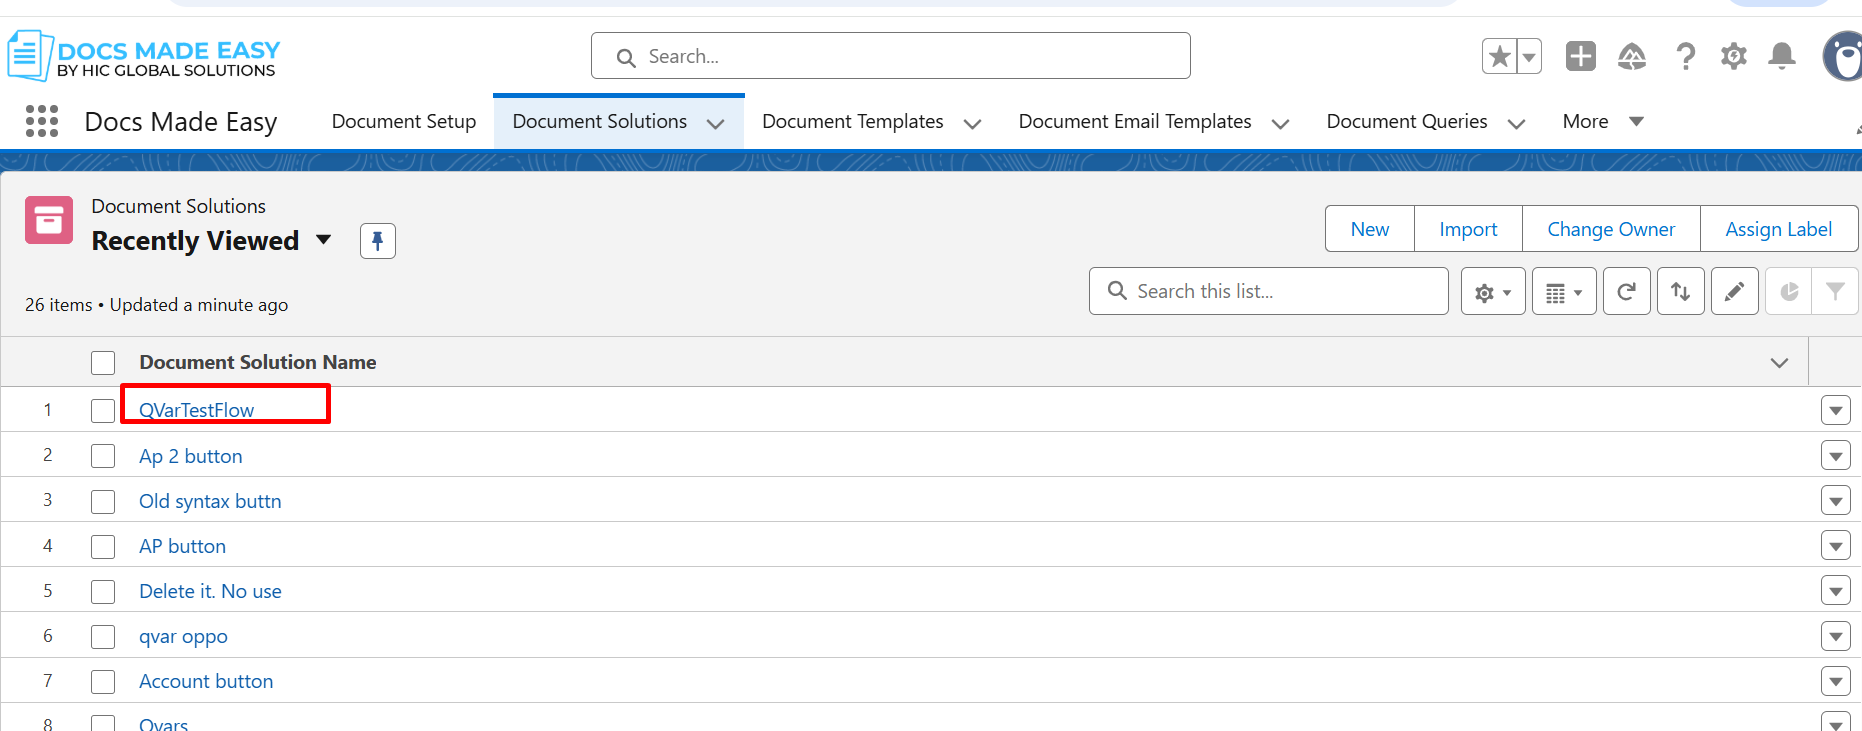
Step 11: Find the document solution you need and open it.
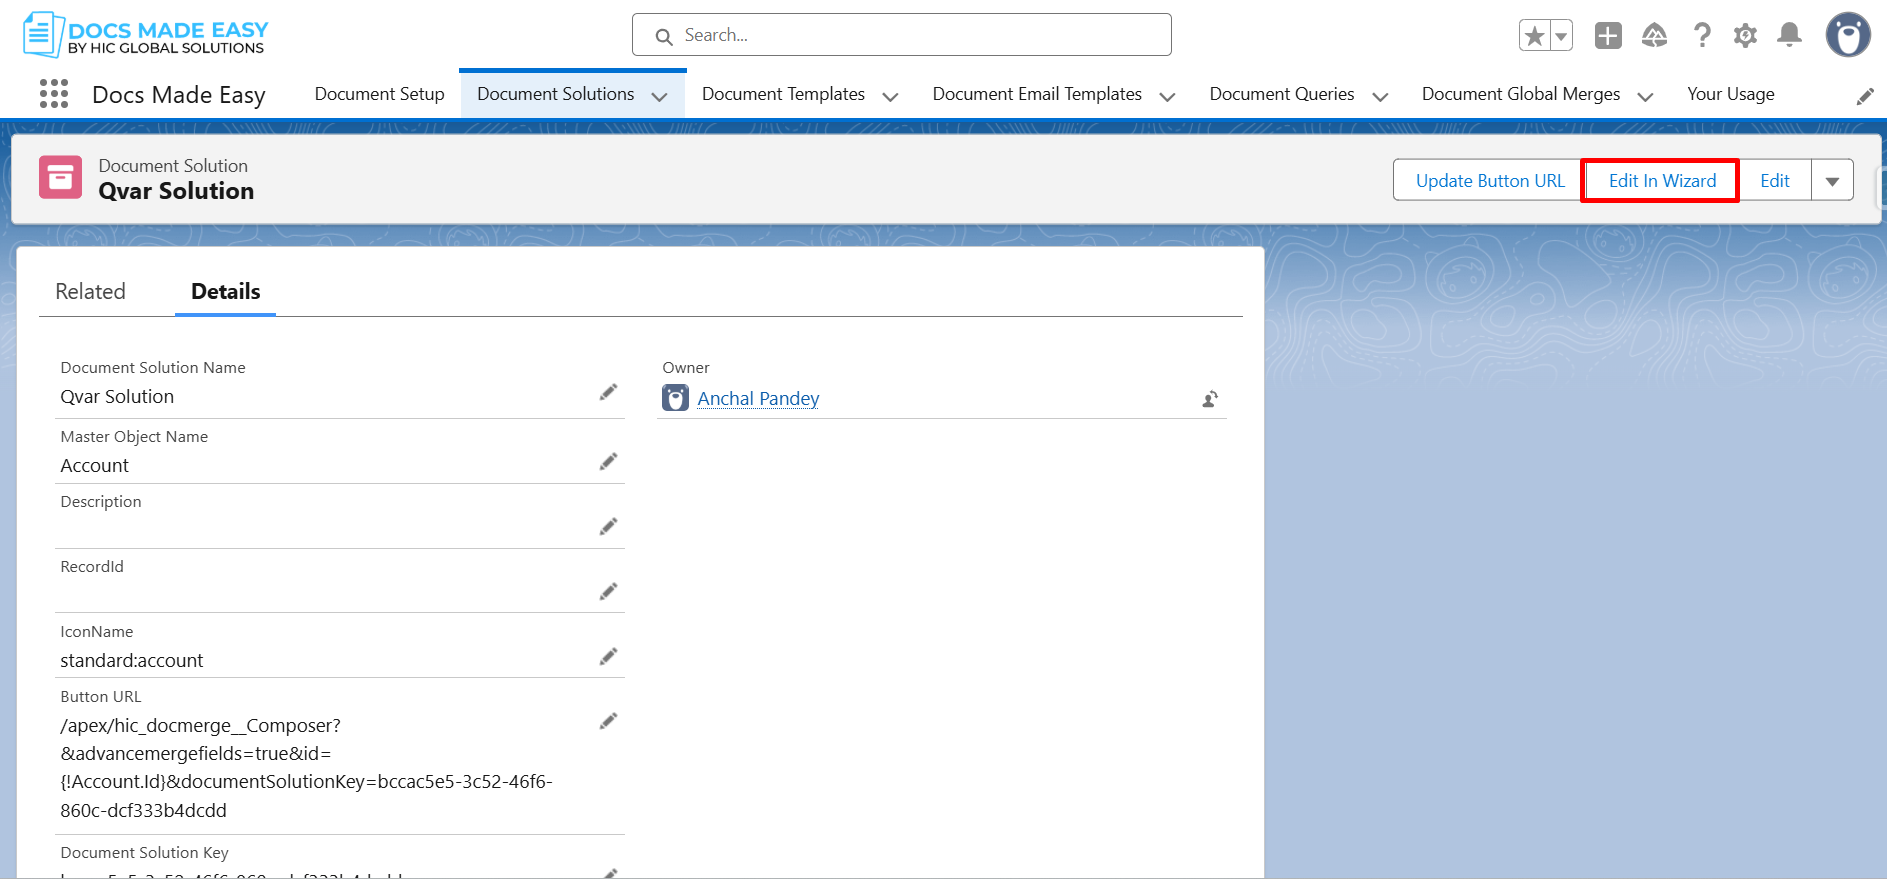
Step 12: Click on Edit in Wizard.
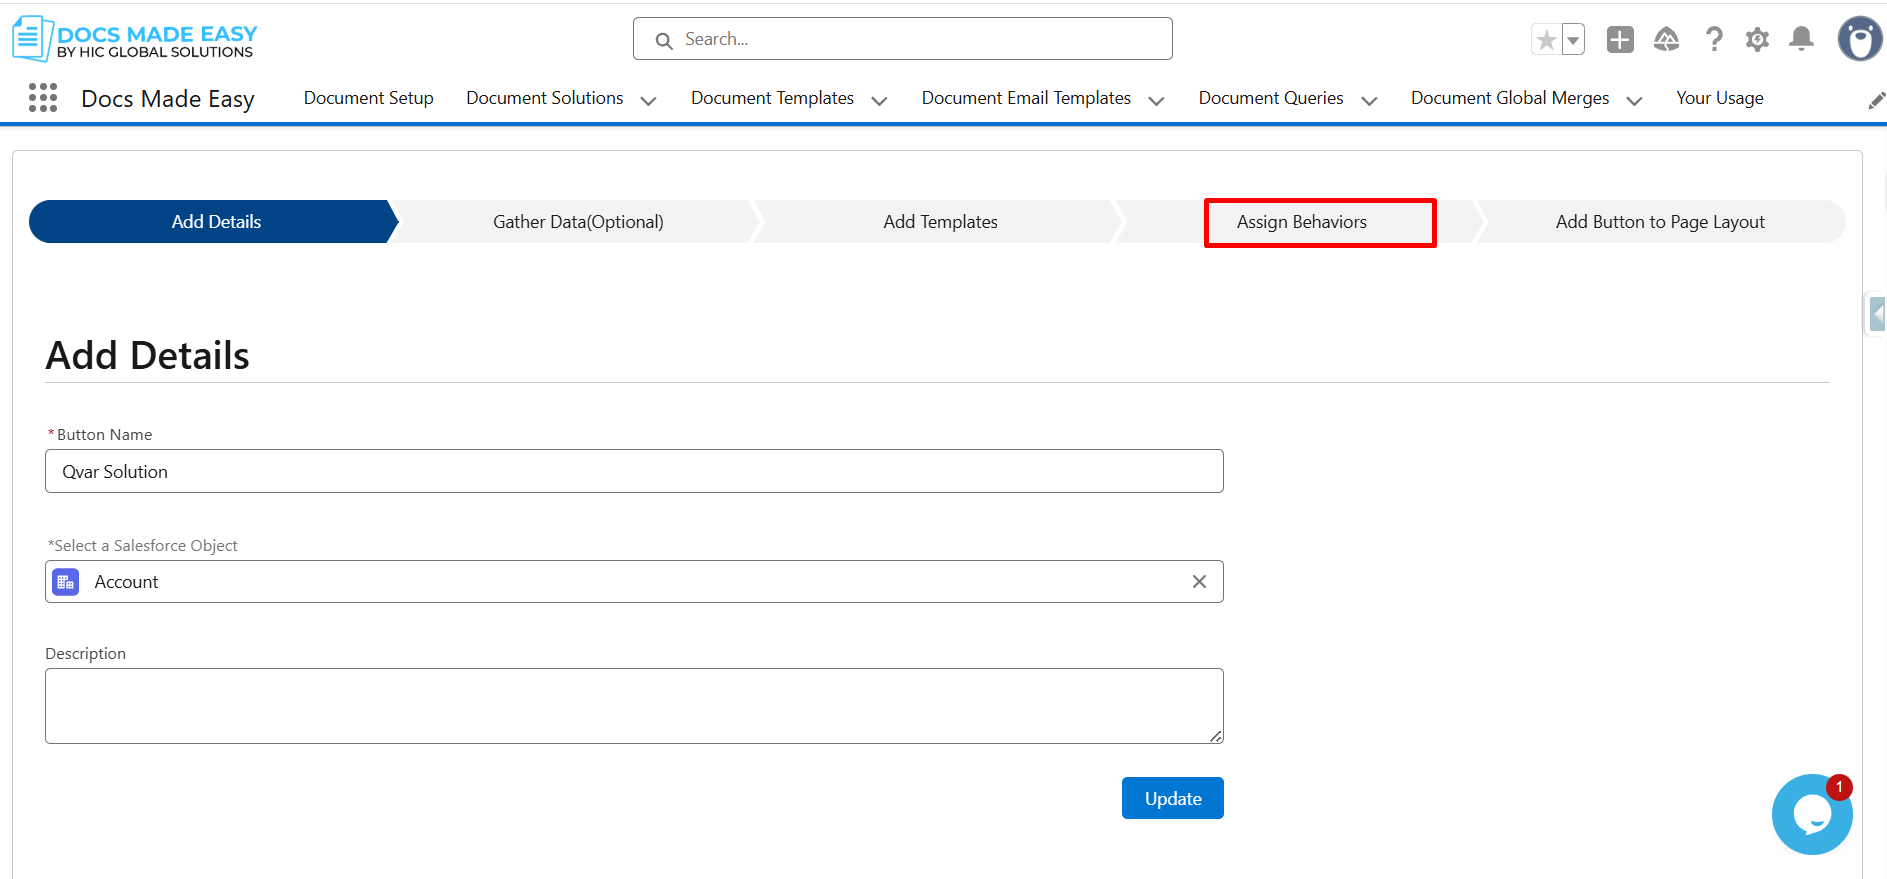
Step 13: Click on Assign Behaviors.
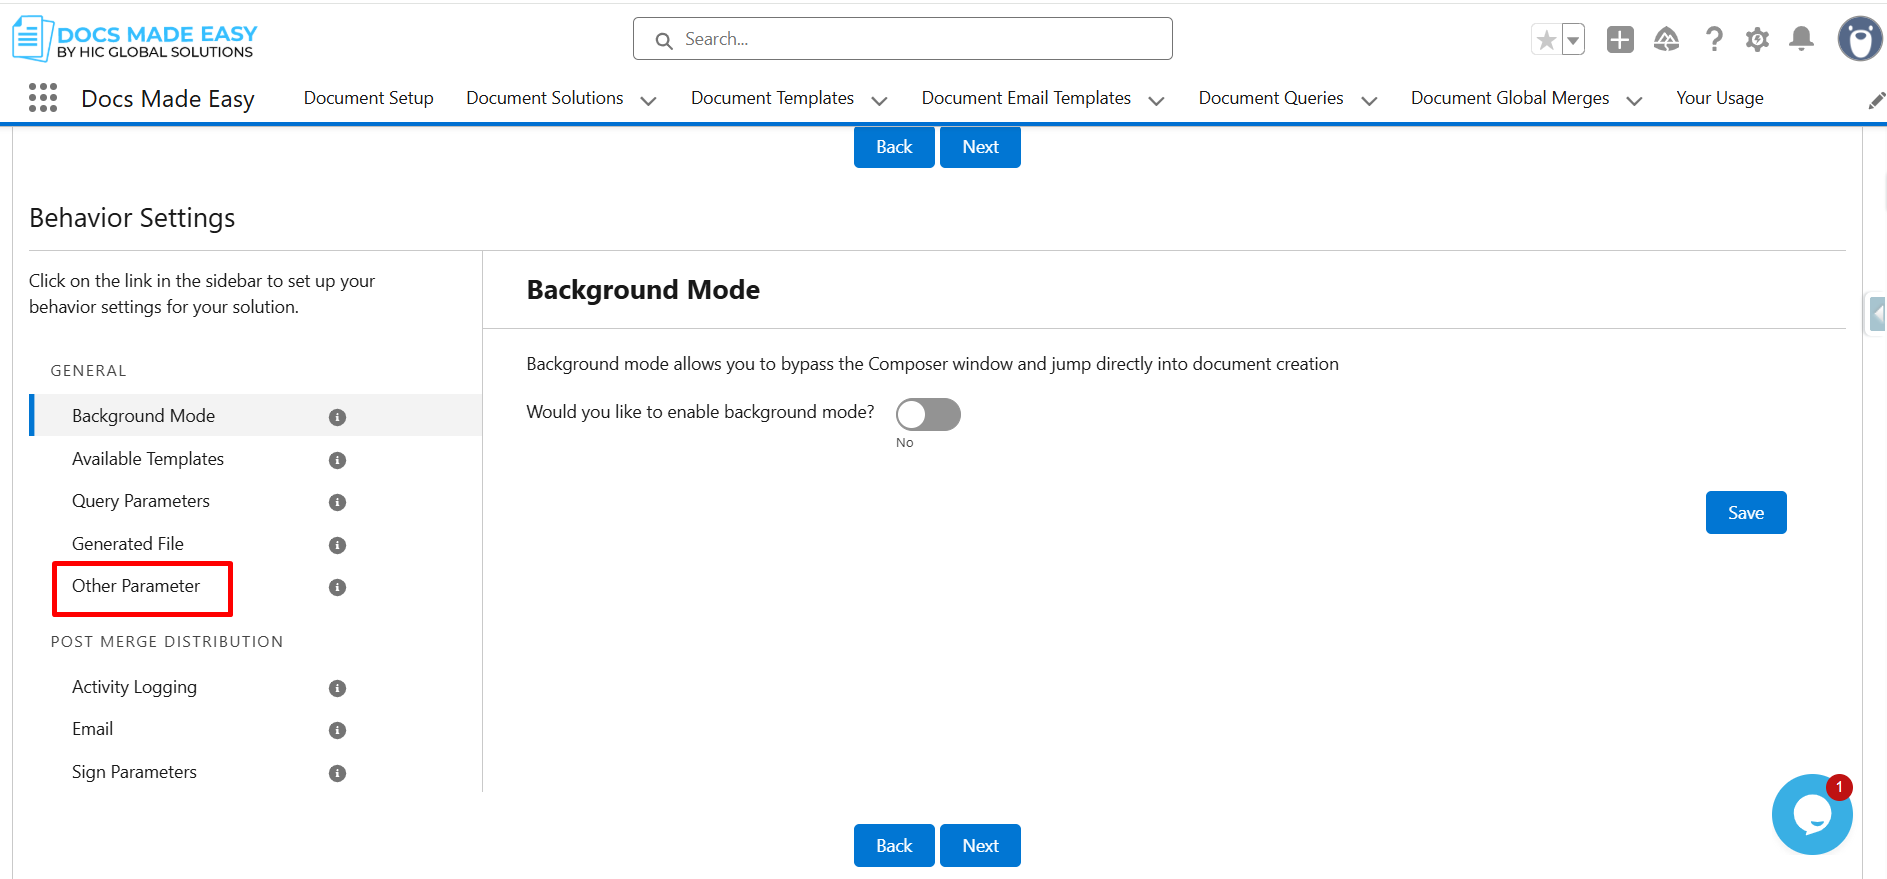
Step 14: Followed by, click on Other Parameters.
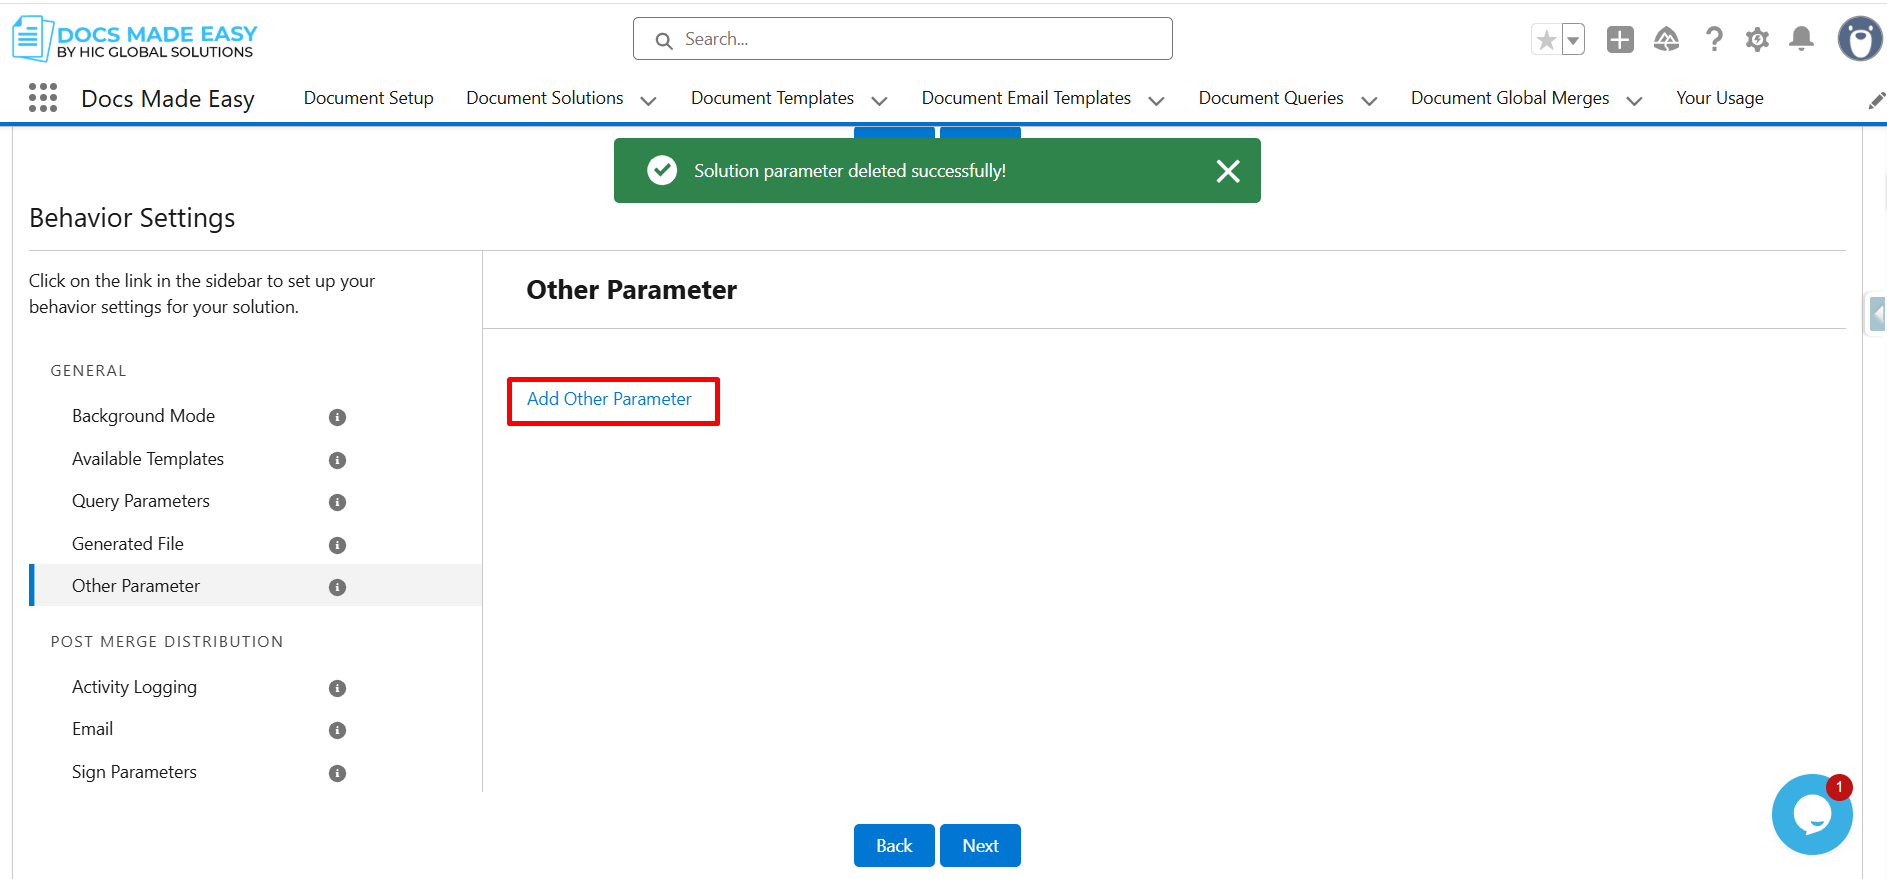
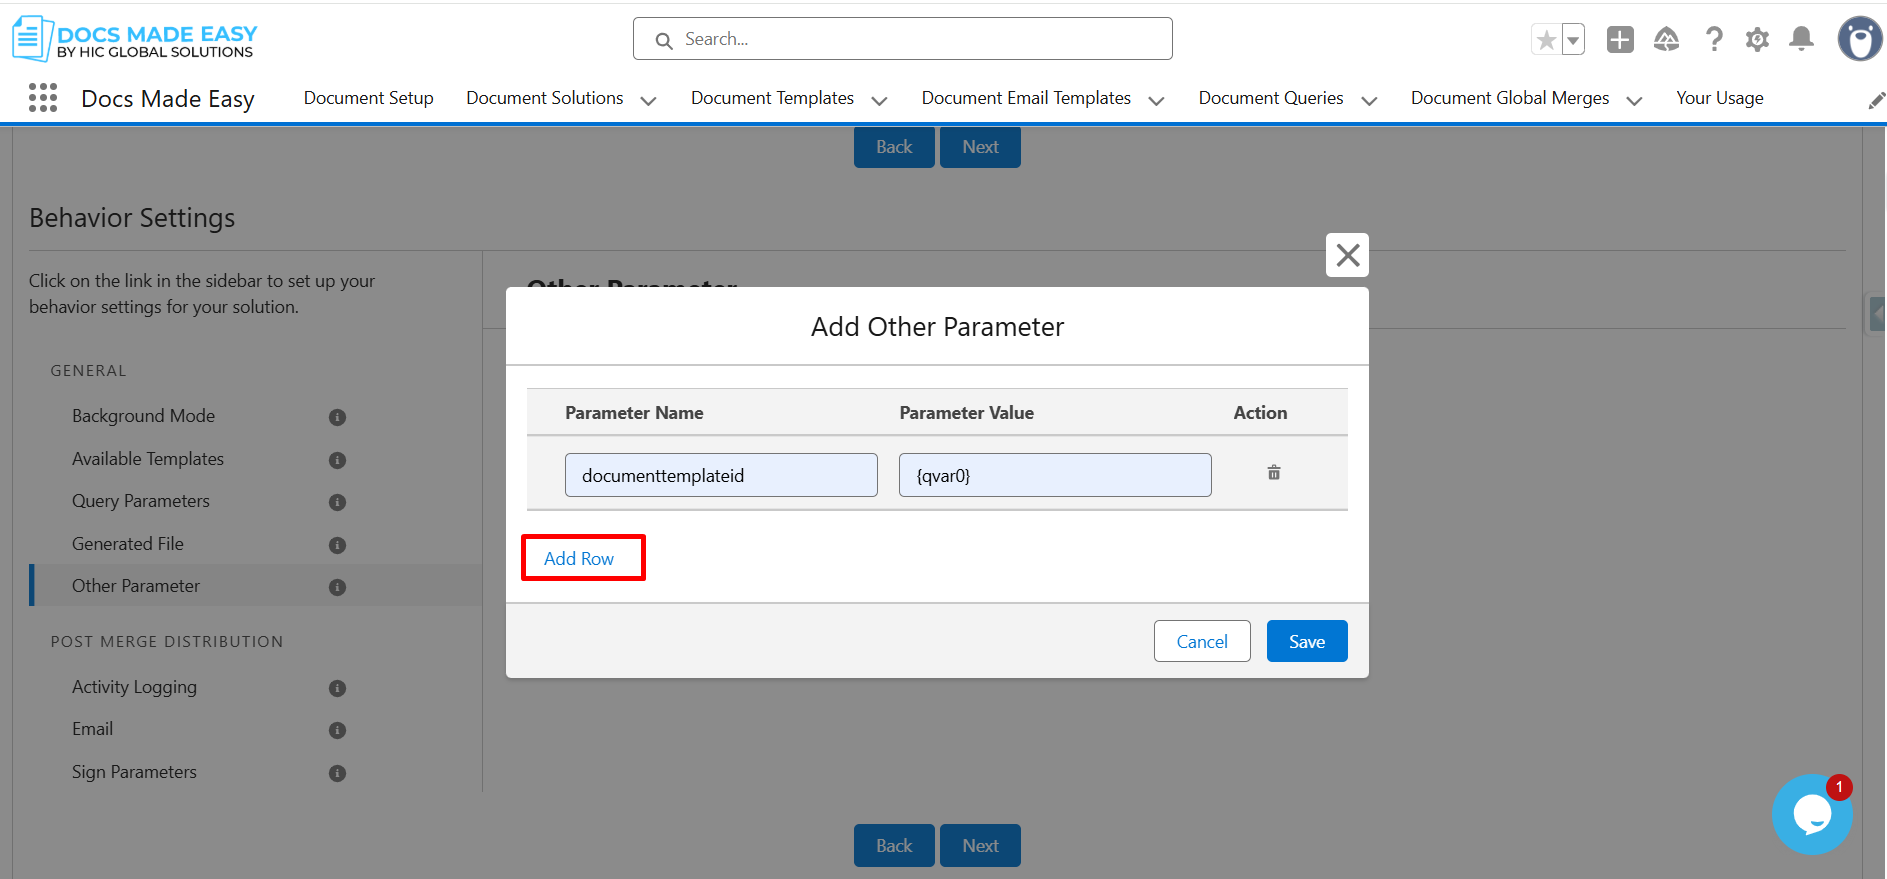
Step 15: Click on Add Other Parameters.
Step 16: Enter Parameter Details:
- Parameter Name: documenttemplateid
- Parameter Value: {qvar0}
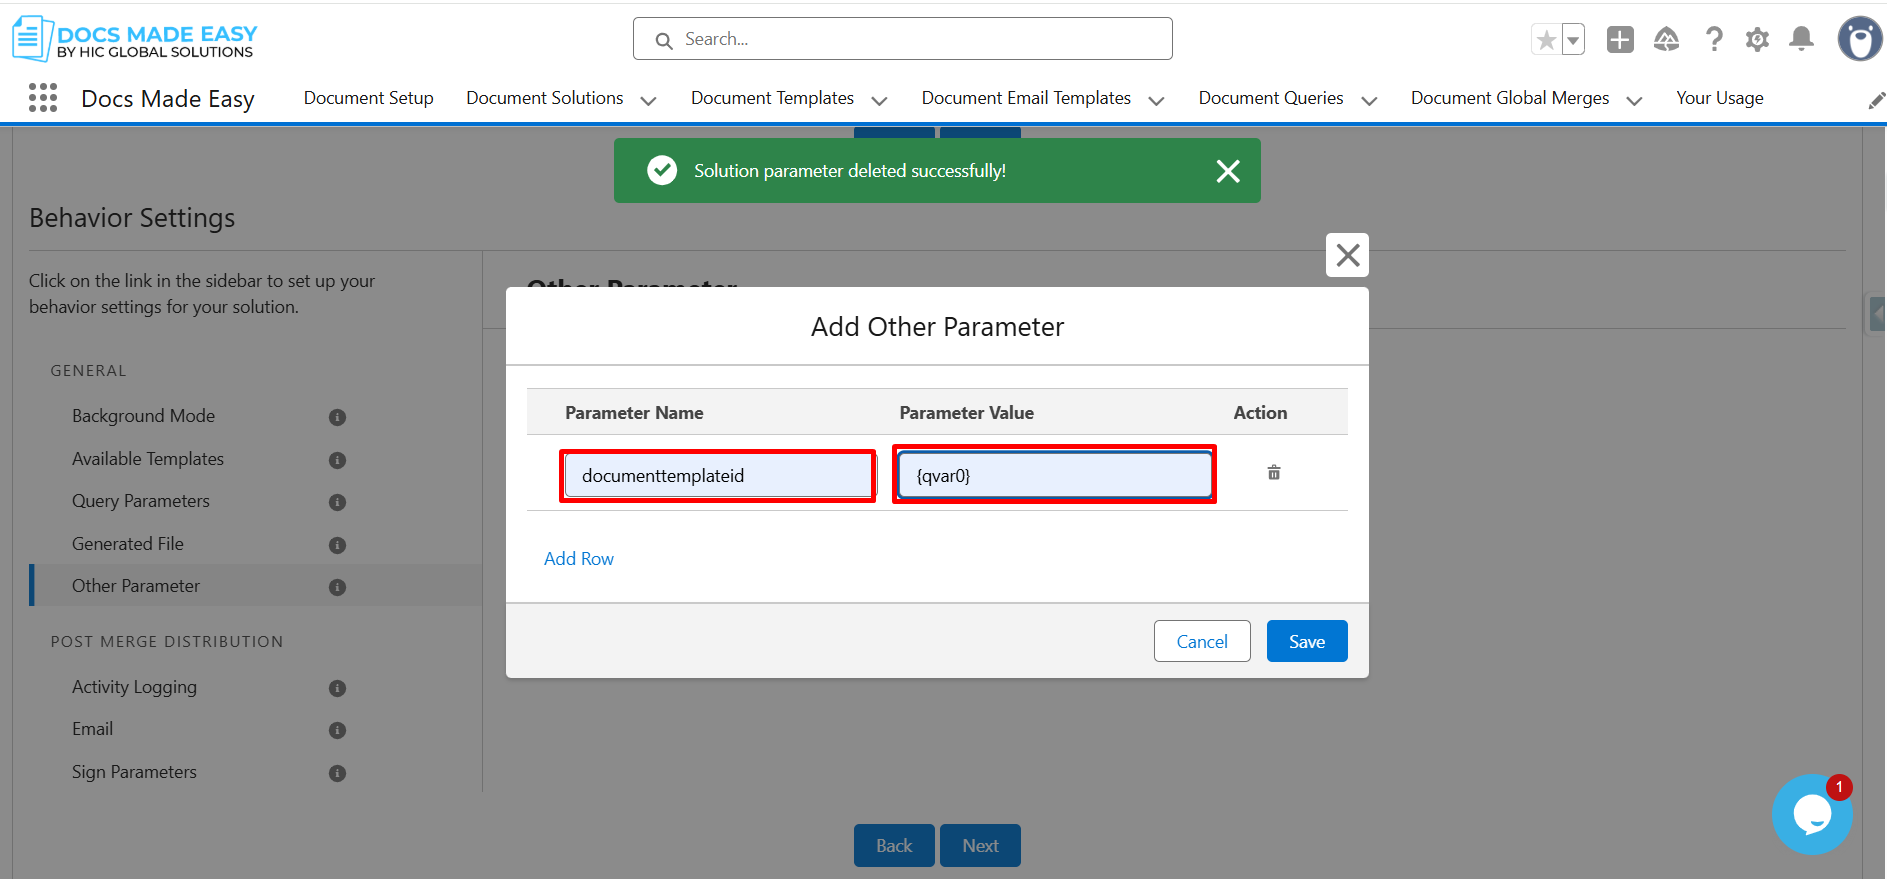
Step 17: Click on the “Add Row” link (it’s in blue text just under the first row).
A new blank row will appear with Parameter Name and Parameter Value fields.
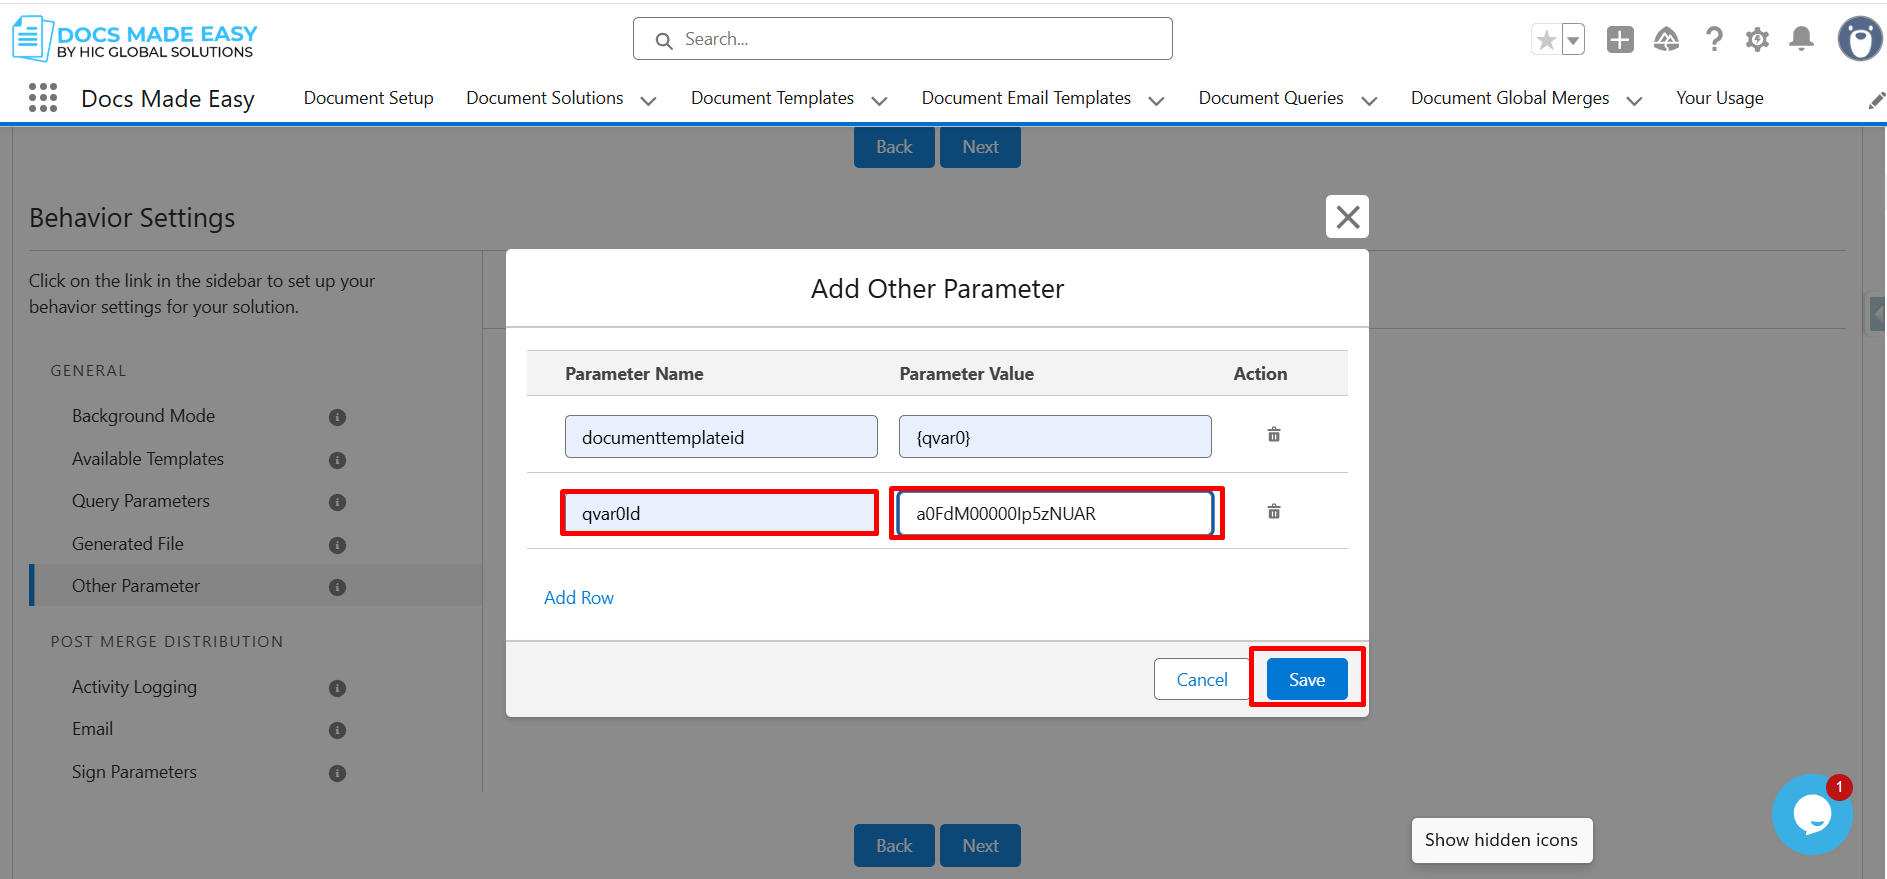
Step 18: Enter qvar0Id in the Parameter Name field.
In the Parameter Value field, enter the Document Query ID. Then, click on Save.
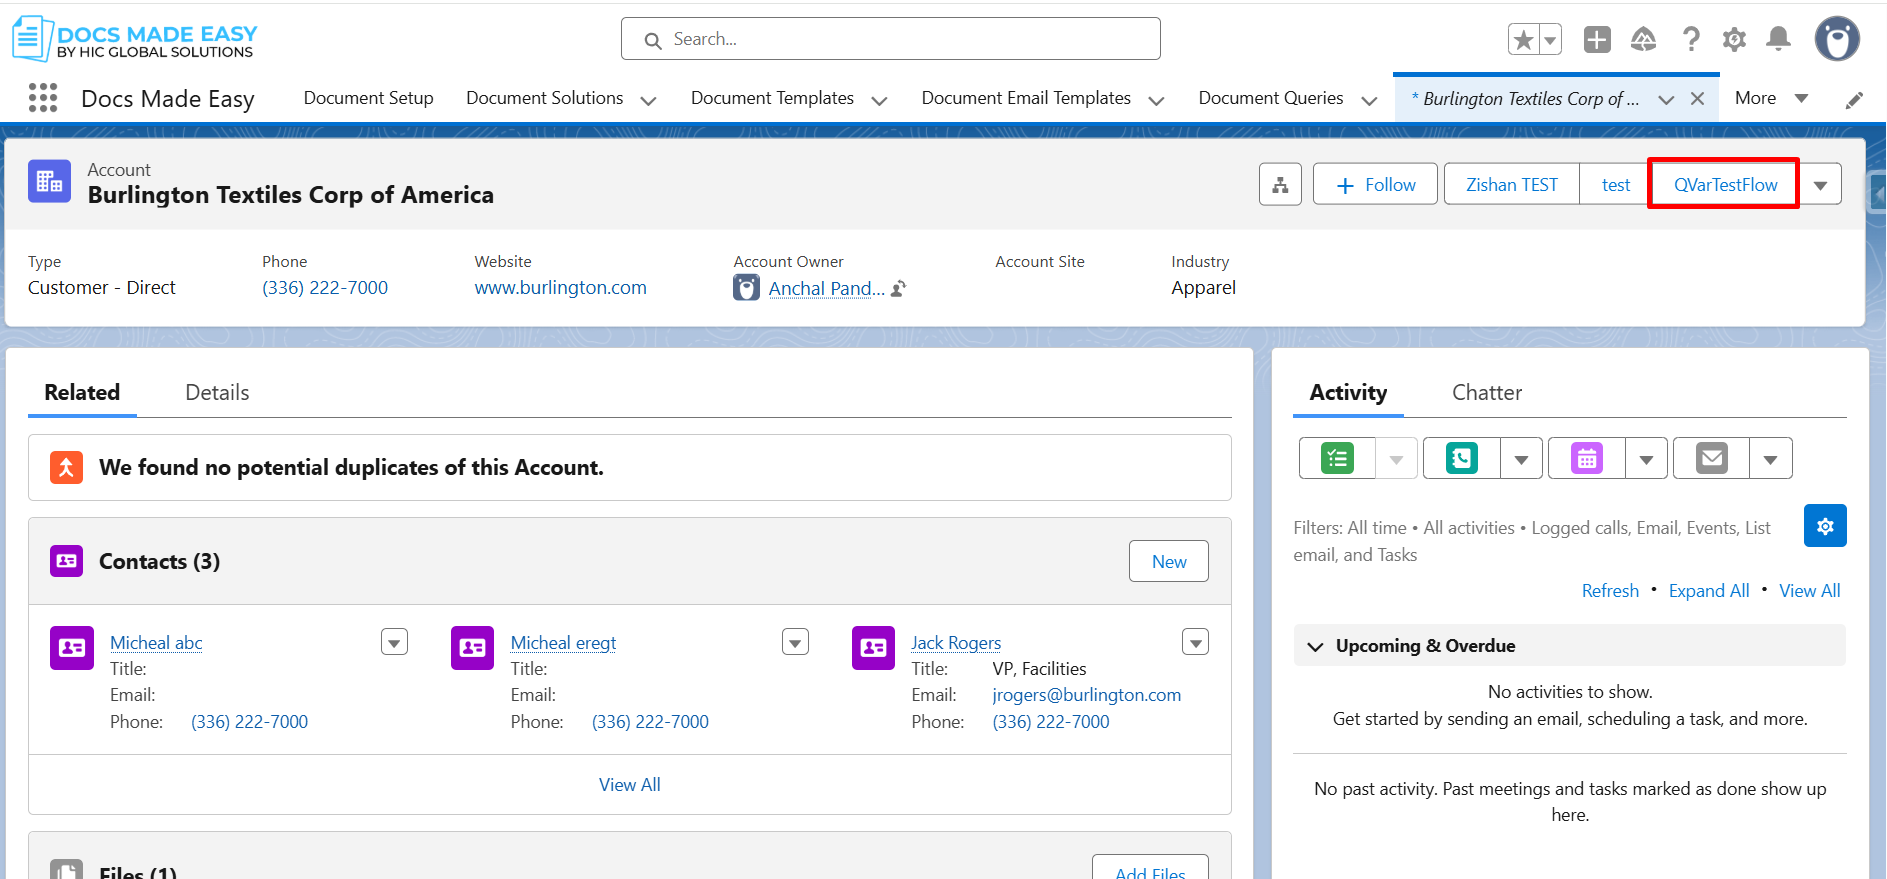
Step 19: Navigate to the object on which the solution is created and click on the created button.
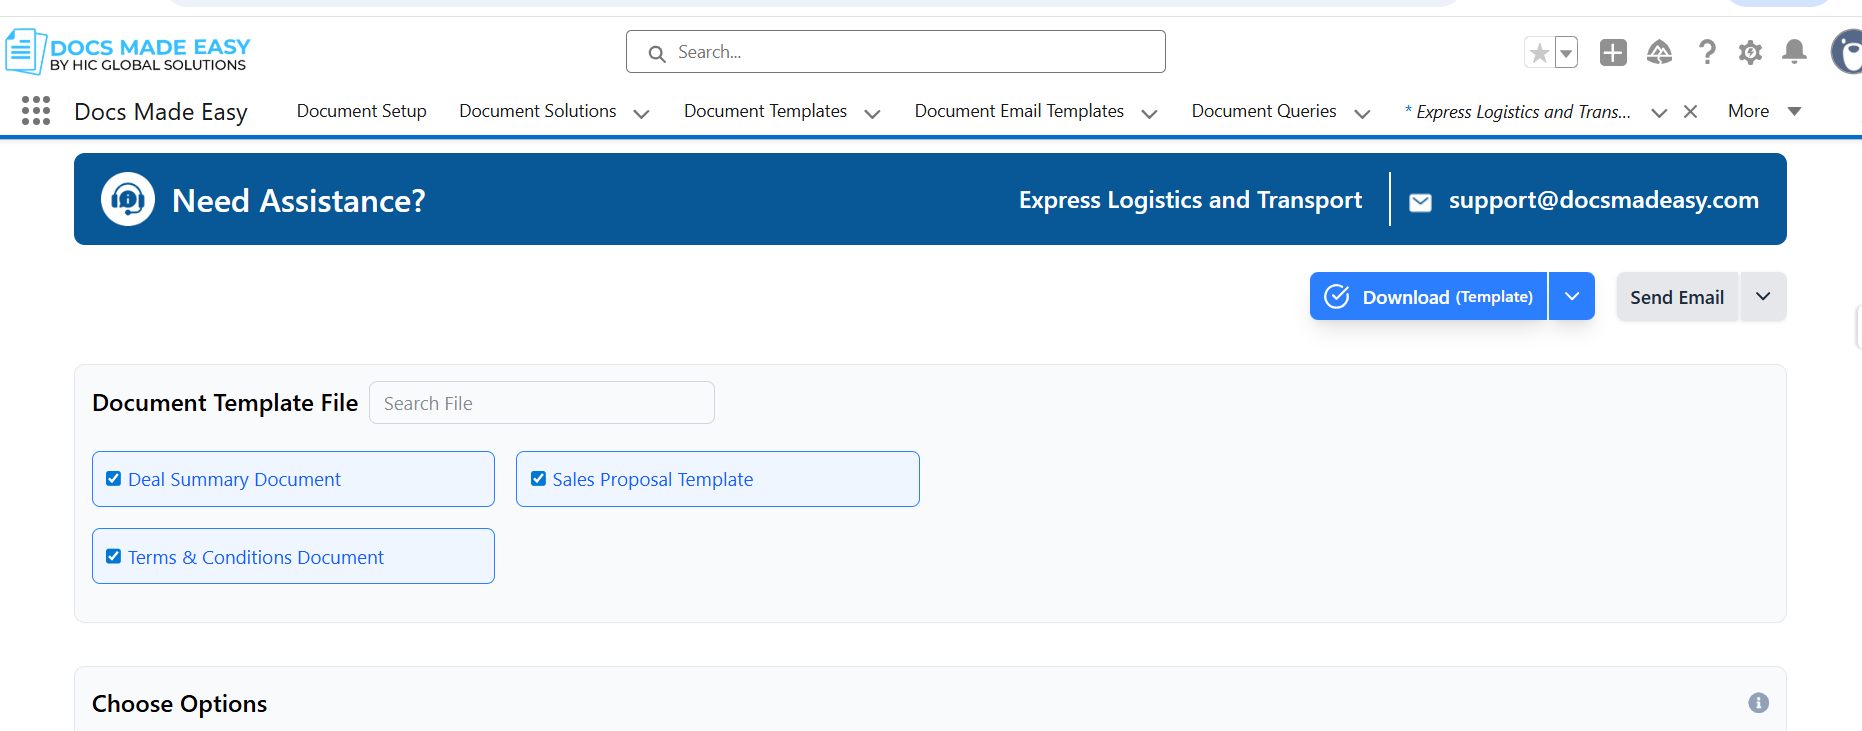
Step 20: All available document templates that meet the query will be displayed under Document Template File.
Conclusion
These are the steps to configure the QVar parameter for dynamic document generation in your solution. Once set up properly, your document templates will automatically appear based on the query you created, making the entire process more efficient and structured.
This setup also supports better Salesforce workflow automation, as the right templates are displayed without manual selection every time. If you follow the steps carefully, the configuration is simple and works smoothly.
We hope this guide has helped you understand the process clearly. If you still have any doubts, feel free to reach out to the support team for further assistance.
Frequently Asked Questions
Related Blogs
How to Generate & Send Documents for eSign in Salesforce
Sending a document for signature directly from Salesforce can make the approval process much easier, especially when you want to…
How to Generate Salesforce Documents Using Quick Document Merge
Creating Salesforce documents does not have to involve multiple steps or moving between different tools. With Quick Document Merge, you…
How to Create a Scope of Work (SOW) in Salesforce with Docs Made Easy
Creating a Scope of Work manually can take time, especially when information needs to be collected from Salesforce and added…