How to Send Standard Salesforce Emails Using Docs Made Easy
Category :
Document Generation

Docs shouldn’t be complicated.
With Docs Made Easy, creating professional, Salesforce-powered documents is just a few clicks away.
Get Started NowThis blog outlines how to configure standard Salesforce email functionality using Docs Made Easy, enabling users to send emails directly from Salesforce records. It details a step-by-step process, starting from logging into Salesforce to checking the email output after sending. Users will learn to set up email details, connect templates, and manage communication efficiently without switching tools, streamlining their workflow and enhancing productivity.
Sending emails directly from Salesforce can make everyday communication easier, especially when users need to share documents with customers or contacts. Instead of switching between different tools, teams can manage the process from their Salesforce records.
Docs Made Easy provides an option to configure standard Salesforce email functionality with a document button. Users can set up the email details, connect an existing email template, and send messages directly from a record.
In this blog, we will walk through the steps to configure and use the standard Salesforce email option with Docs Made Easy.
Steps to Send Standard Salesforce Emails
Here are the steps to configure the standard Salesforce email button using Docs Made Easy and send emails directly from a Salesforce record.
Step 1: Log in to Salesforce
- Log in to your Salesforce account using your credentials.
Step 2: Open Docs Made Easy
- Open the App Launcher in Salesforce, search for Docs Made Easy, and launch the application.
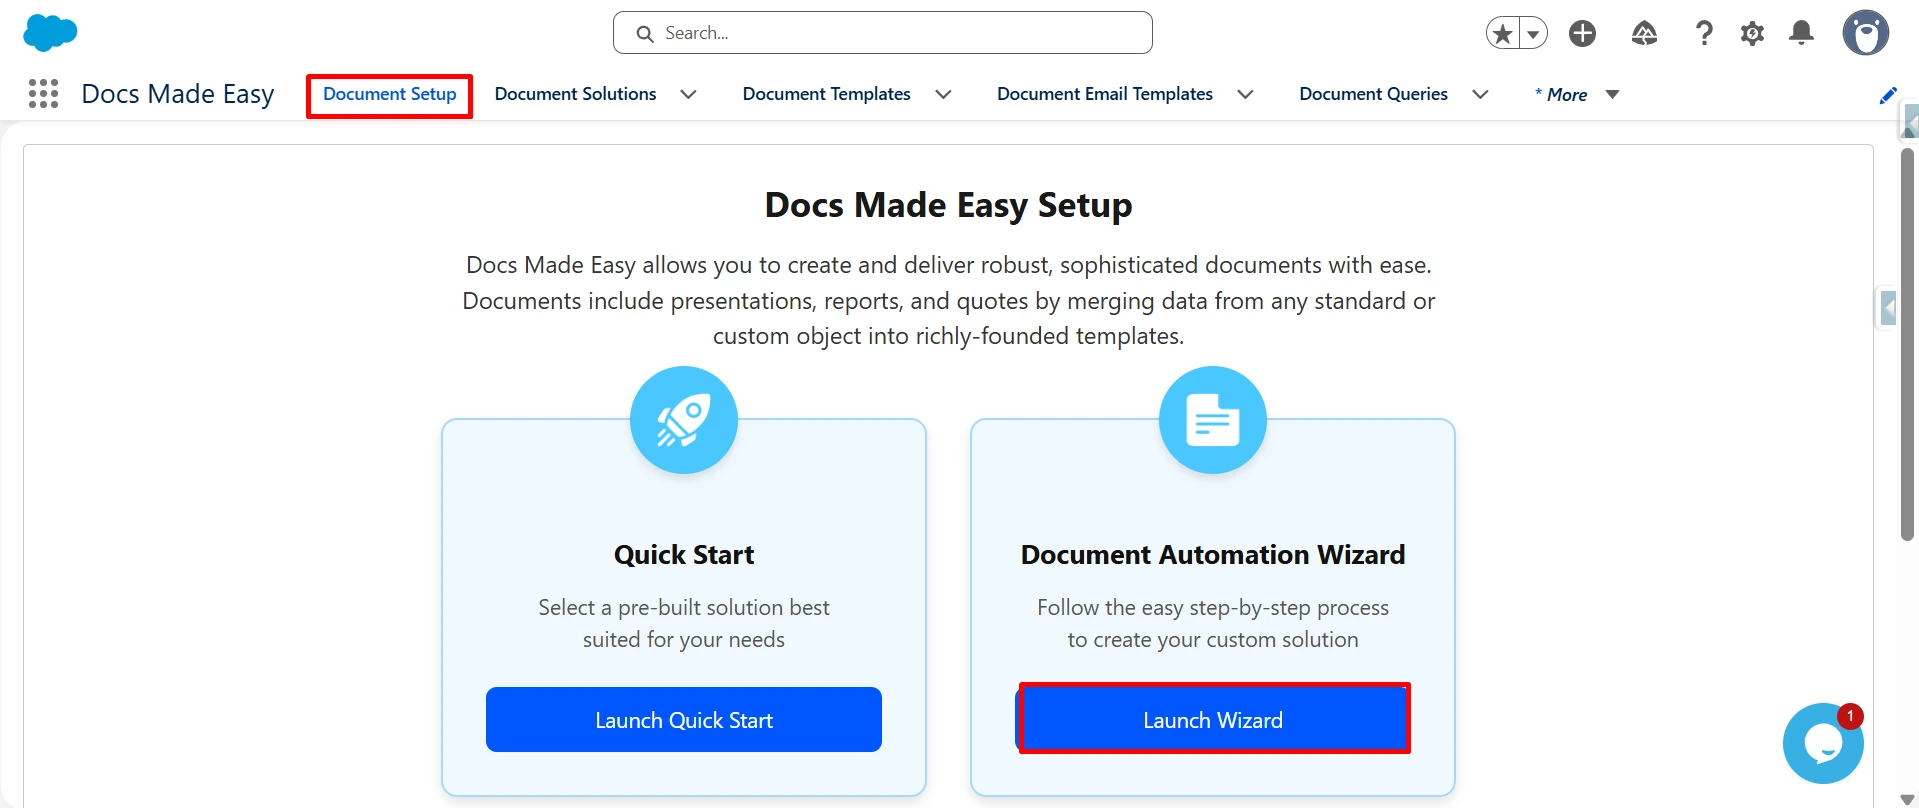
Step 3: Open Document Setup
- Navigate to Document Setup and click the Launch Wizard button to start configuring the button.
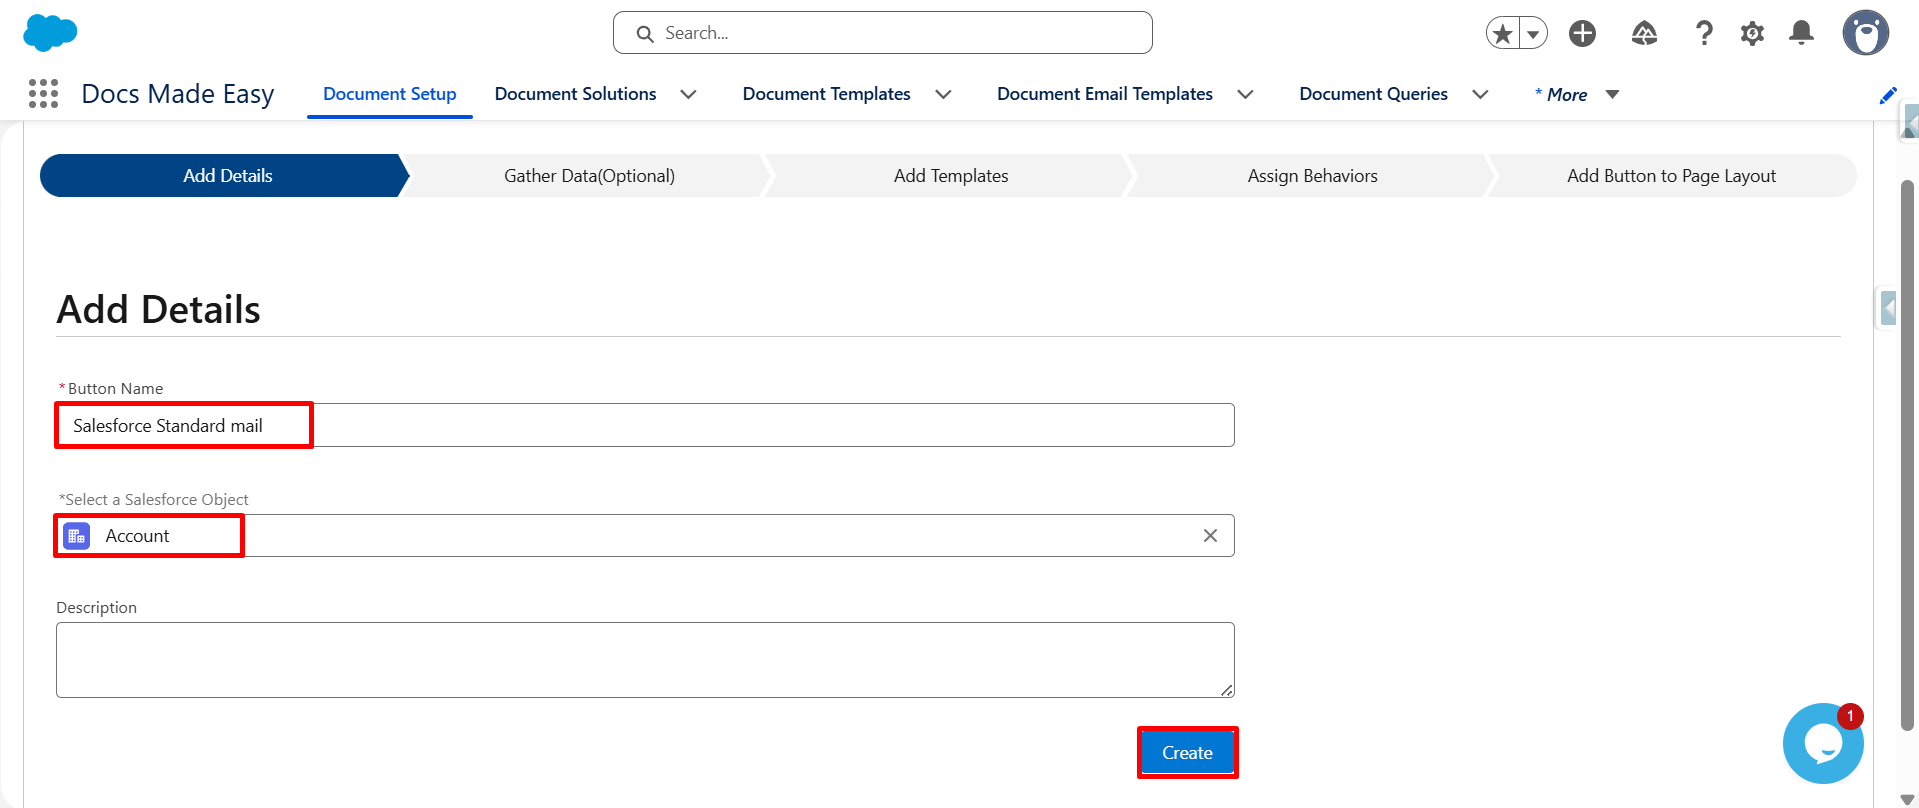
Step 4: Enter Button Details
- Enter the required Button Name and select the Salesforce object where you want to use the button.
- Once the details are added, click Create.
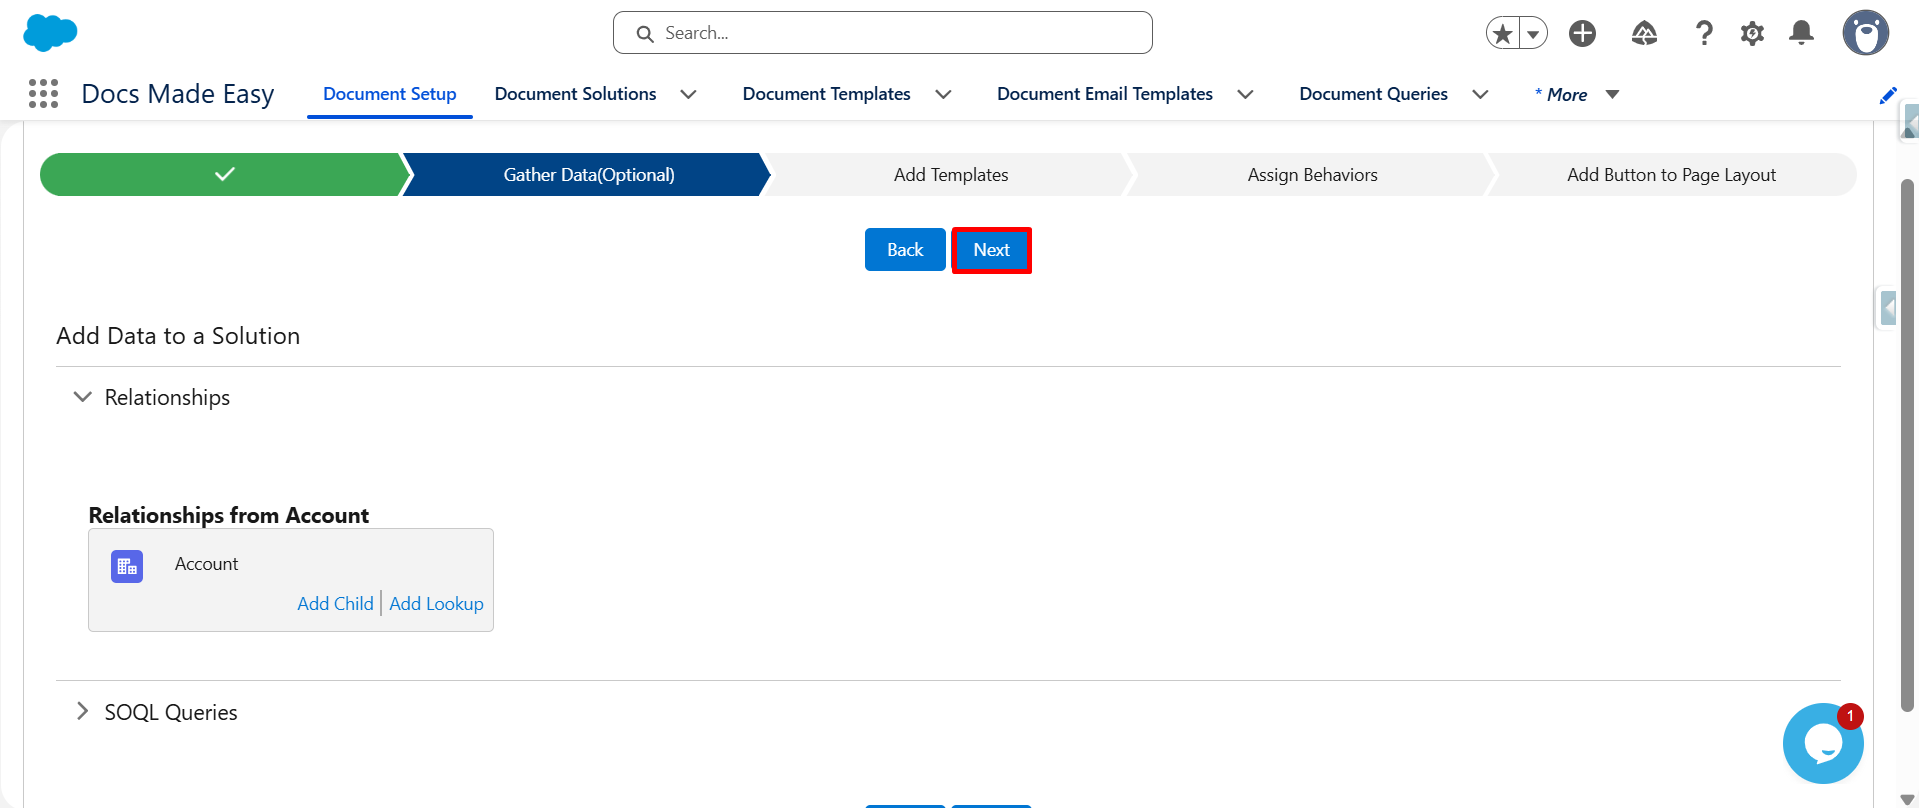
Step 5: Continue to the Next Screen
- Click Next to proceed with the button configuration.
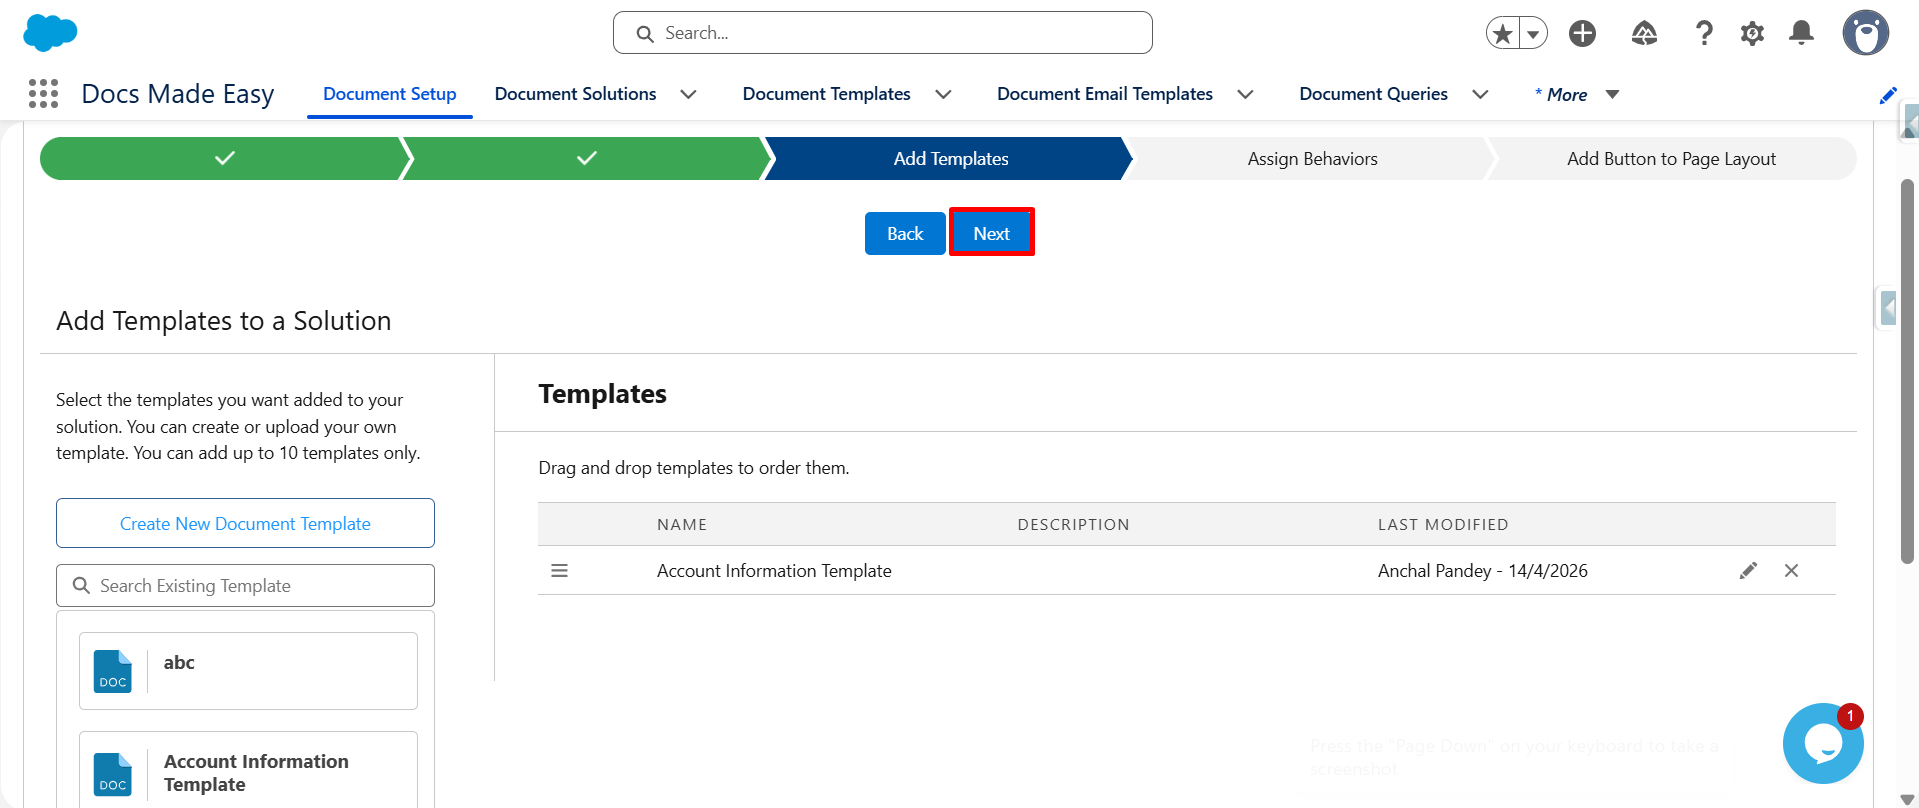
Step 6: Add a Template
- Add the required Salesforce document template to the setup.
- Once the template is selected, click Next.
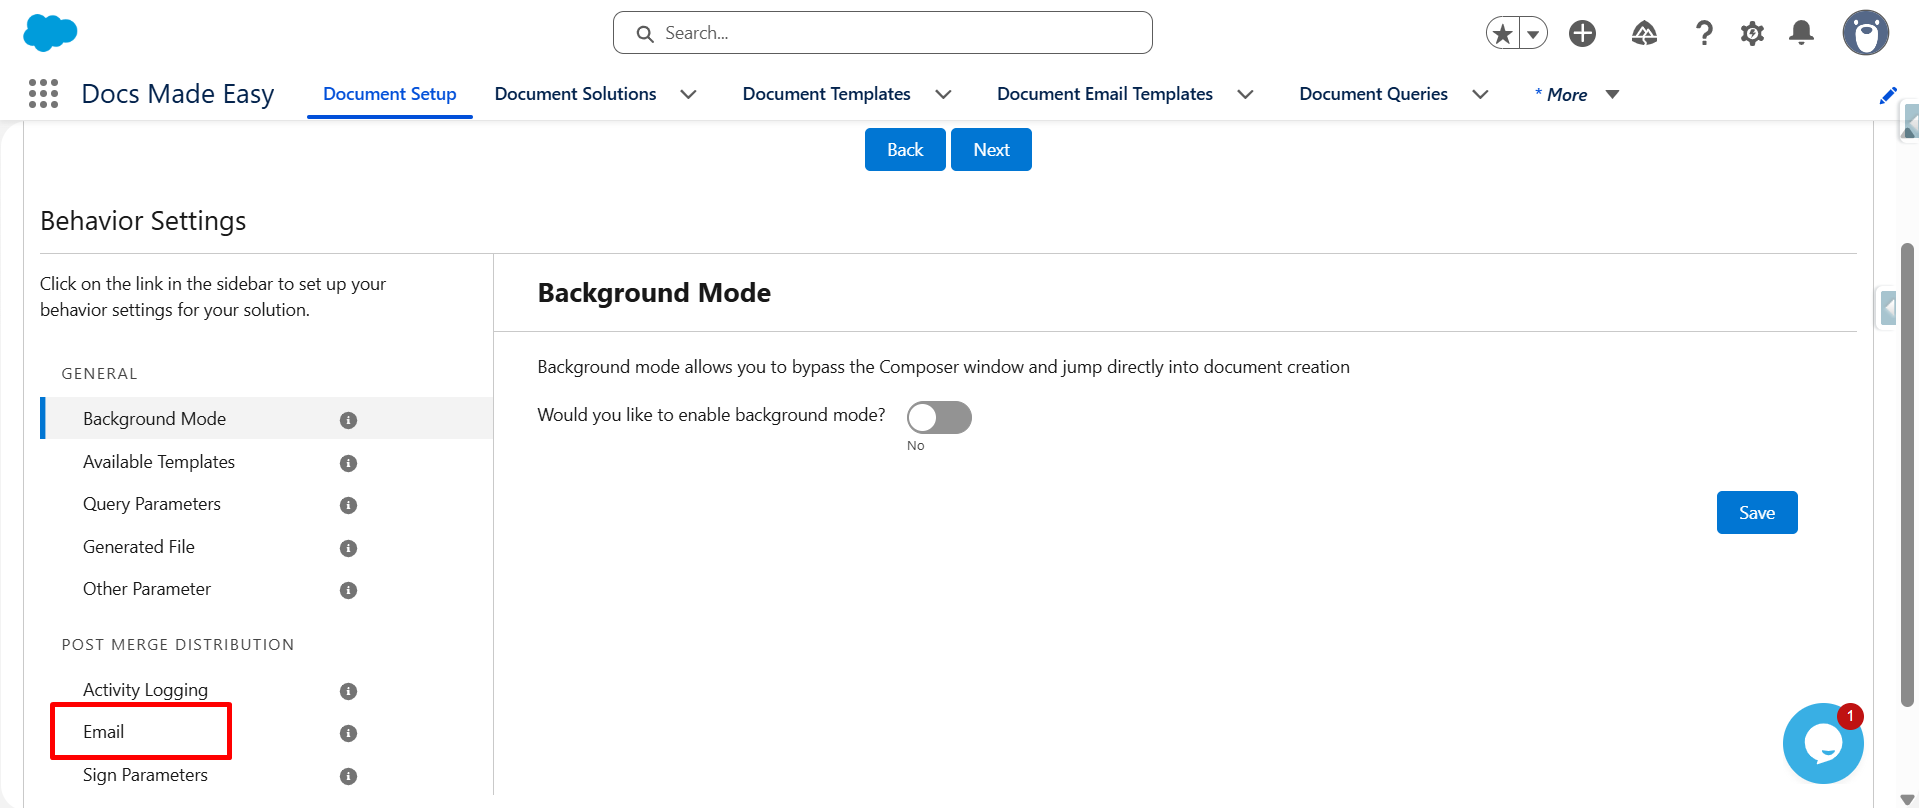
Step 7: Select Email
From the available options, click Email to configure the email settings.
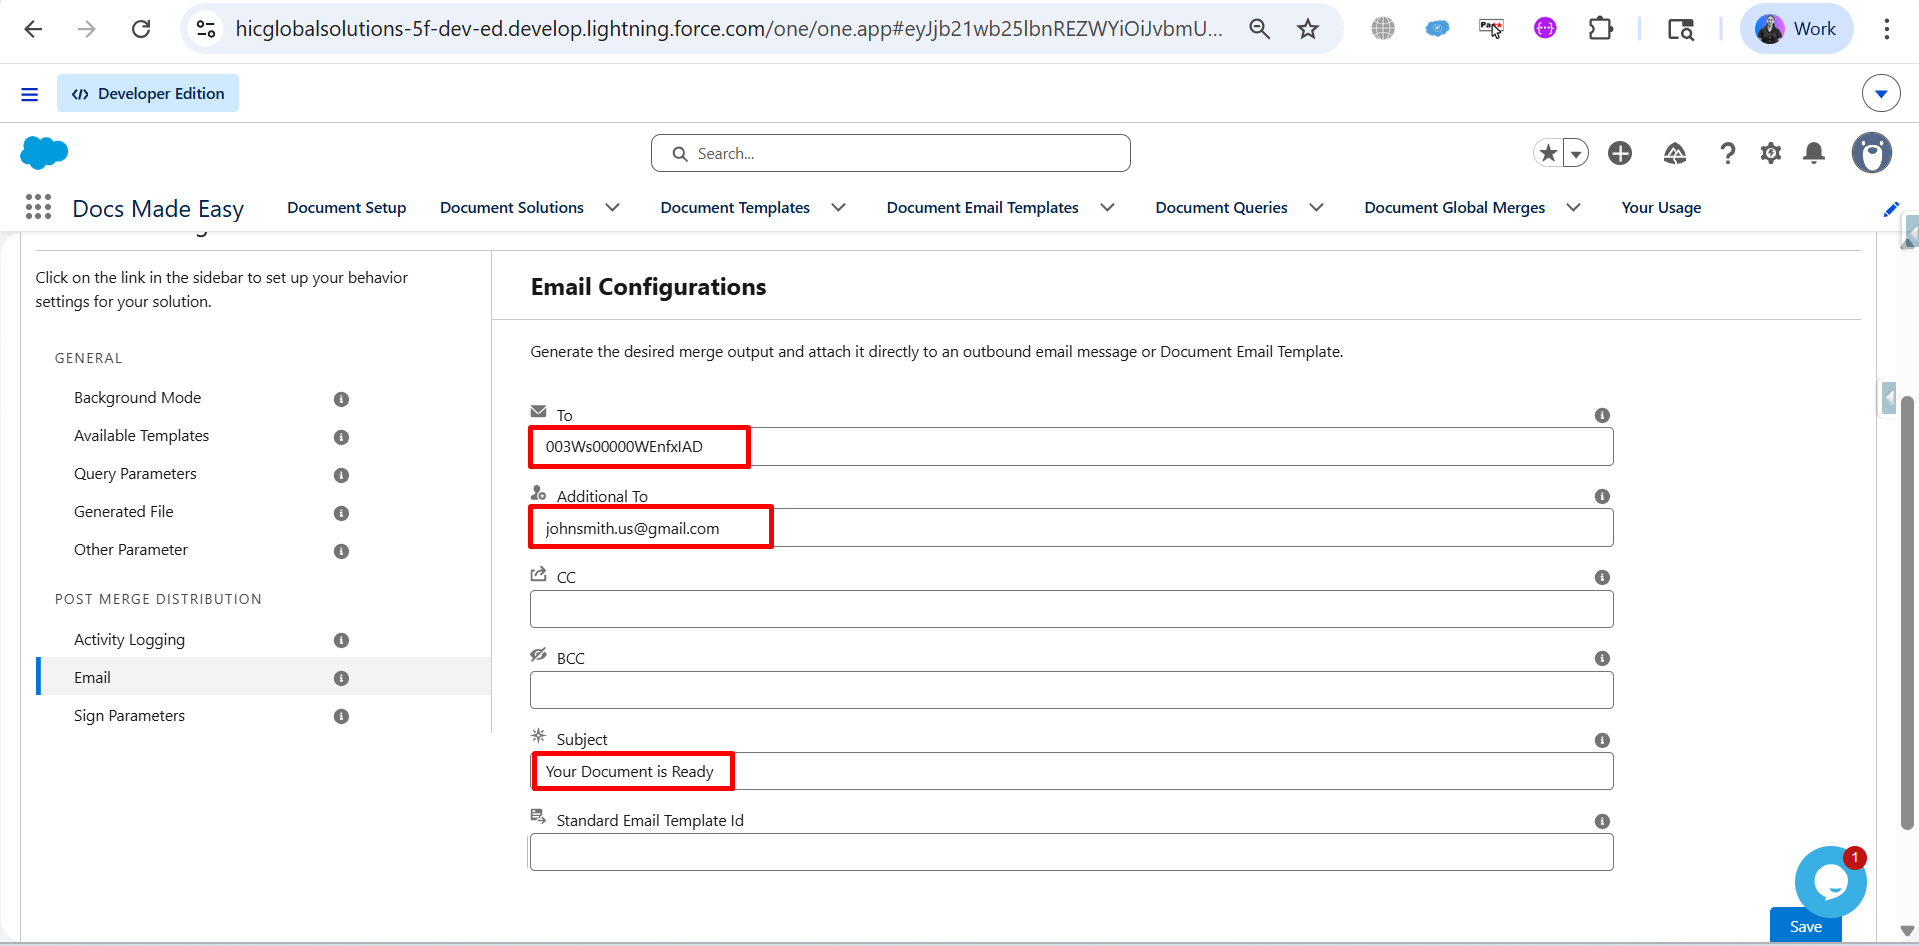
Step 8: Enter Email Details
Add the required recipient and email information in the available fields:
- To: Enter the recipient’s Contact ID.
- Additional To: Enter any extra email addresses that should receive the email.
- CC: Add email addresses to receive a copy, if required.
- BCC: Add email addresses for blind copies, if required.
- Email Subject: Enter the subject of the email.
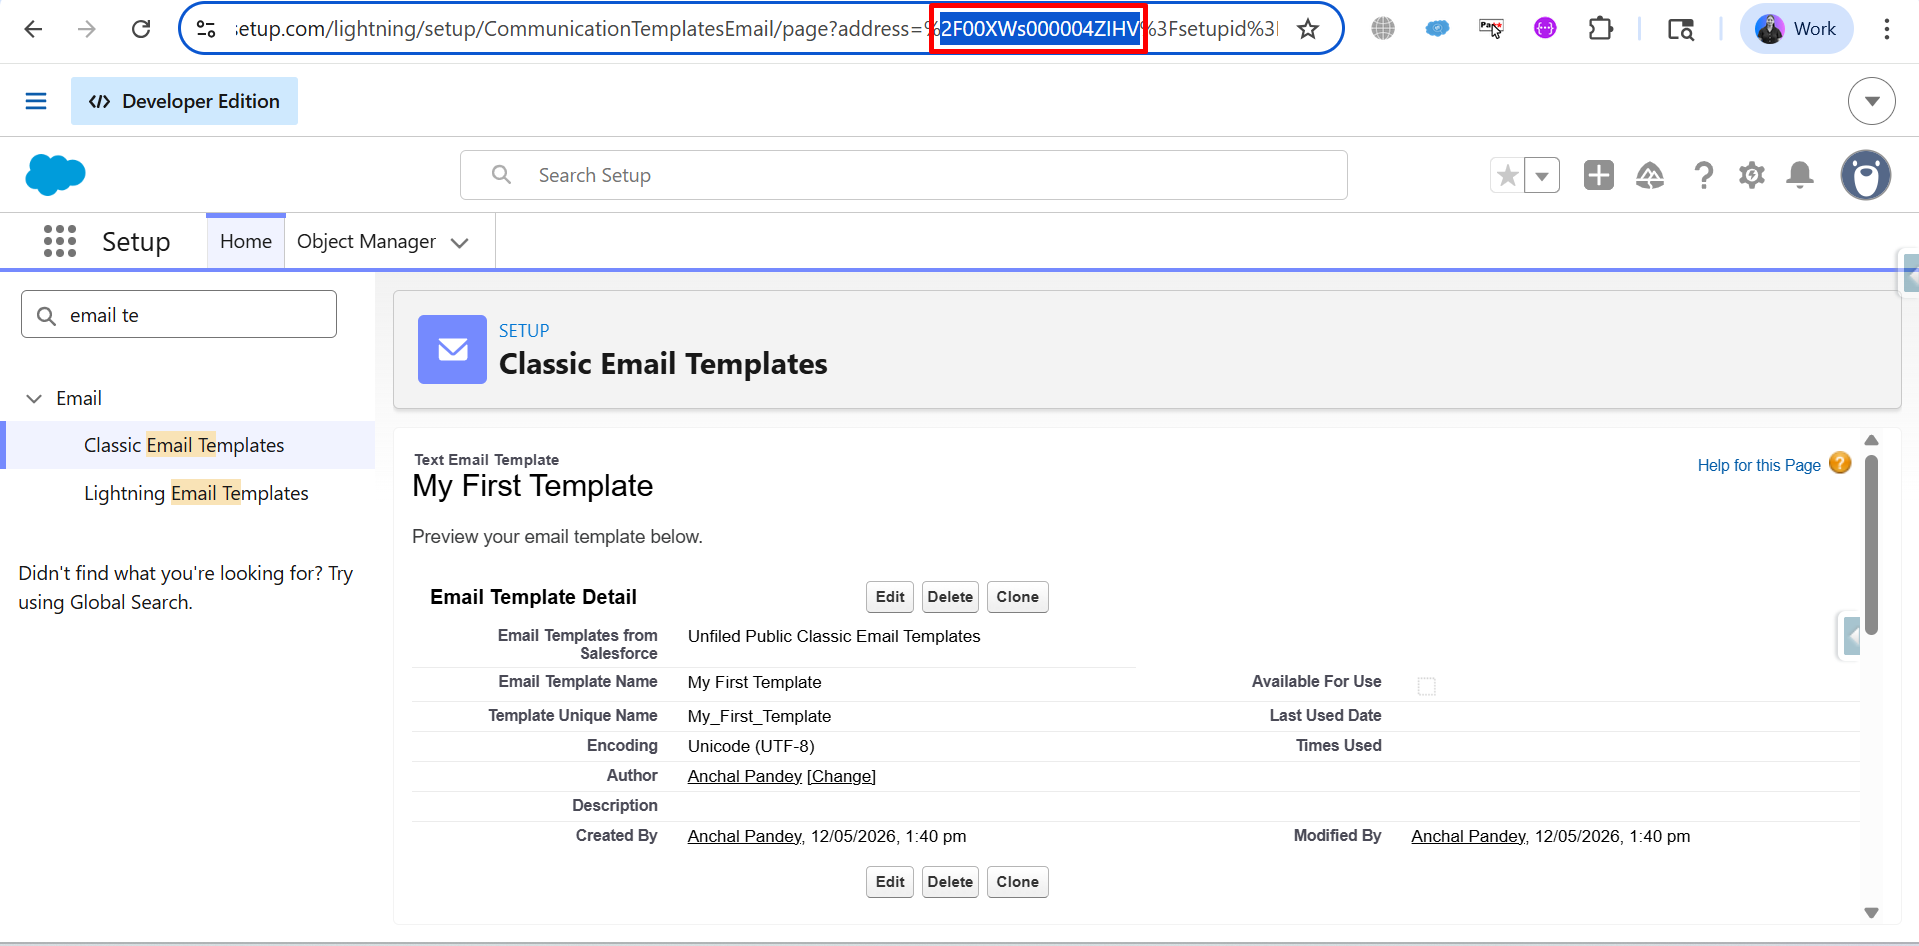
Step 9: Copy the Salesforce Email Template ID
- Open Salesforce Setup and navigate to Classic Email Templates.
- Open the required email template and copy its Template ID from the browser URL.
- Example: 00XWs00000AZHIV
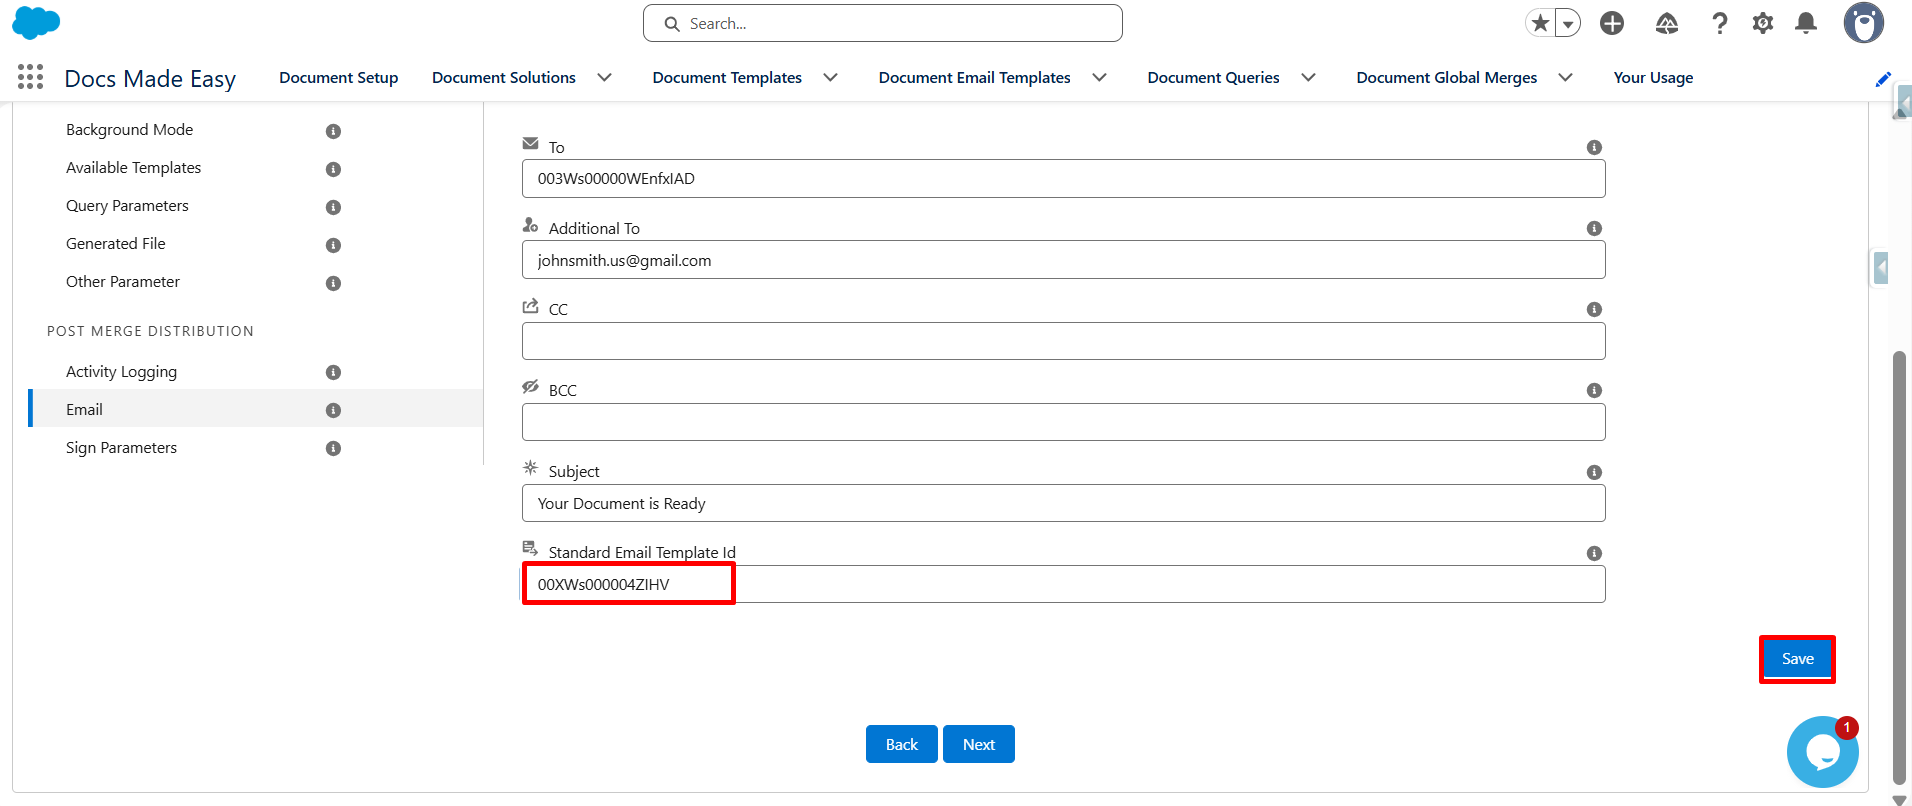
Step 10: Add the Template ID
- Return to the Docs Made Easy setup and paste the copied ID into the Standard Email Template ID field.
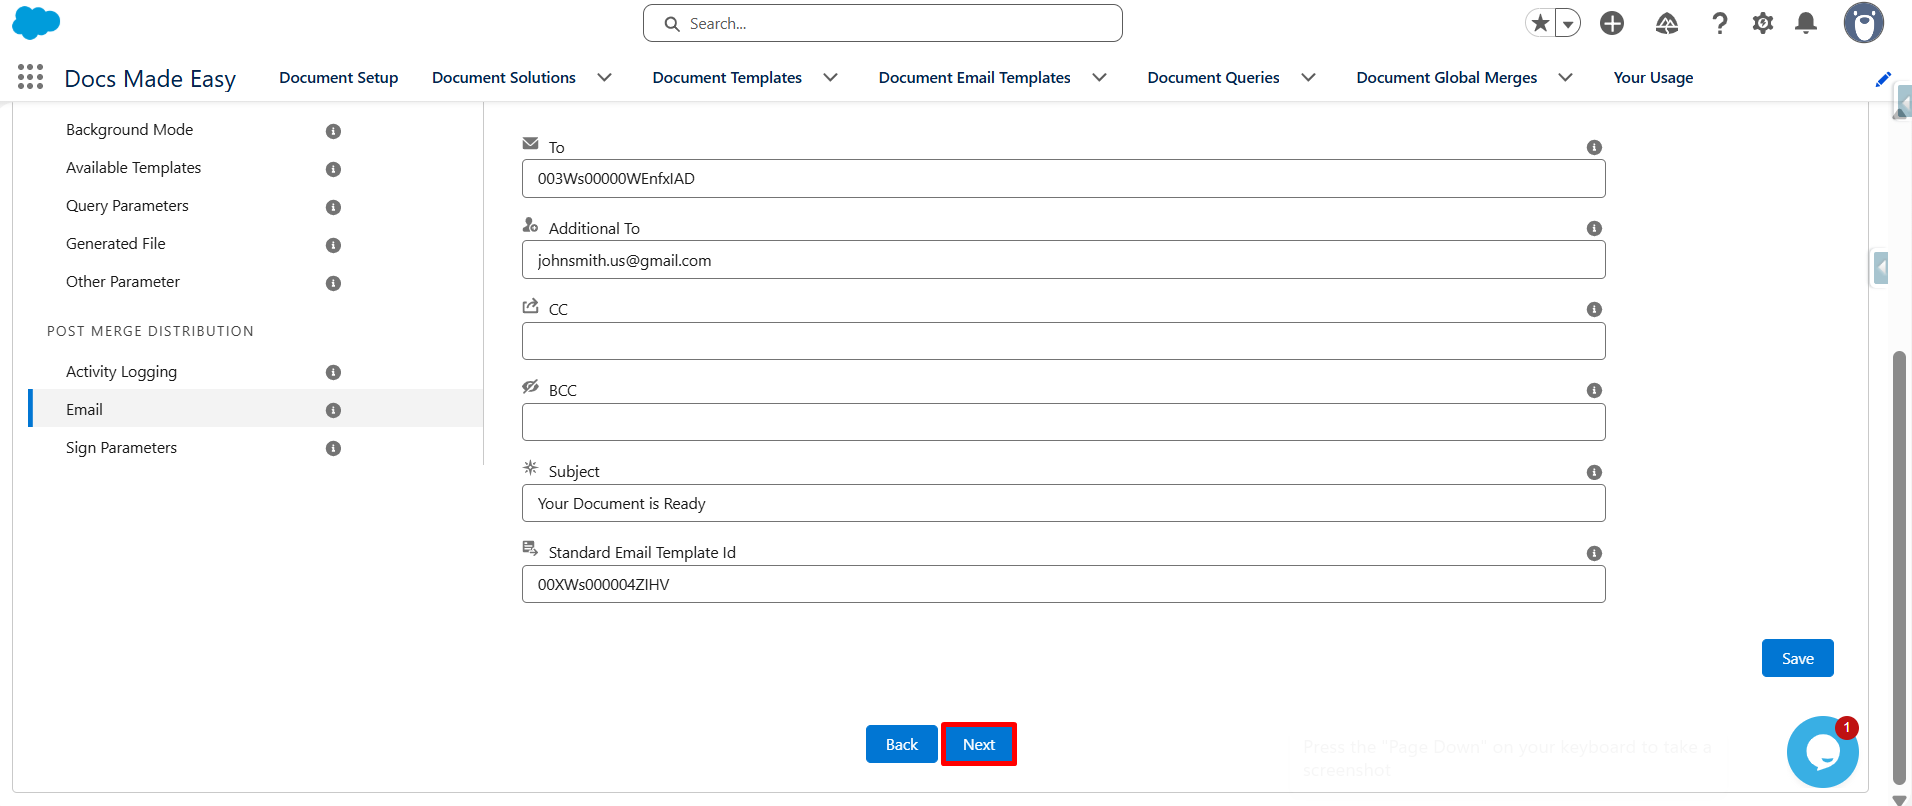
Step 11: Proceed to the Next Step
- Click the Next button to continue with the configuration.
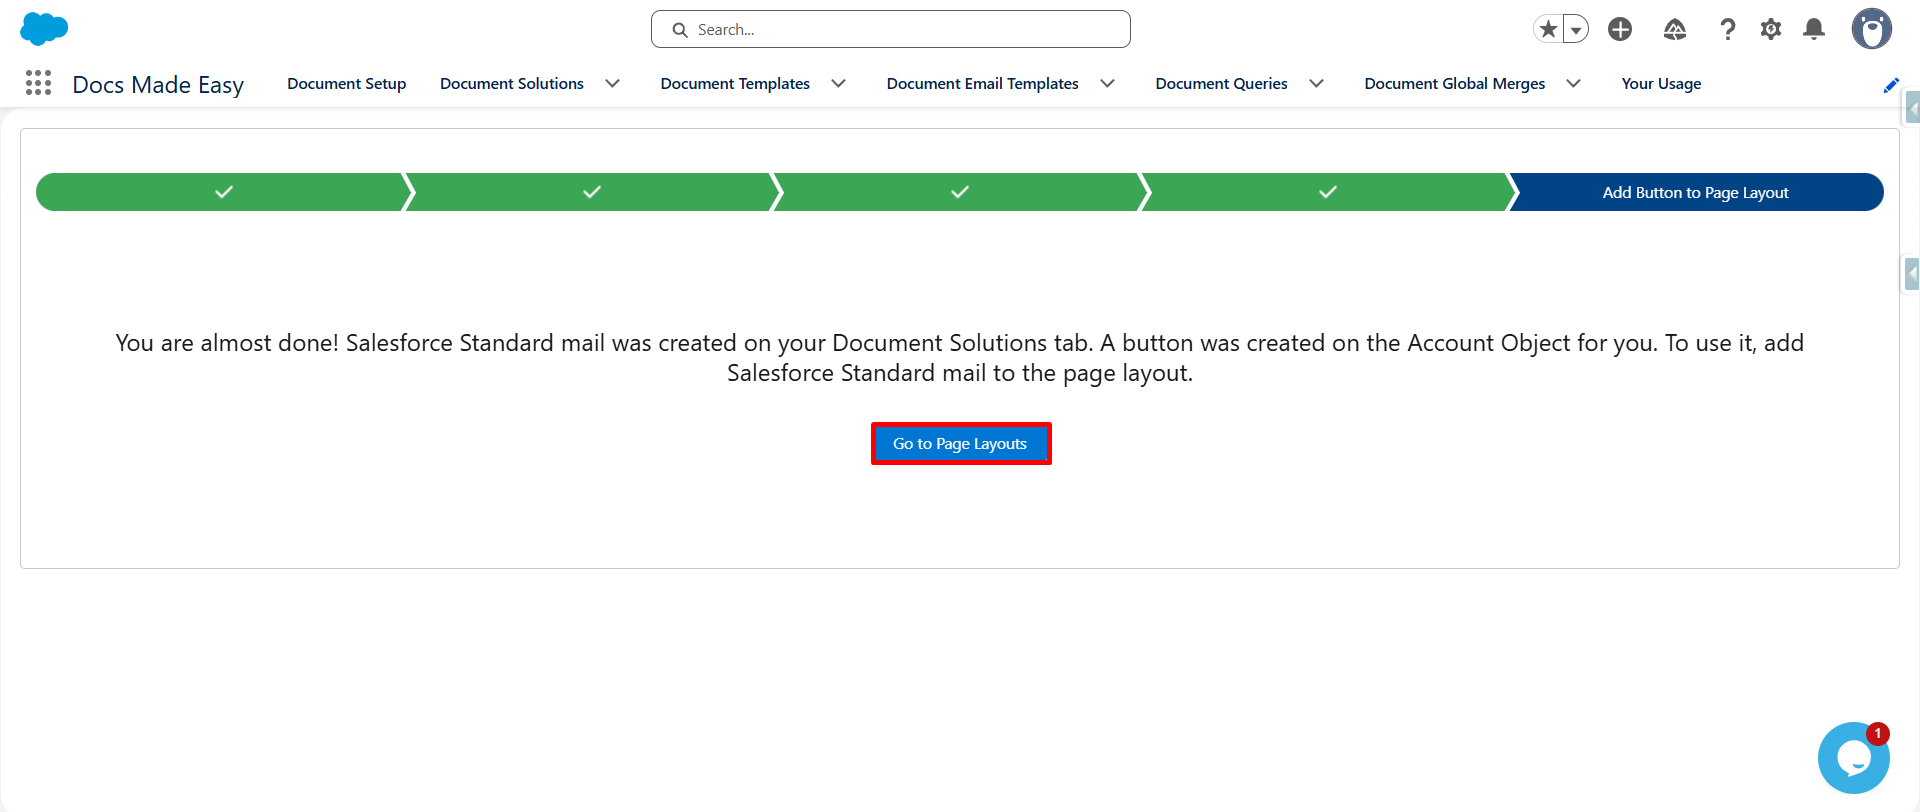
Step 12: Open the Page Layout
- Click Go to Page Layout to access the page layout settings for the selected Salesforce object.
Step 13: Add the Salesforce Standard Email Button
- Under Mobile & Lightning Actions, find the Salesforce Standard Email button.
- Drag and drop it into the Salesforce Mobile and Lightning Experience Actions section.
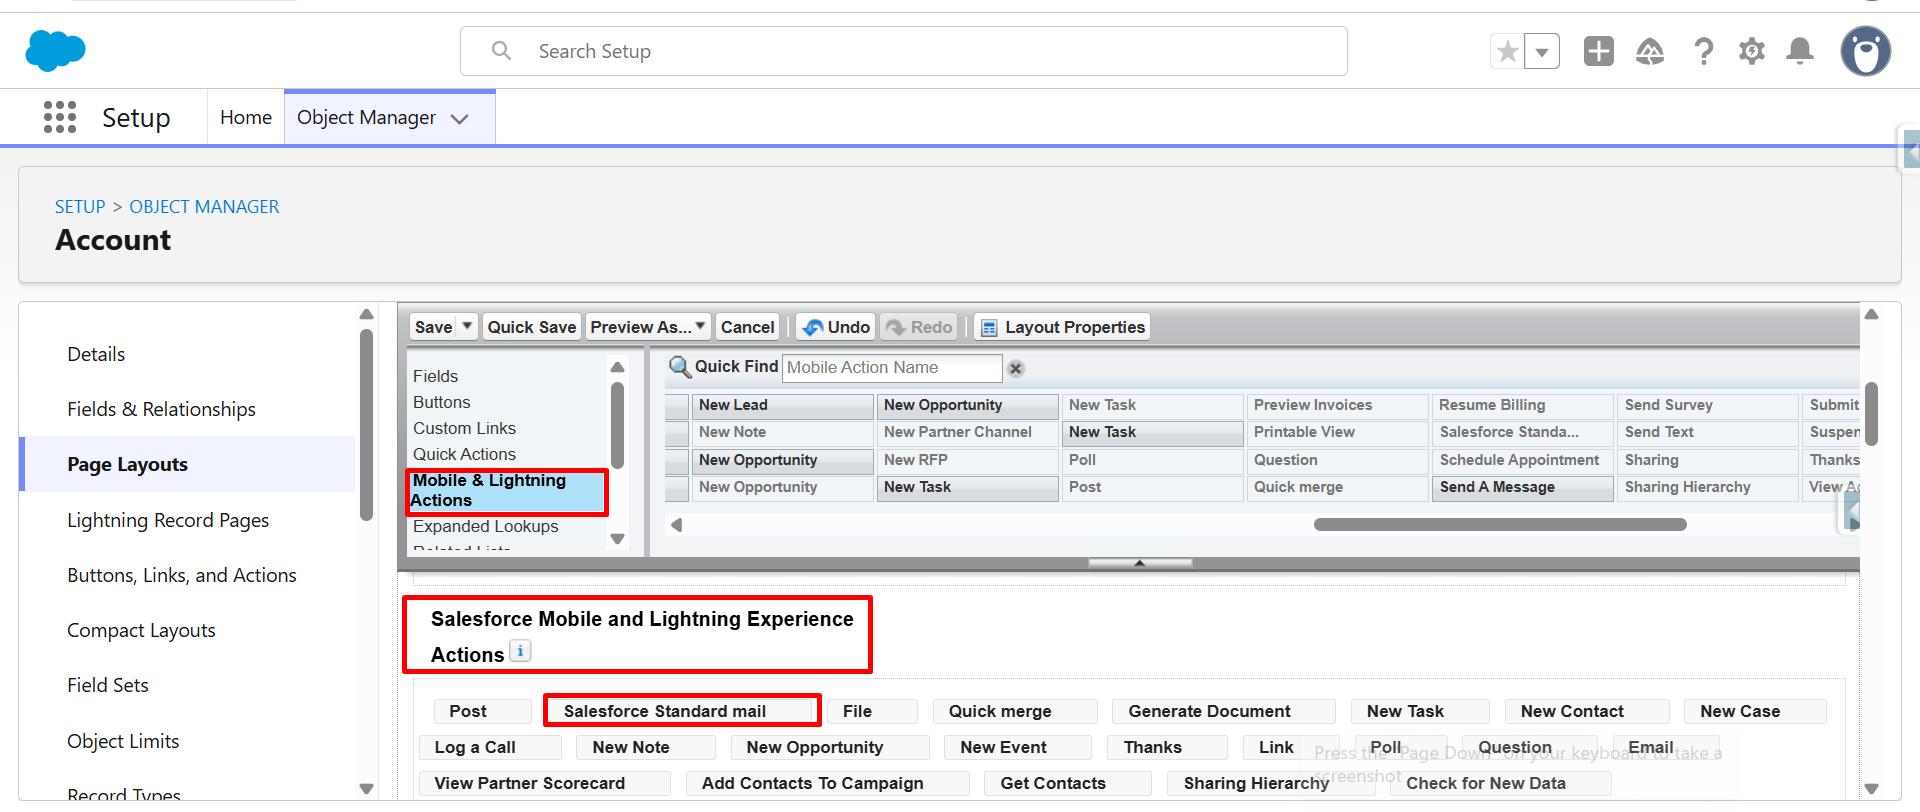
Step 14: Save the Page Layout
- Click Save or Quick Save to apply the page layout changes.
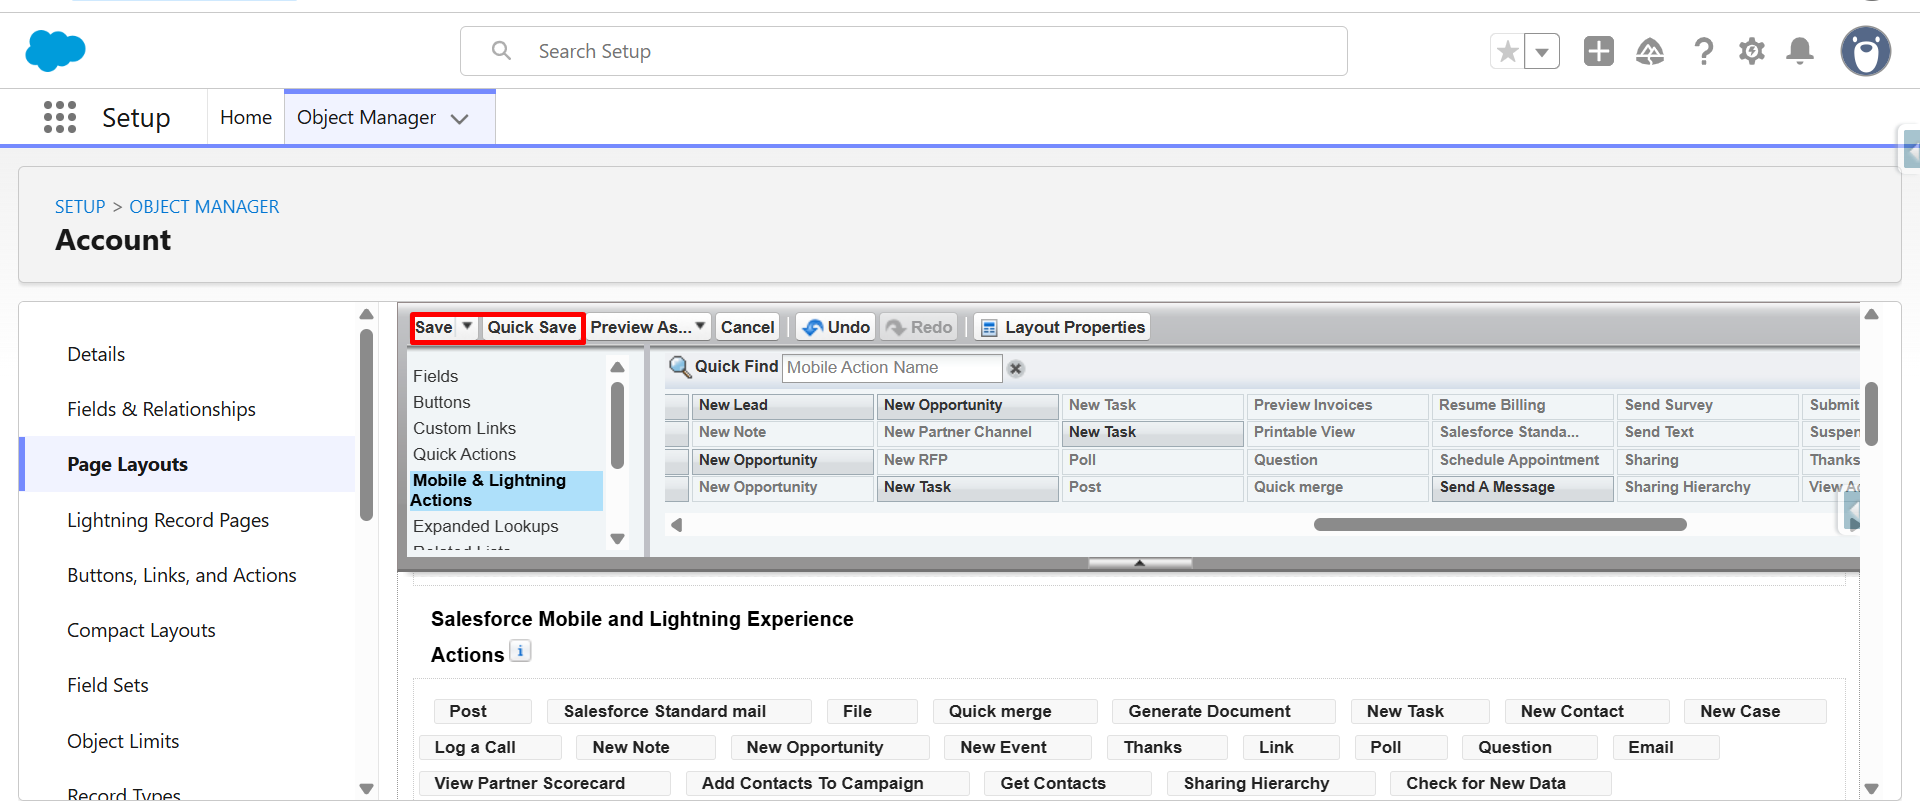
Step 15: Open an Account Record
- Navigate to an Account record in Salesforce and click the Salesforce Standard mail button.
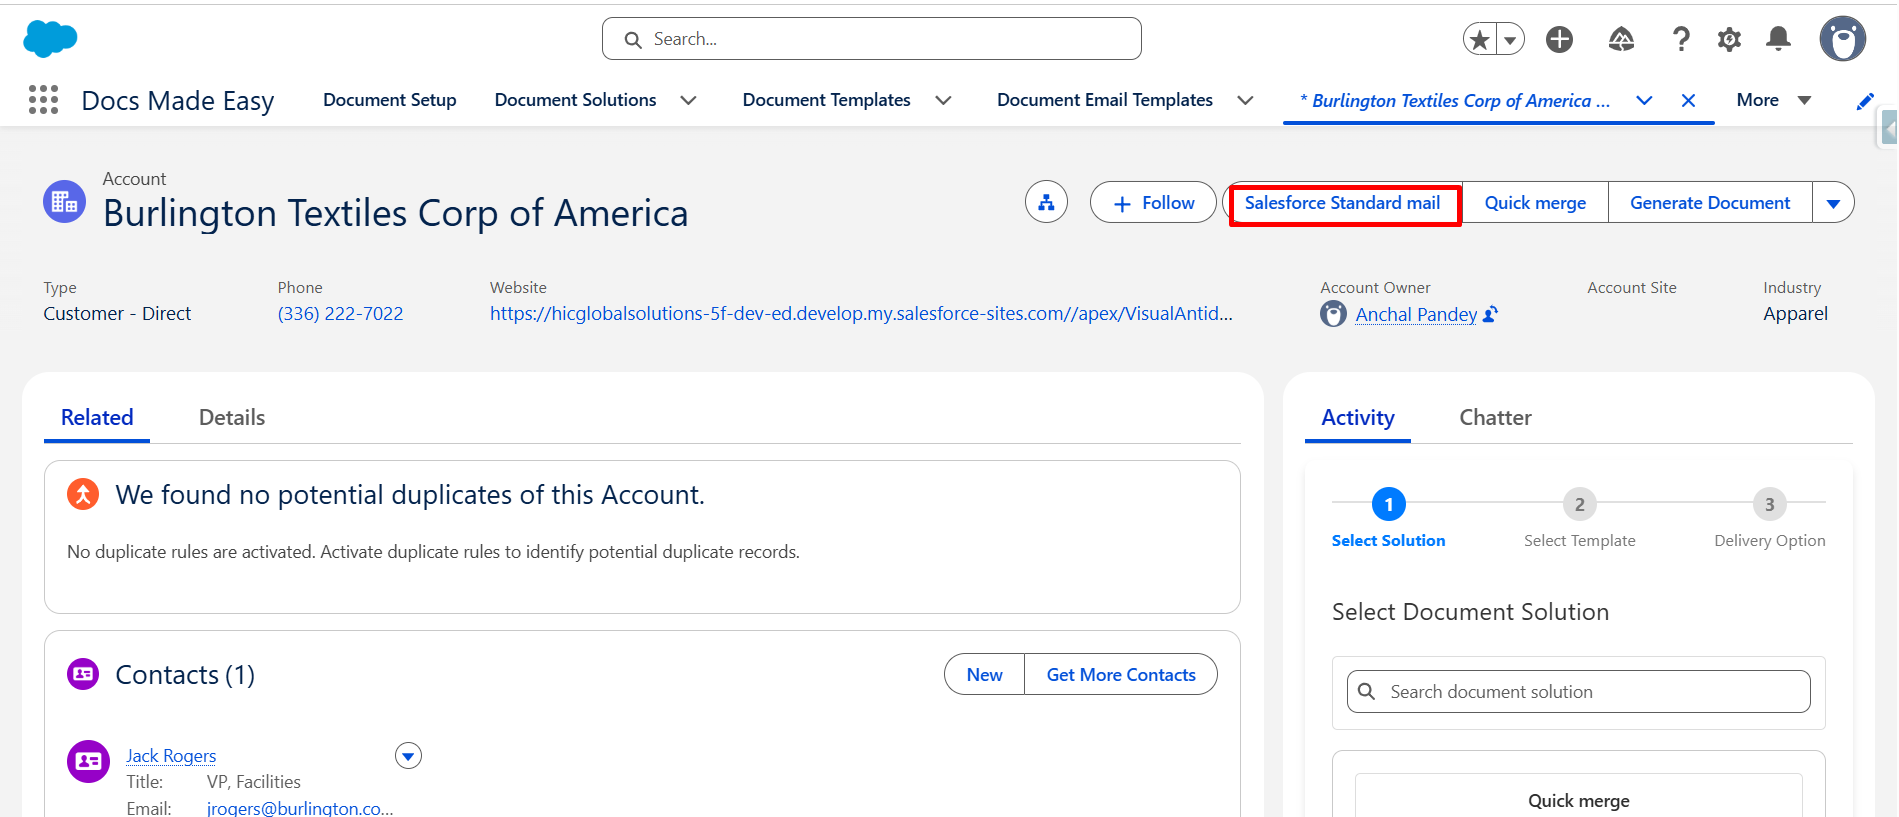
Step 16: Select Standard Salesforce Mail
- Click Std Salesforce Mail to open the configured email option.
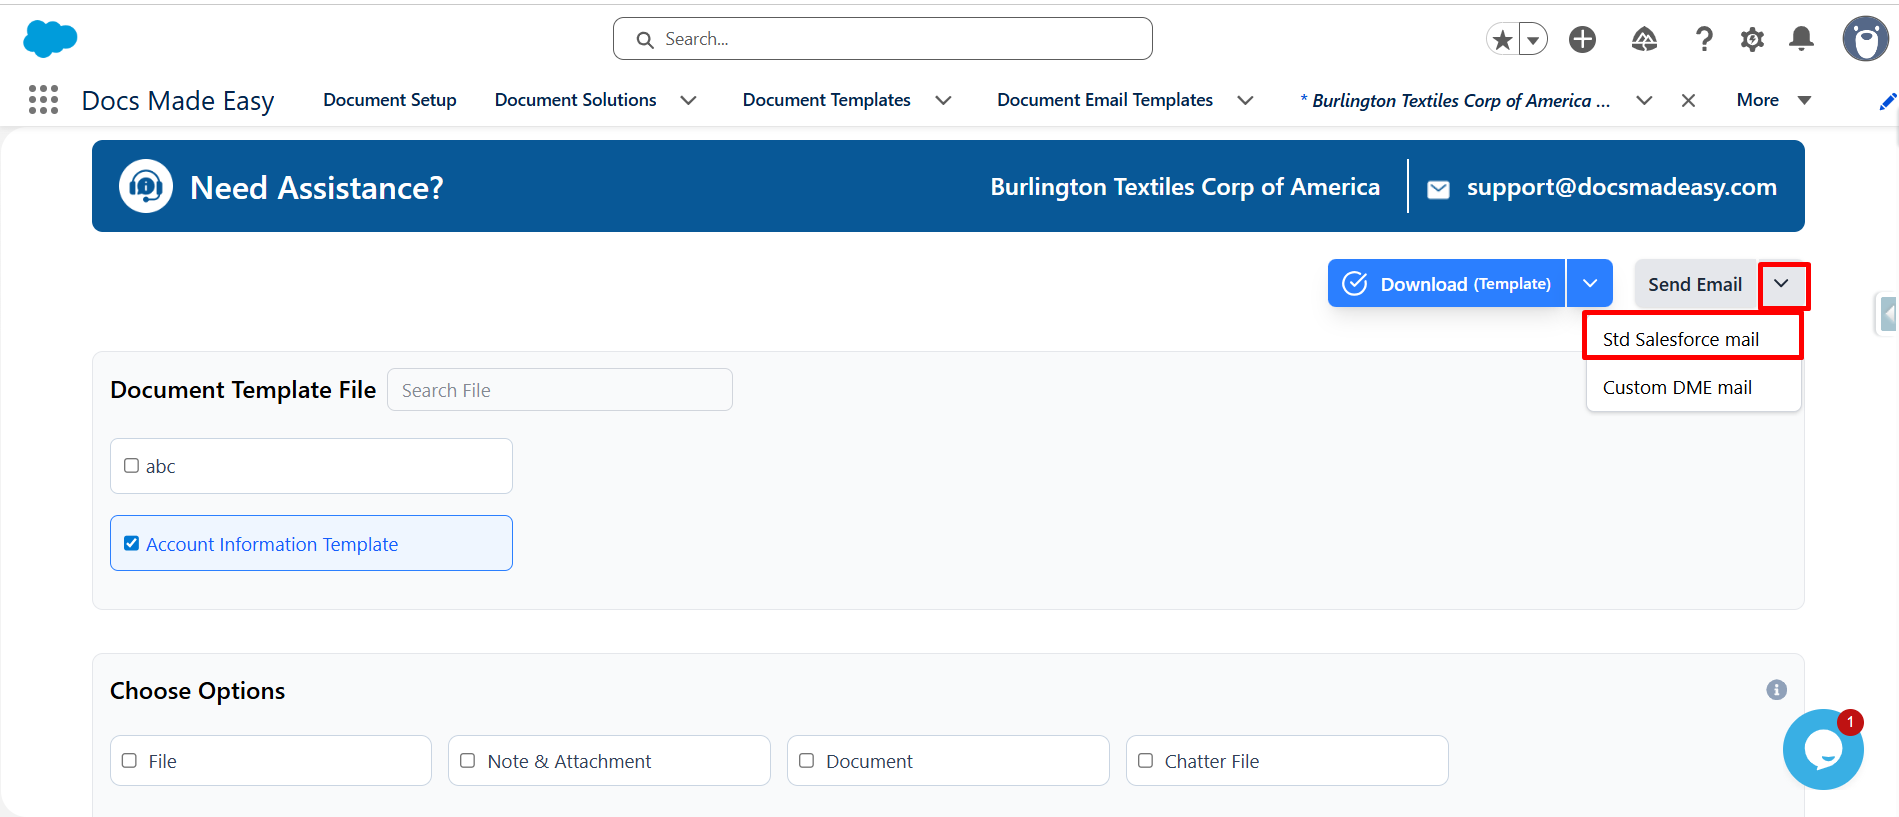
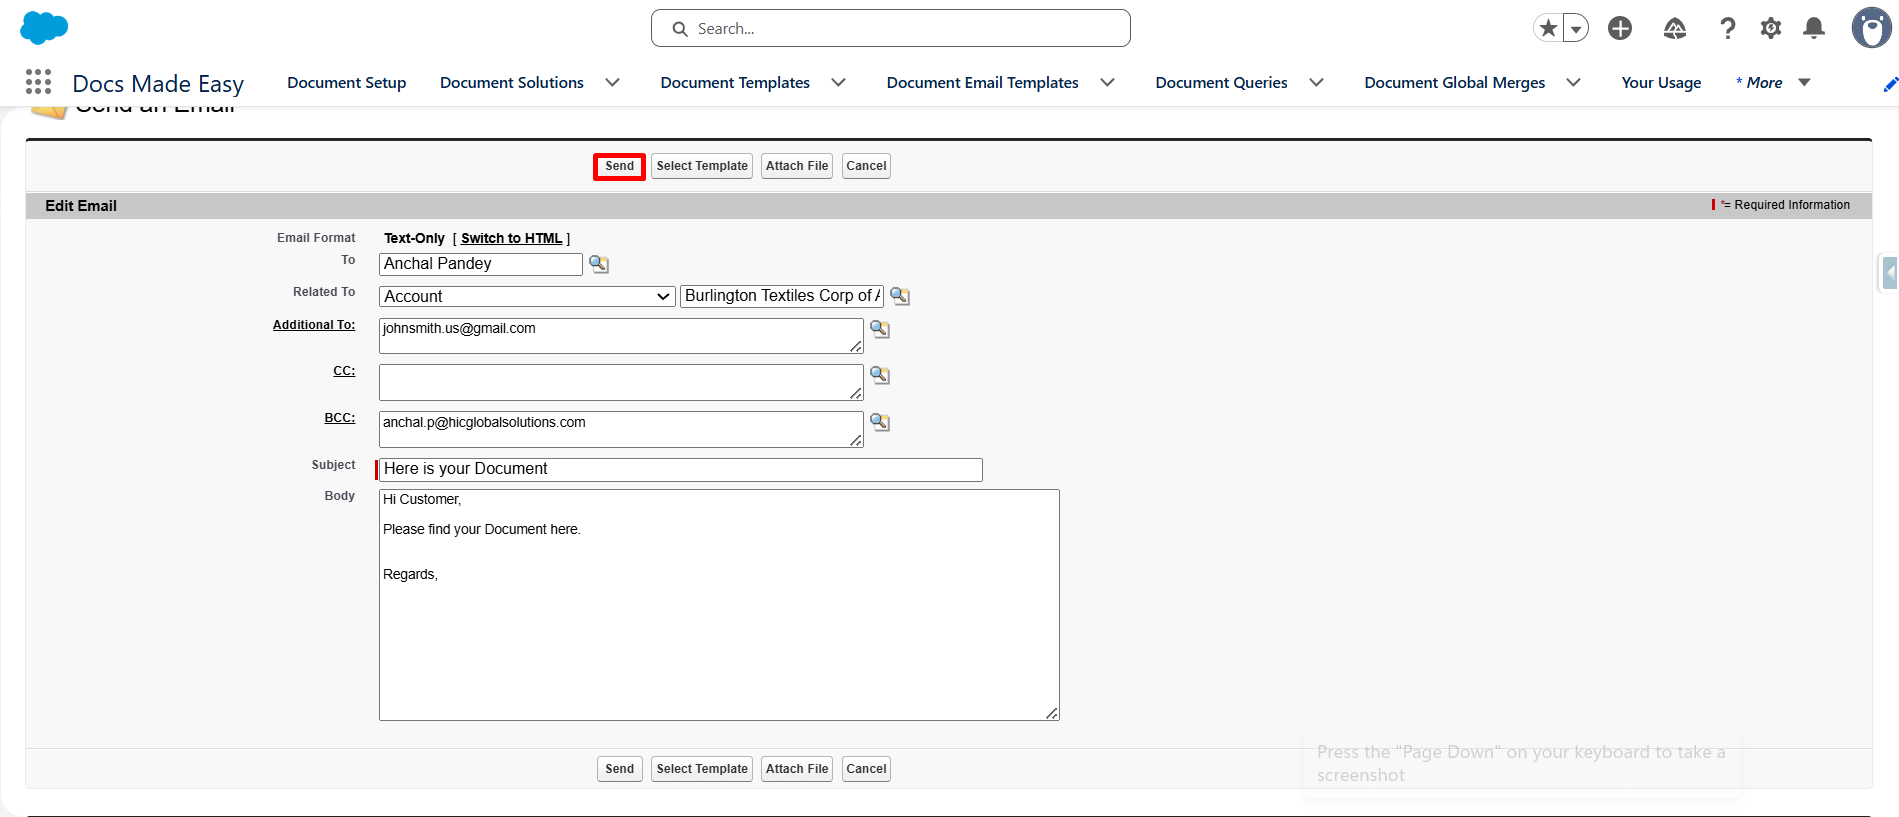
Step 17: Send the Email
- Review the email details and click the Send button to send the email directly.
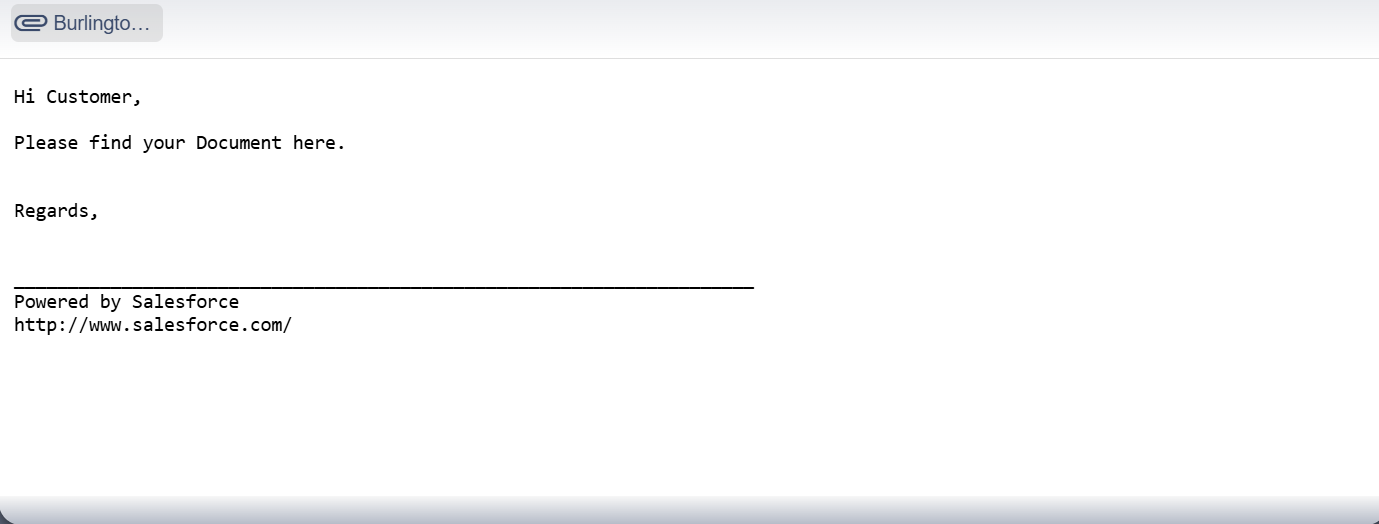
Step 18: Check the Email Output
- Open the recipient’s mailbox and check the received email to verify the output.
Conclusion
Configuring standard Salesforce emails gives users a convenient way to send emails directly from Salesforce records. Once the setup is complete, users can select the configured button, enter the required details, and send their emails without switching between applications.
With Docs Made Easy, businesses can simplify Salesforce document generation and keep document-related communication connected to their existing workflows. So, for any queries or assistance, contact us at Support@docsmadeasy.com.
Frequently Asked Questions
Related Blogs
How to Use Apex Data for Salesforce Document Generation
Docs Made Easy allows users to generate documents using Salesforce records and predefined templates. However, some business requirements need data…
Top 7 Benefits of Integrating Docs Made Easy with Salesforce Revenue Cloud
Managing revenue today involves much more than creating quotes and sending contracts. Businesses need a connected process that handles pricing,…
Salesforce Documentation Best Practices: How to Reduce Admin Dependency and Scale Faster
As businesses grow in Salesforce, managing documentation often becomes difficult. At first, teams can easily manage workflows, approvals, automations, and…