How to Show Different Tables in Salesforce Documents
Category :
How To

Docs shouldn’t be complicated.
With Docs Made Easy, creating professional, Salesforce-powered documents is just a few clicks away.
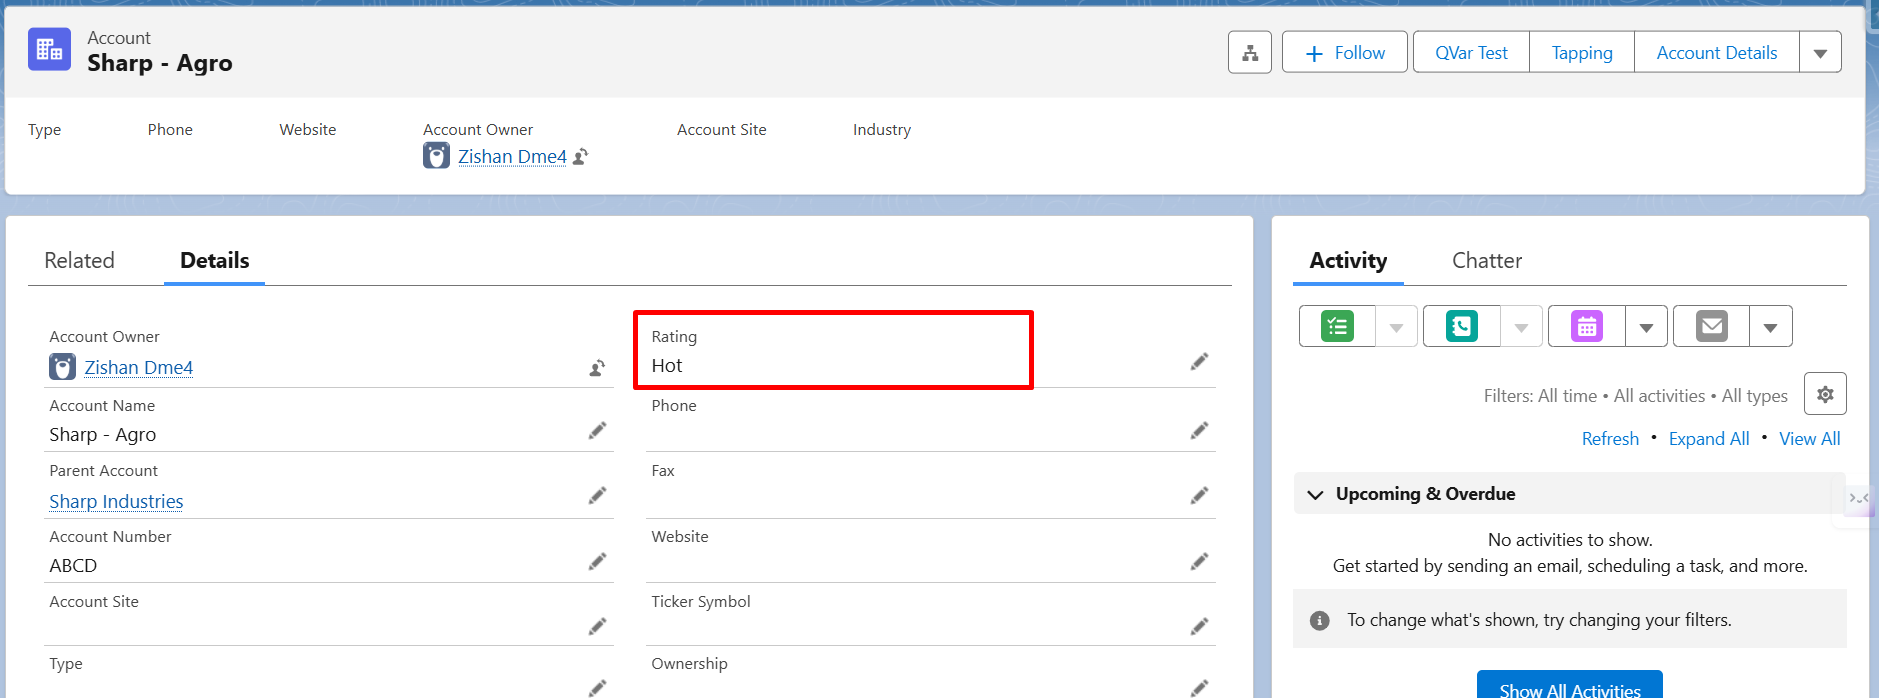
Get Started NowIn Salesforce document generation, displaying the right data in the right format can become difficult when different conditions exist in a record. For example, if Account Rating is not handled properly, users may end up generating the wrong table or manually editing documents every time, which increases effort and the chances of errors.
To solve this, IF conditions can be used inside Word templates to automatically control which table is shown based on Salesforce field values. This ensures documents are always accurate, dynamic, and aligned with business rules.
Let’s now look at how this can be implemented step by step.
Steps to Create Conditional Tables in Salesforce Document Generation
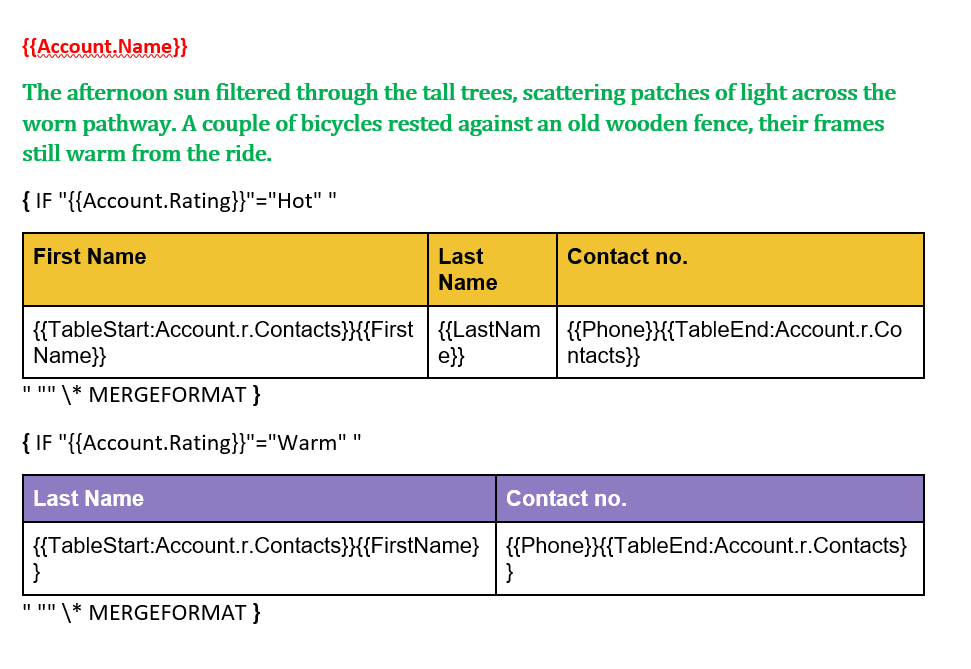
To show this use case, we have created two table formats based on the Account Rating field. One table includes full contact details, while the other shows a simpler version with only key information.
Table one:
| First Name | Last Name | Contact no. |
|---|---|---|
| {{TableStart:Account.r.Contacts}}{{FirstName}} | {{LastName}} | {{Phone}}{{TableEnd:Account.r.Contacts}} |
With three columns: First Name, Last Name, and Contact Number.
Table two:
| Last Name | Contact no. |
|---|---|
| {{TableStart:Account.r.Contacts}}{{FirstName}} | {{Phone}}{{TableEnd:Account.r.Contacts}} |
With only two columns: LastName and Contact number.
Step 1: Open your document in the template editor (here we are using MS Word) where you want to apply conditional logic for table rendering.
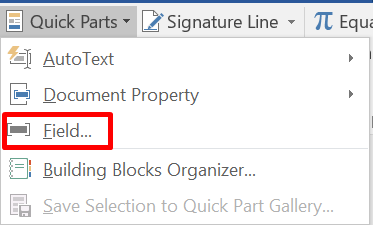
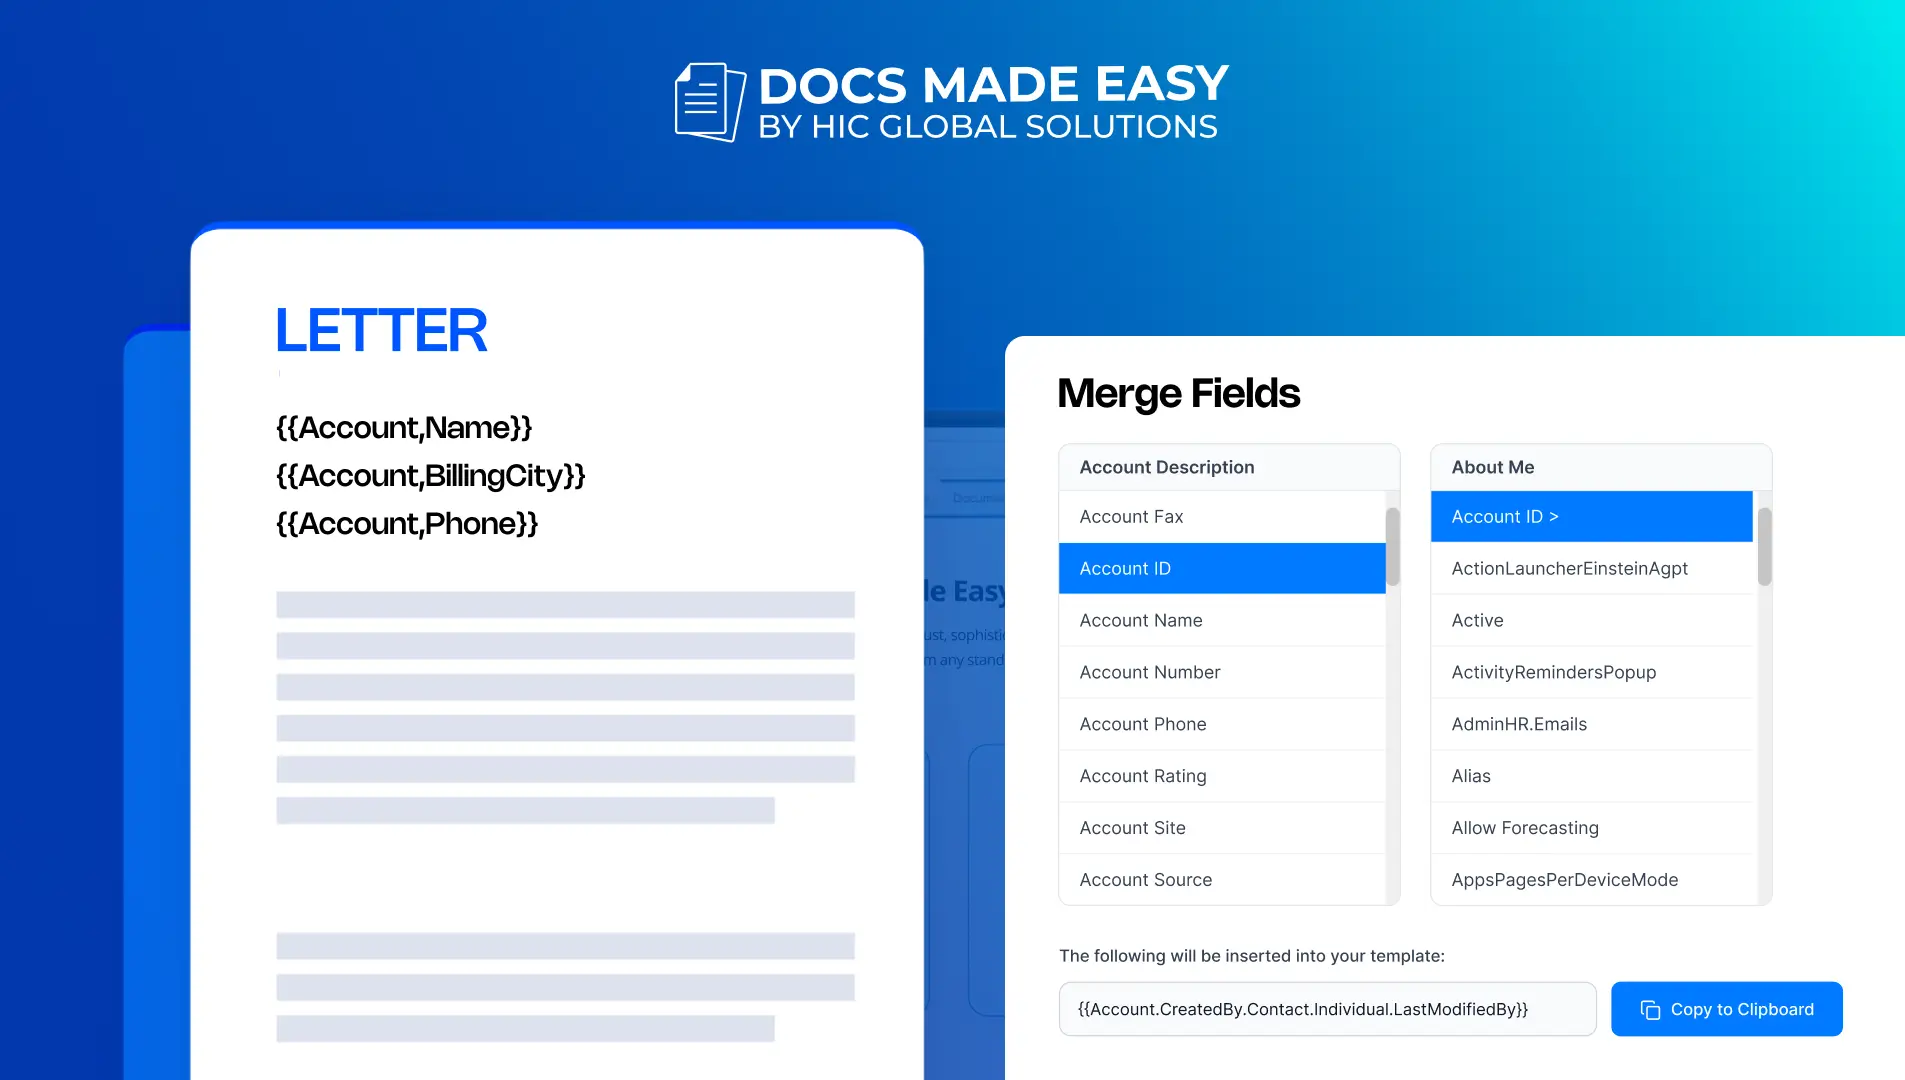
Step 2: Now go to the Insert tab in the menu, click on Quick Parts, and then select Field from the available options.

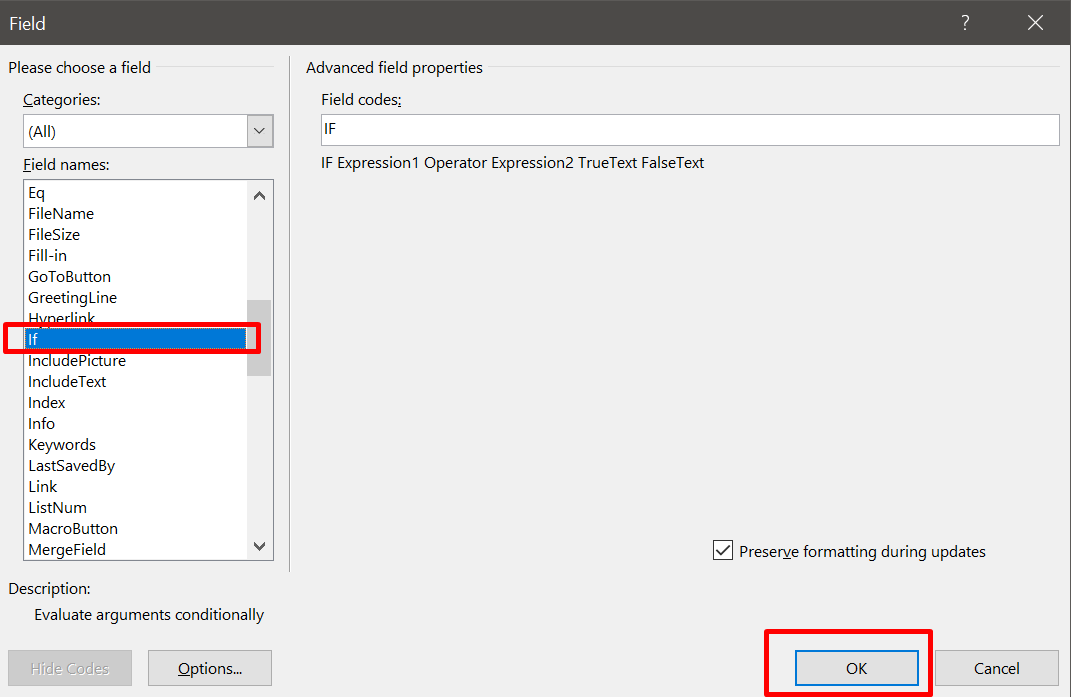
Step 3: Now select IF Expression from the list of fields and click on OK to insert it into your template.
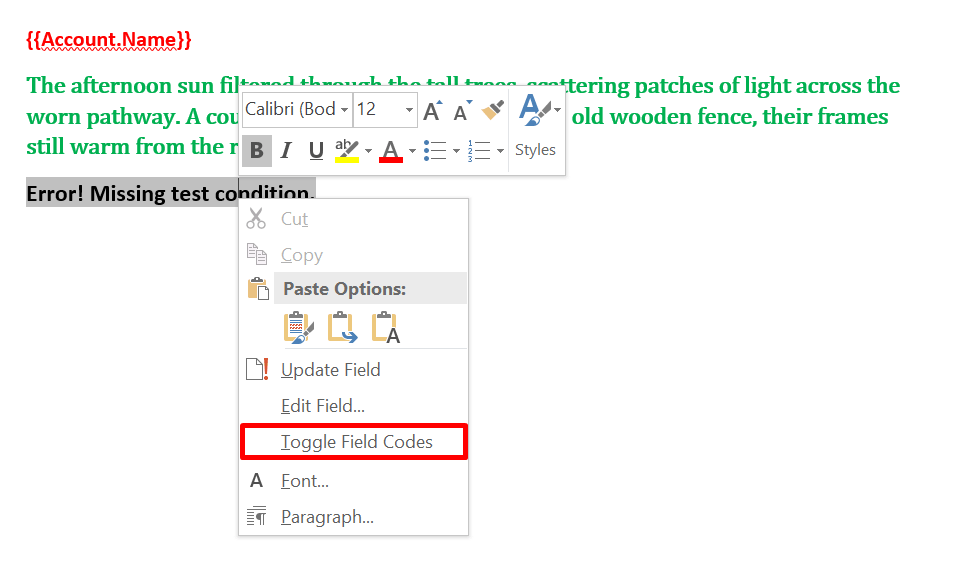
Step 4: You will now see the condition field inserted in your document. Click on Toggle Field Codes to edit the logic.
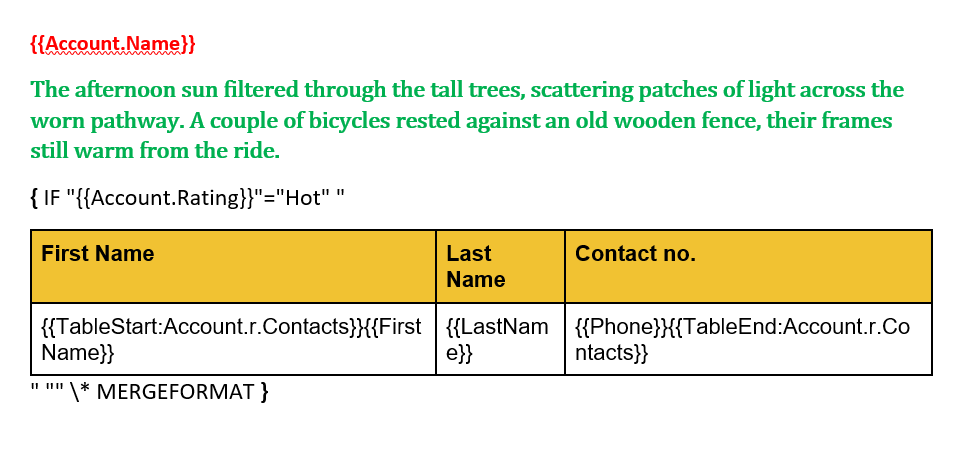
Step 5: In the condition field, define your logic using the Salesforce merge field. For example:
“{{Account.Rating}}” = “Hot” → Paste Table 1
Otherwise → Paste Table 2 or leave blank
This condition ensures that if Account Rating is Hot, Table 1 will be displayed, otherwise Table 2 will be rendered.
Step 6: If required, you can insert another conditional field and define additional conditions based on different rating values.
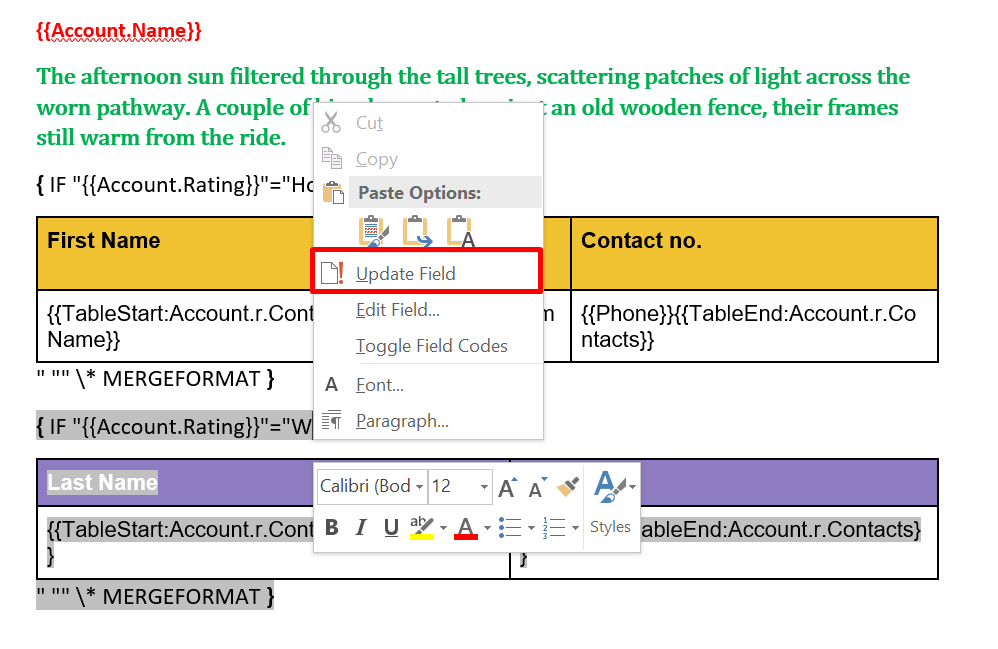
Step 7: Once your logic is properly defined, click on Update Field to apply changes.
Step 8: Save the template and add it to your document generation solution.
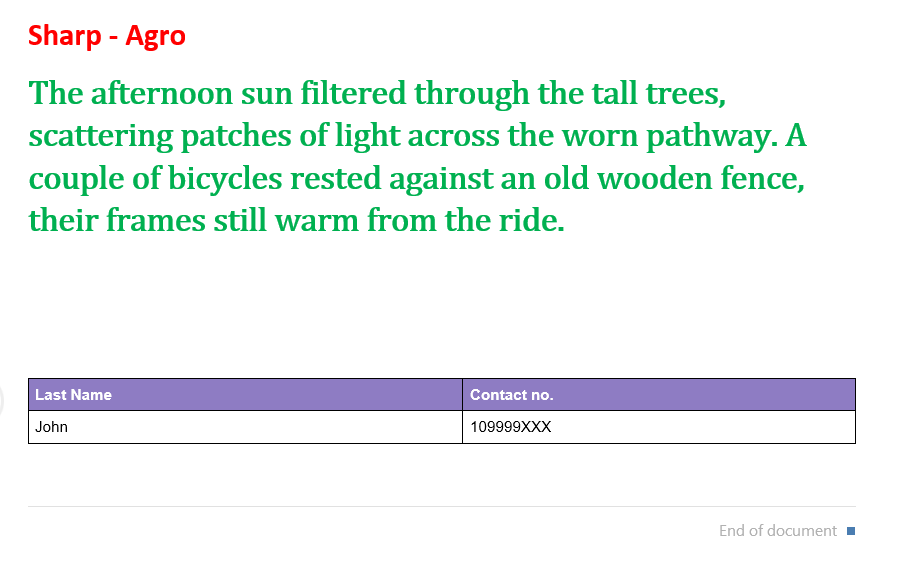
Step 9: Generate the document using a Salesforce record.
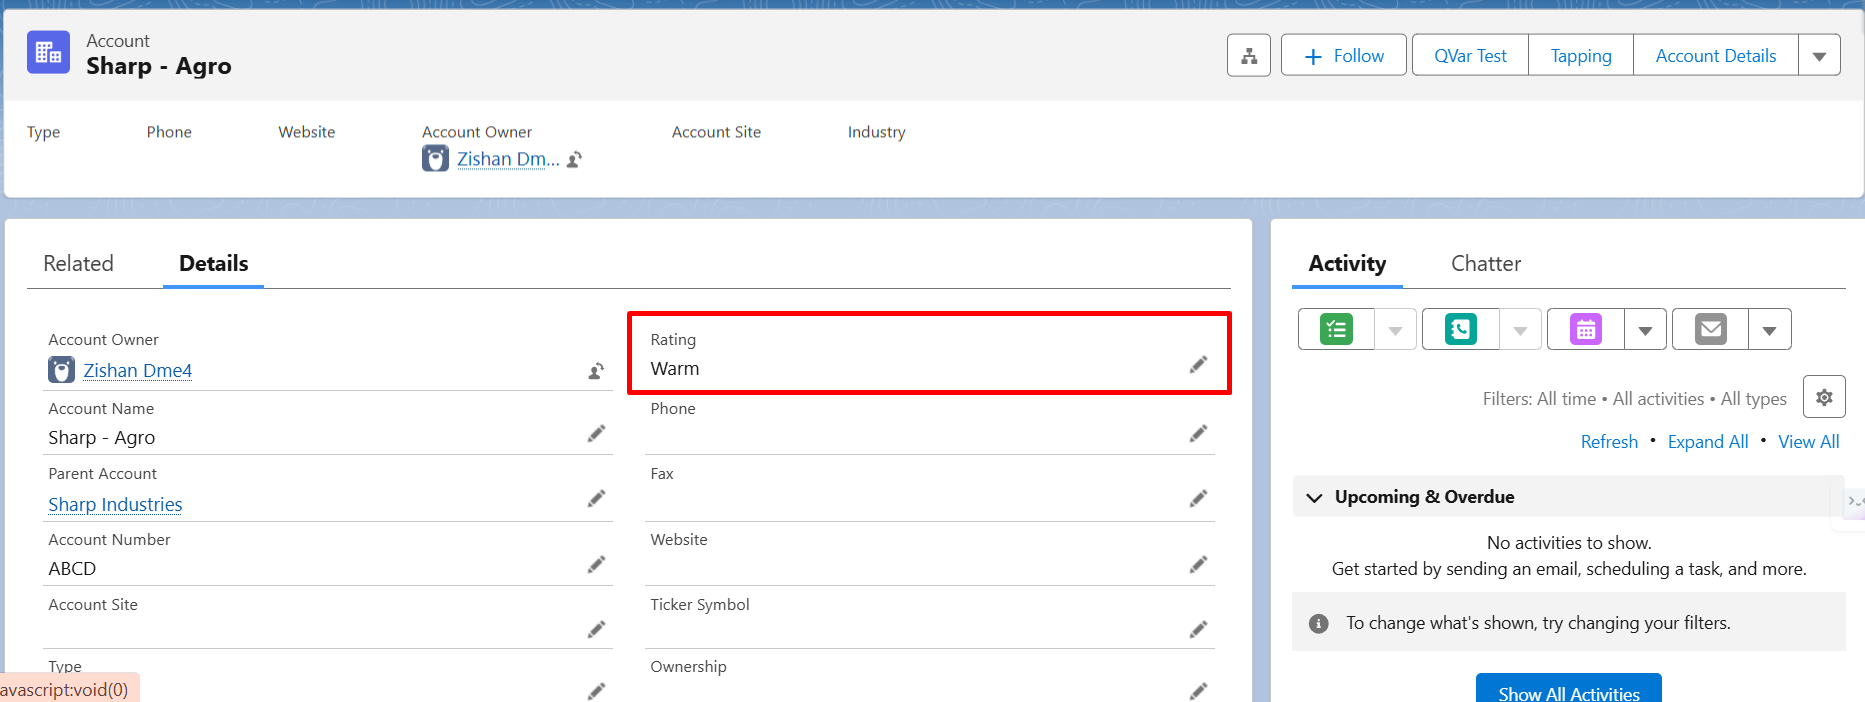
If the record has rating Warm, Table 2 will be shown.
- If the record has rating Hot, Table 1 will be displayed.
Conclusion
Conditional tables in Salesforce document generation make it easier to handle different data scenarios without creating multiple templates. Once the IF logic is set up correctly, the document automatically picks the right table based on the record value, so you don’t need to adjust anything manually each time.
This approach keeps your templates clean and easier to manage over time, especially when business rules change or new conditions are added.
We hope this helps you set up IF conditions in a simple way and makes your document generation process more efficient in real use.
Frequently Asked Questions
Related Blogs

How to Generate QR Codes and Barcodes in Salesforce Documents
Adding QR codes and barcodes to your documents can make it easier to track records, verify information, and share data…
How to Create a Document Template Using Merge Field Helper
Creating documents manually by copying information from Salesforce can take time and often leads to errors. With a document template…

How Does Salesforce Revenue Cloud Simplify the Quote-to-Cash Process?
For a long time, businesses used Salesforce CPQ to simplify their quoting process. It helped sales teams create accurate quotes…